
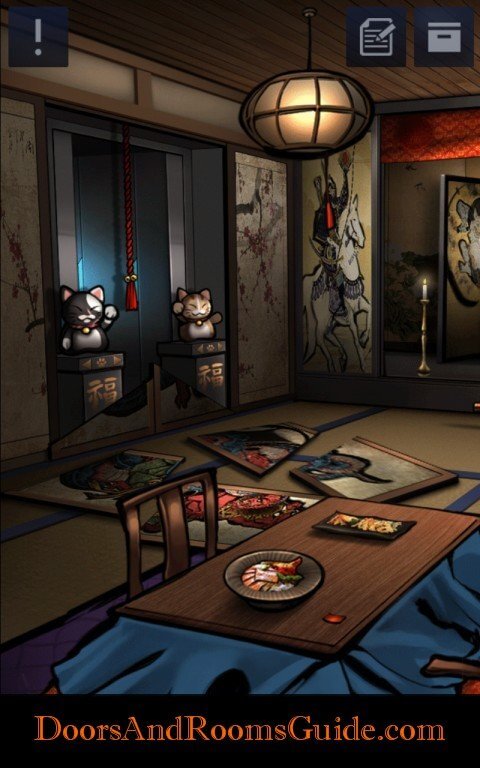
Entering an oriental dining room, the way out guarded by many layer of securities. In Doors and Rooms 2 Chapter 3 Stage 2, you will need to retrieve a key from a samurai armor, decode a puzzle box, and say hello to the cats in order to escape this room. This walkthrough guide will show step-by-step to collect resources and solve the puzzles. Please leave comments if you are still stuck or confused after reading our guide. Thank you!
We have divided the walkthrough guide into 3 sections to help you backtrack if you have already passed the stage. If you are aiming for 100% three star completion the first time around, simply follow the steps in order.
Main Escape | Bonus Star | Quiz Solution
Main Escape
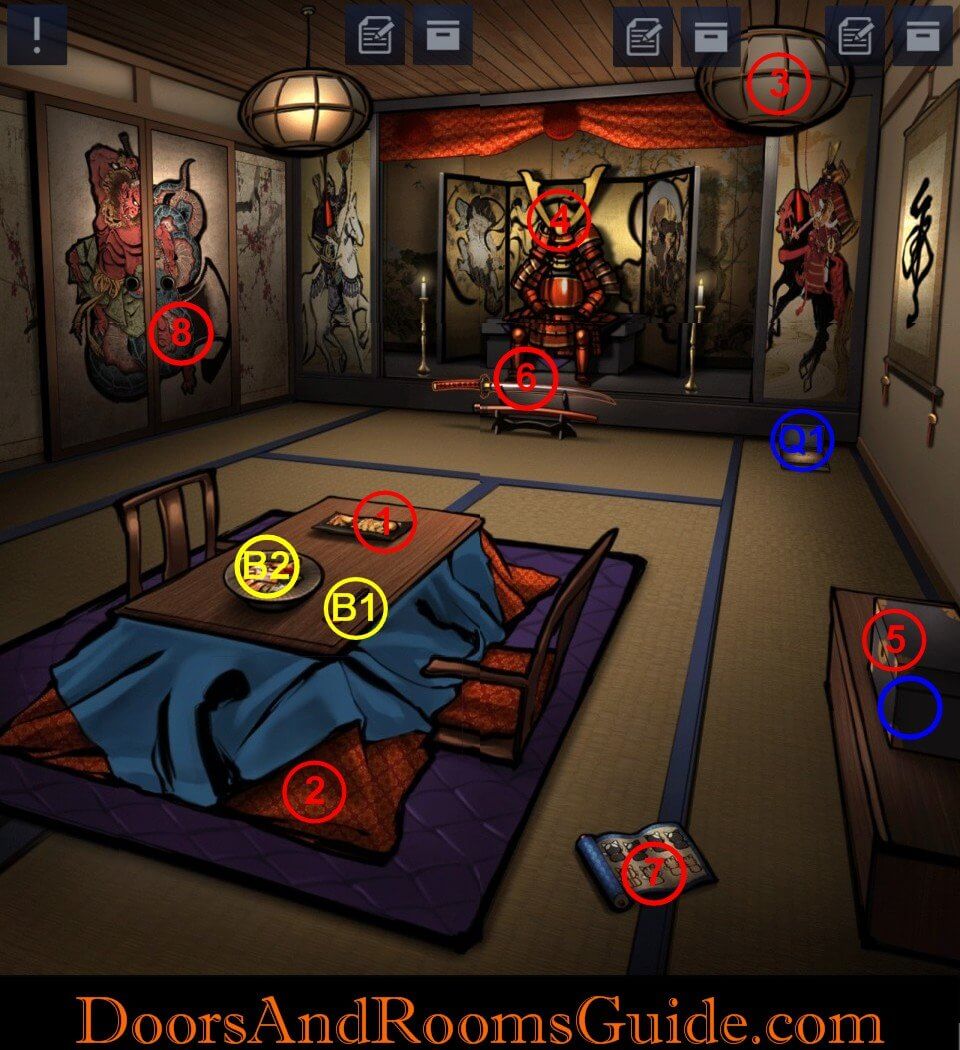
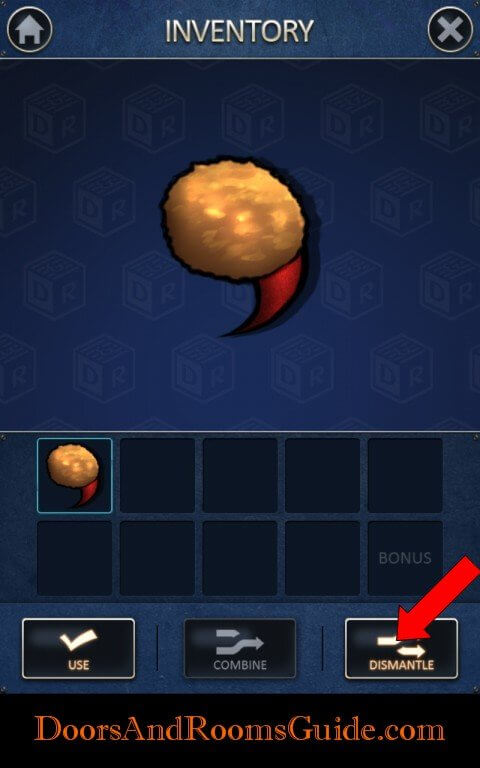
1. Crab Claw: Grab a stuffed crab claw. Dismantle the claw to get a red puzzle piece.
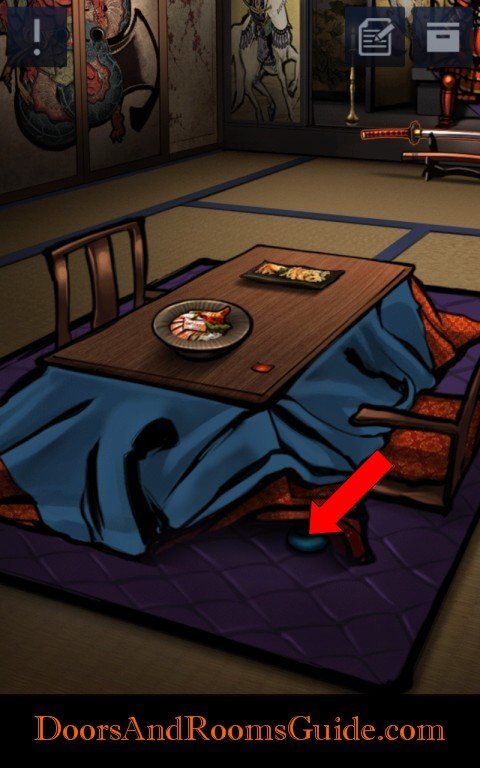
2. Table Cloth: Look under table to retrieve a blue puzzle piece.
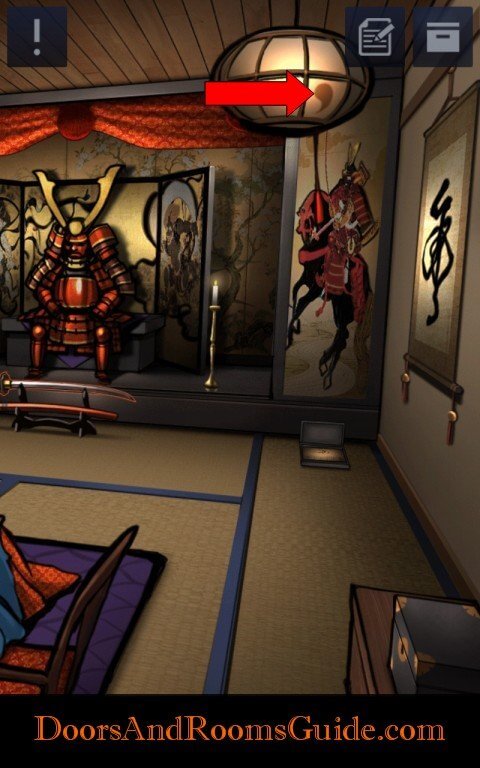
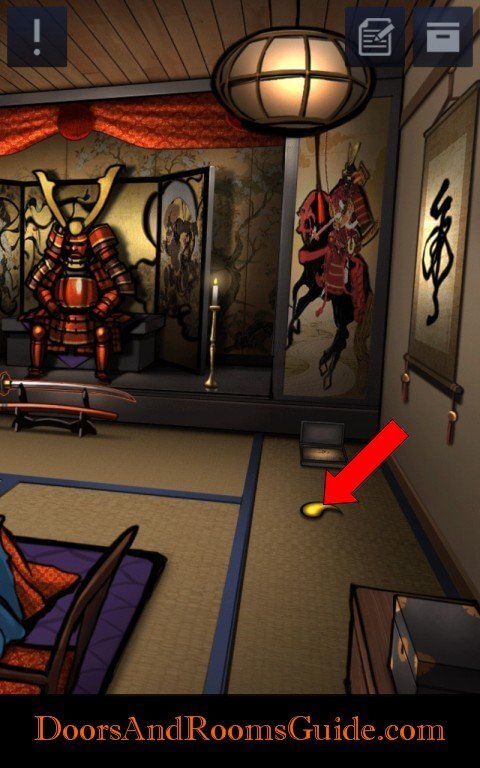
3. Lantern: Turn on the lantern on the right by tapping on it. Tap on the lantern again and a yellow puzzle piece will fall to the ground. Pick up the yellow puzzle piece.
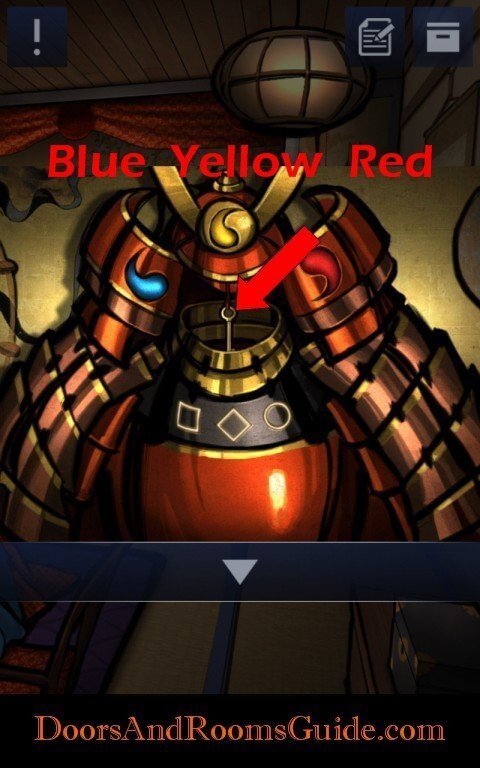
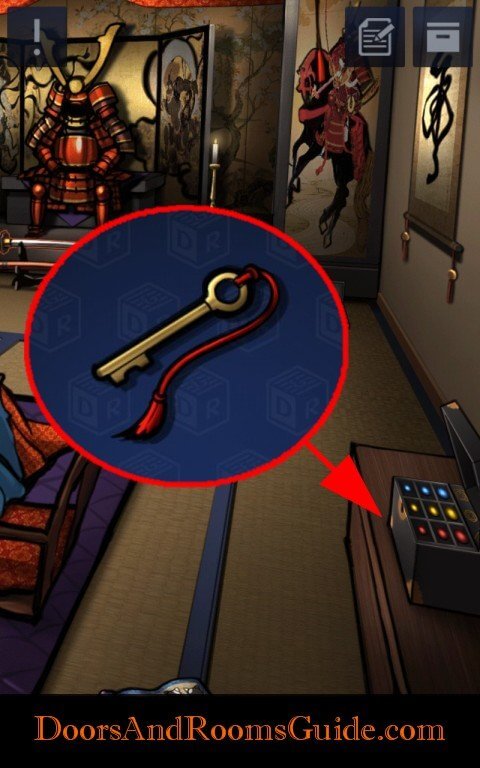
4. Samurai Armor: Insert three puzzle pieces. When the correct puzzle piece is inserted, a corresponding geometric shape on the armor will illuminate. The armor head piece will open. Grab the key.
Blue: Square
Yellow: Diamond
Red: Circle
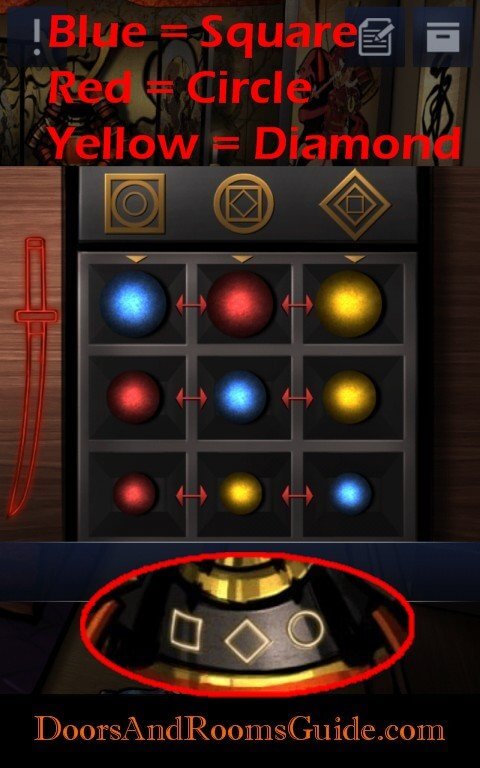
5. Box: Insert key to open the locked box. From the samurai armor, we know that each color representing a shape. Move the color circles to solve the puzzle shape combination at the top of the box. Solution as shown below. The samurai sword will light up.
a. Square: Circle: Circle = Blue: Red: Red
b. Circle: Square: Diamond = Red: Blue: Yellow
c. Diamond: Diamond: Square = Yellow: Yellow: Blue
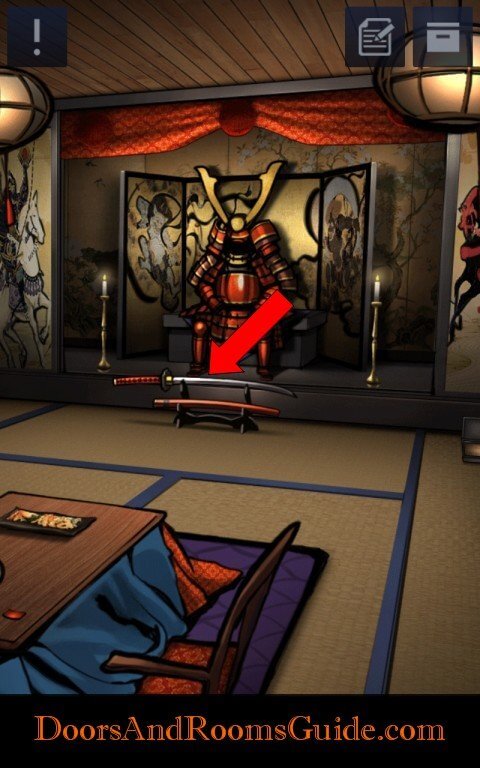
6. Sword: Grab the sword next to the armor.
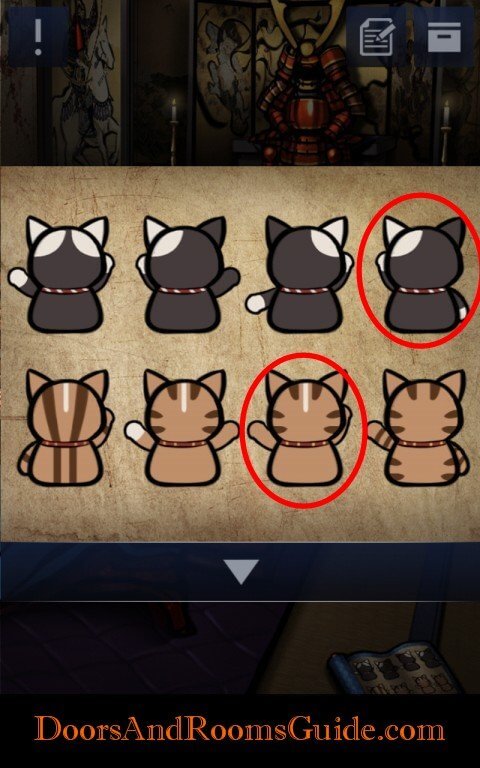
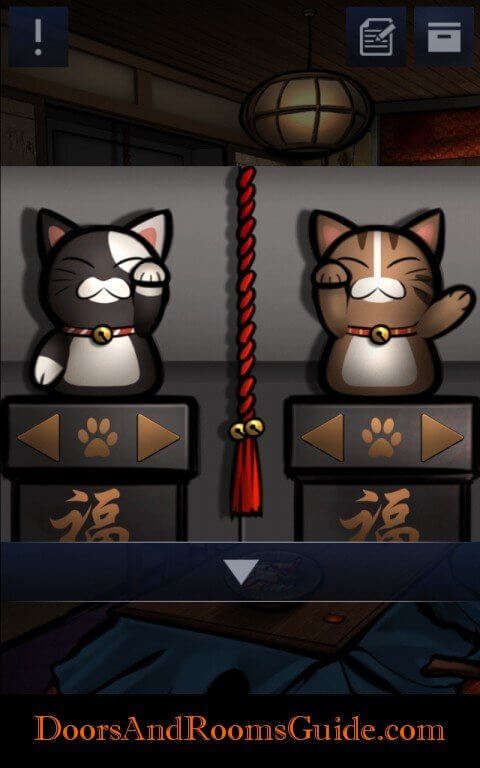
7. Scroll: Notice a scroll on the floor. The scroll contains eight cats with each with different marks and hand gestures.
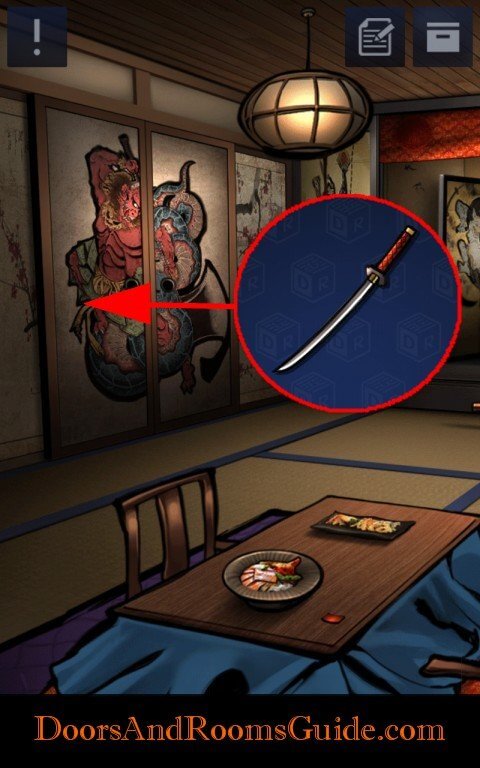
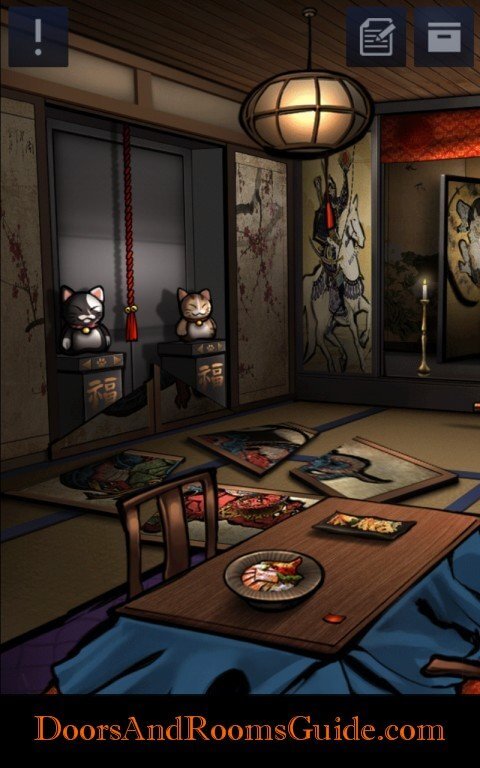
8. Paper Wall: Destroy the paper wall with the sword. Two cats are revealed. Look up the cats on the scroll. Adjust each cat so their hand gestures match the scroll. Pull the tassel. A secret passage way is revealed.
Bonus
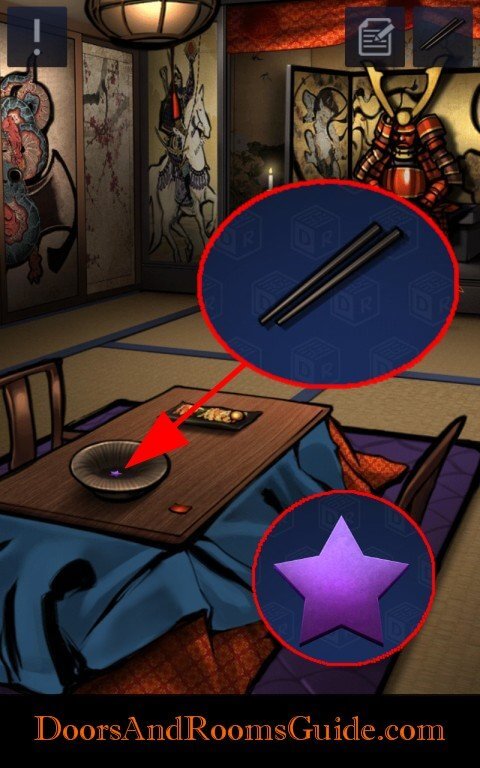
B1. Grab the chopsticks on the table.
B2. Use the chopsticks to remove food from the bowl on the table. Retrieve the bonus star at the bottom of the bowl.
Quiz
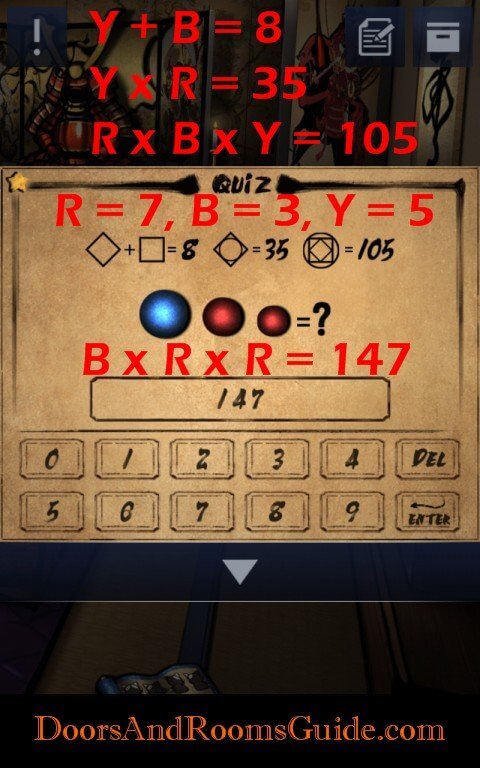
Q1. Locate quiz in a box at the corner of the room.
Assuming:
Yellow (Y) = Diamond Shape
Blue (B) = Square Shape
Red (R) = Circle Shape.
You have been given three pieces of clues:
Y + B = 8
Y x R = 35
R x B x Y = 105
Solve the equations, you will get:
R = 7
B = 3
Y = 5
Therefore:
B x R x R = 147
The answer to the quiz is 147.
Quiz- Where does the multiplying come from? Or is it an assumption?
That’s what I got stuck on. 😛
I can’t get the sword. It just makes a noise & that’s it