
Stage Map

Walkthrough Item Index
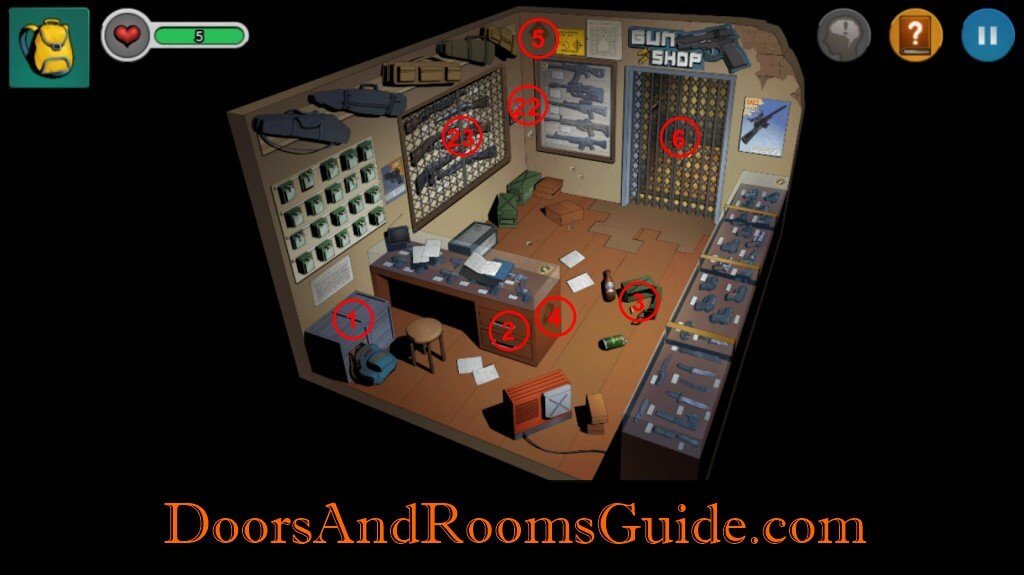
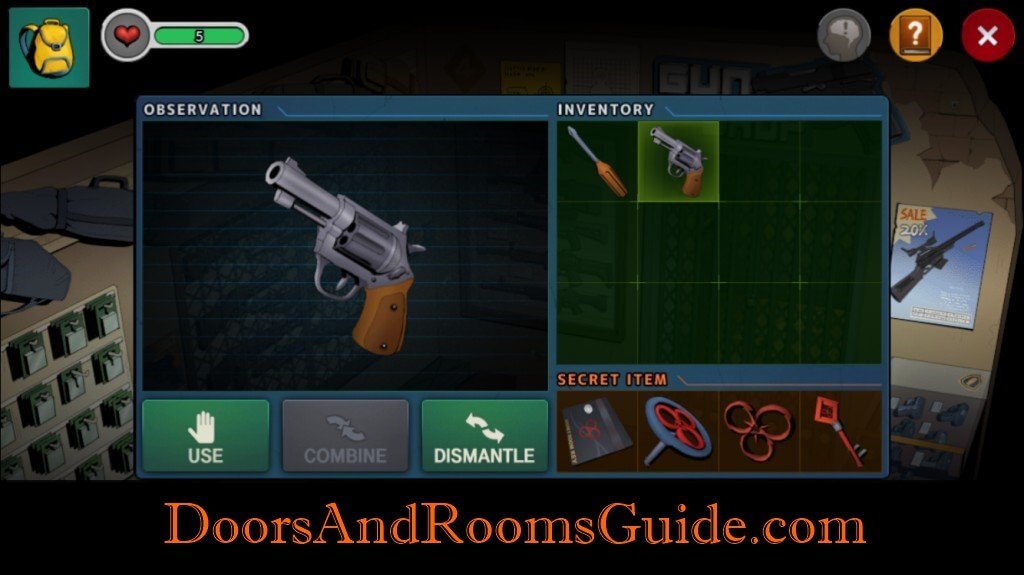
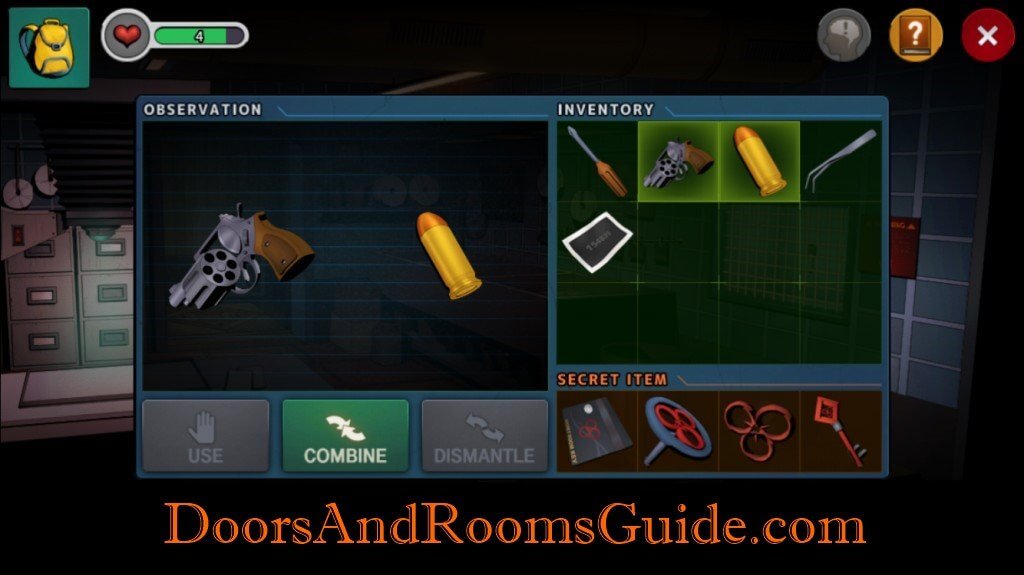
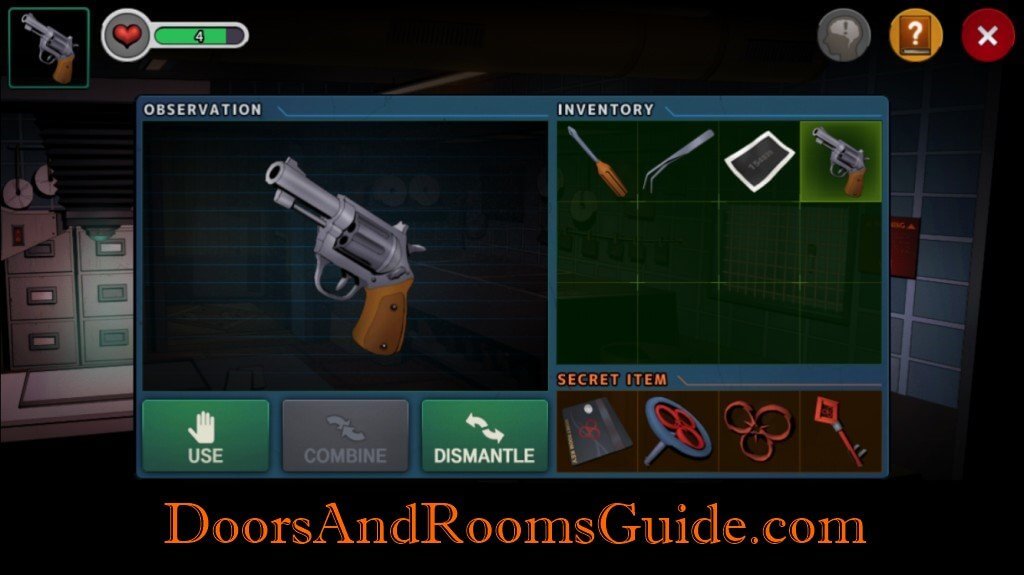
1. Revolver
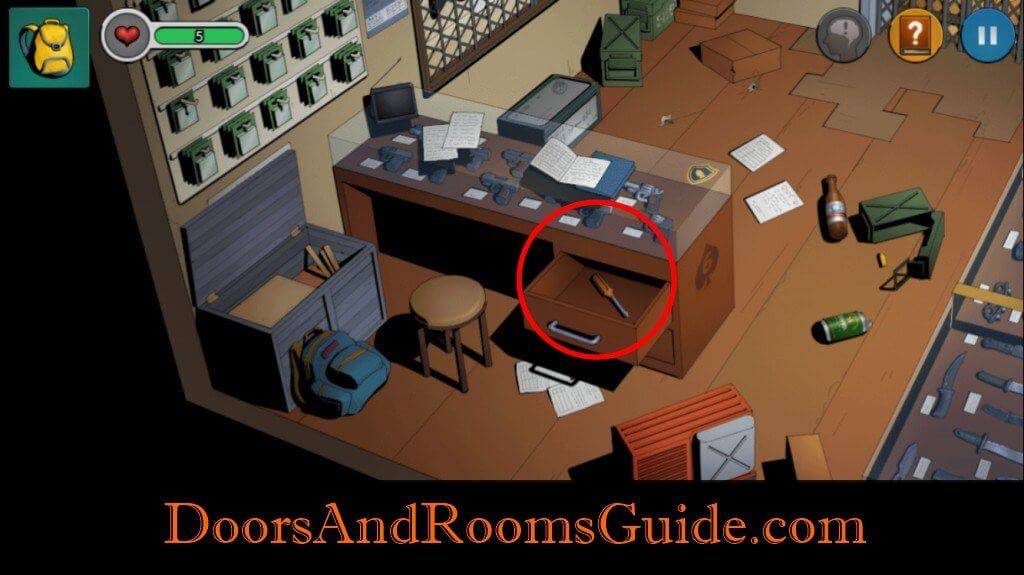
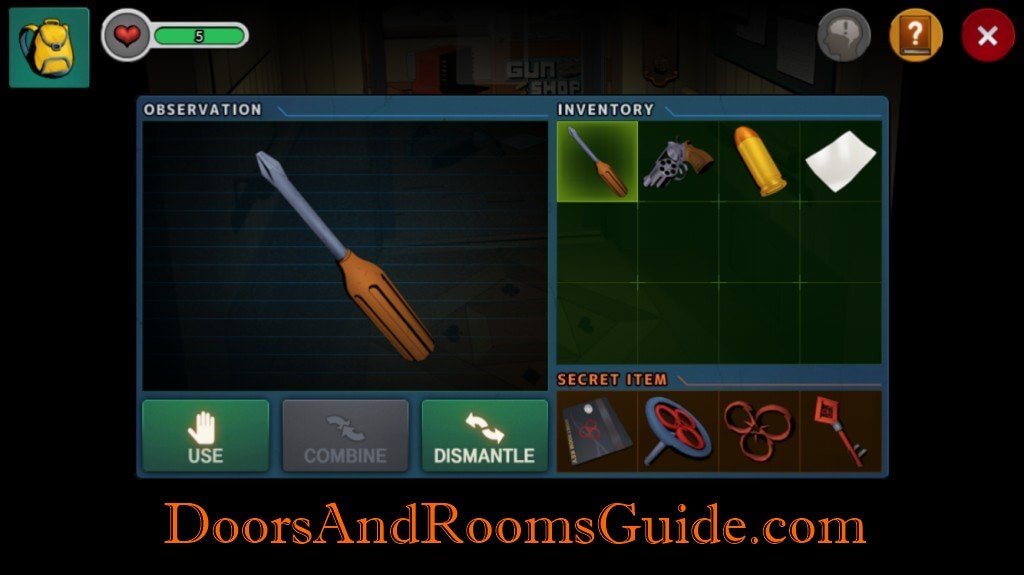
2. Screwdriver
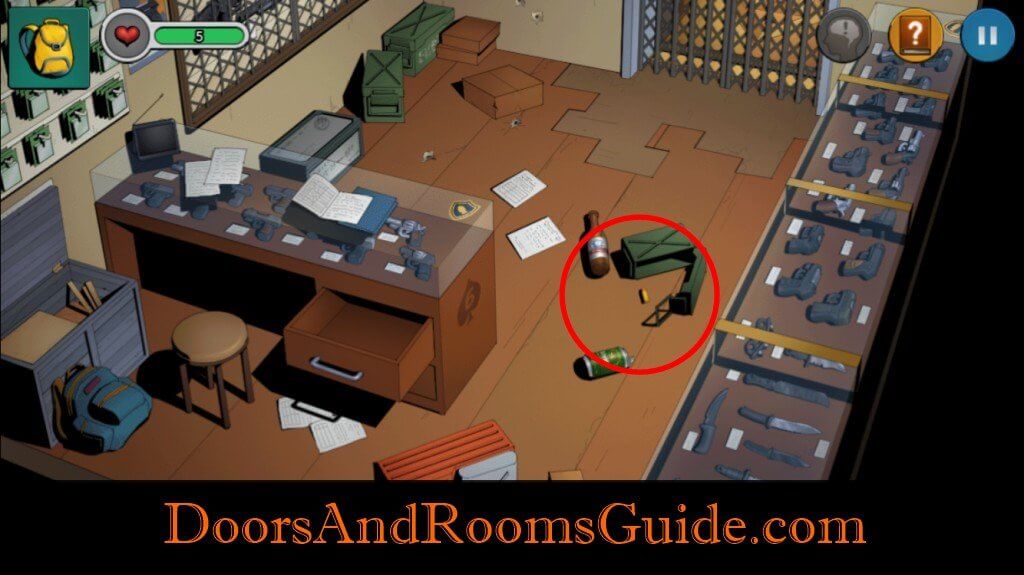
3. Bullet
4. Number Clue 1
5. Number Clue 2
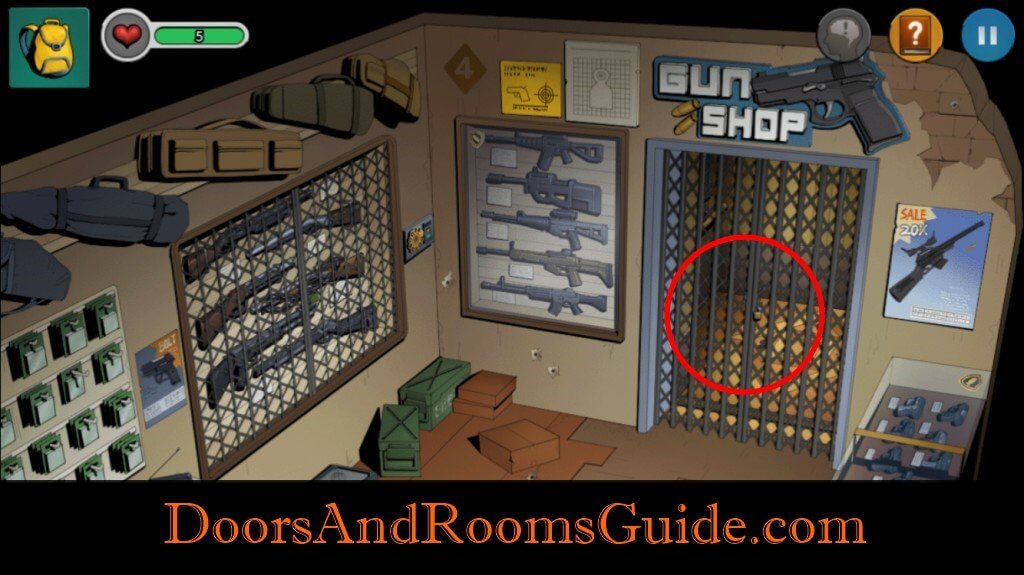
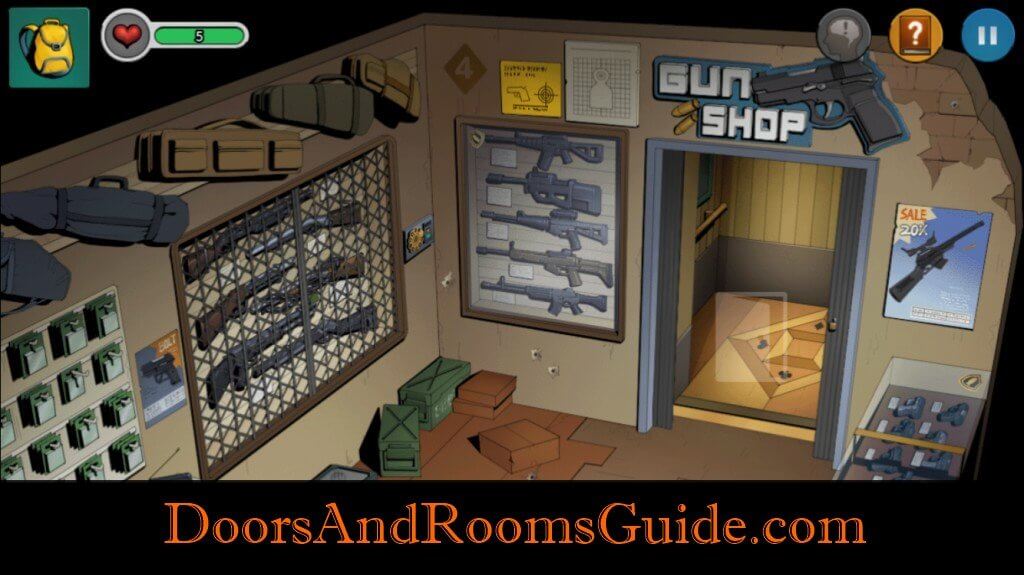
6. Gate
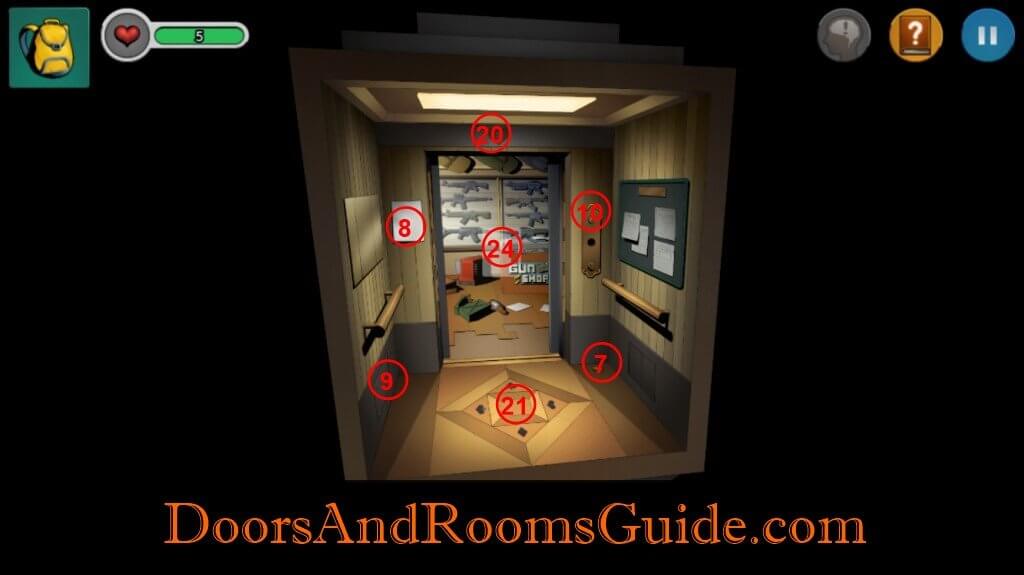
7. Floor
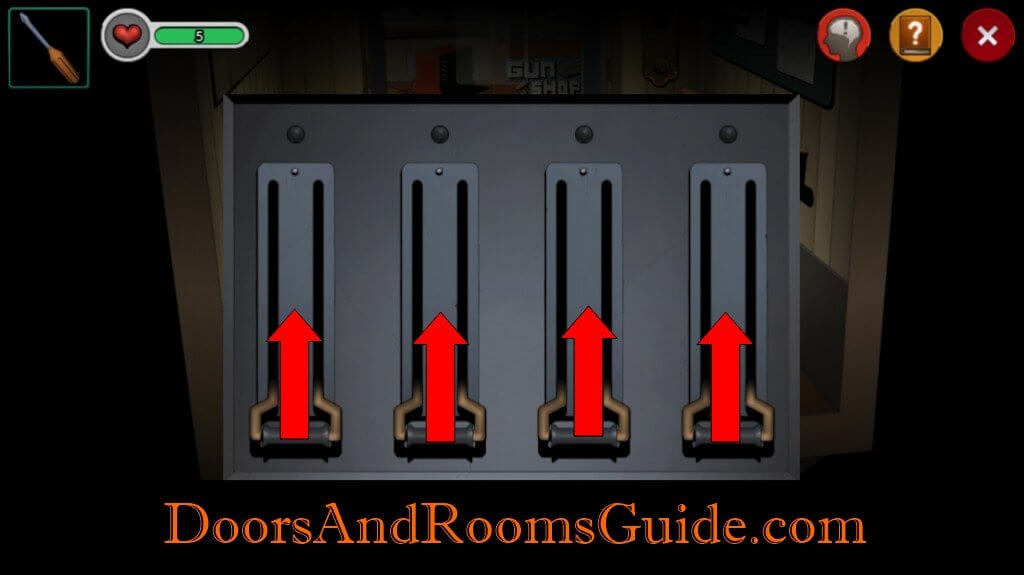
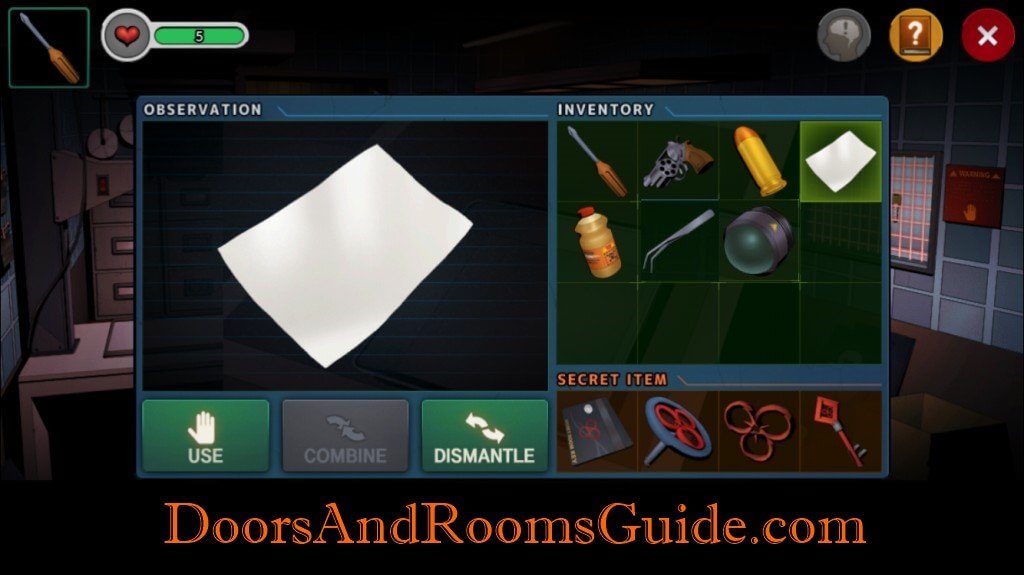
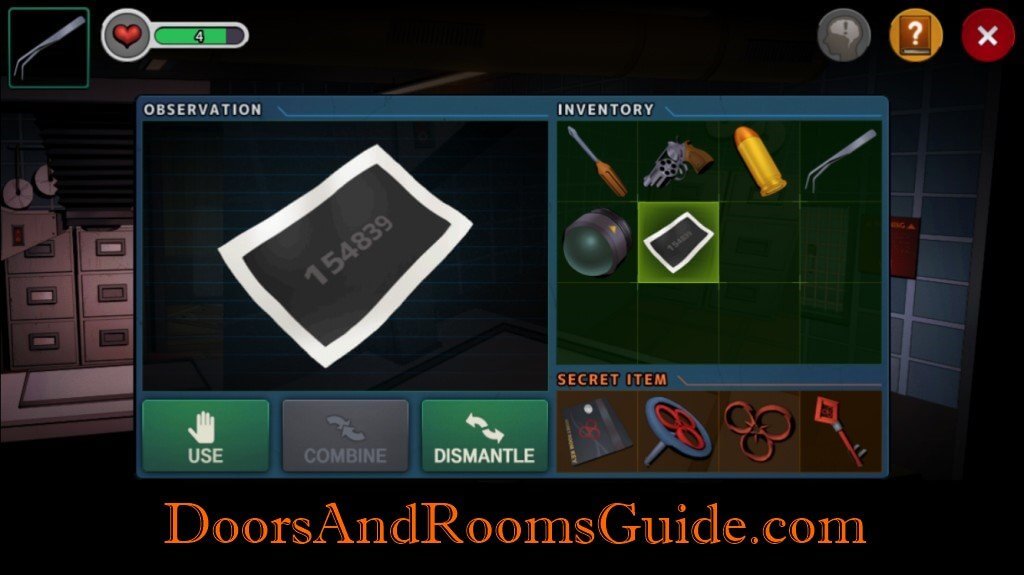
8. Photo Paper
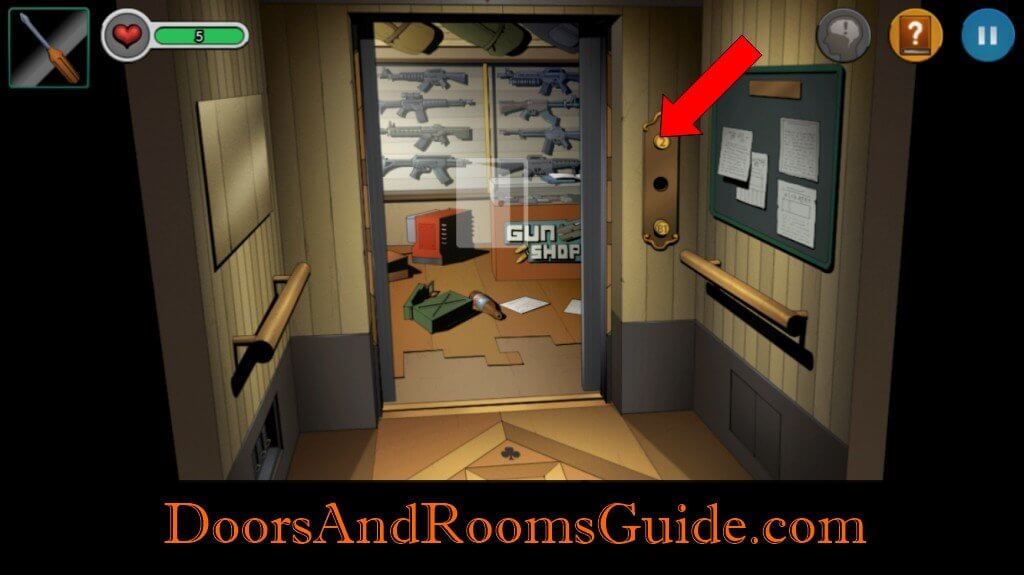
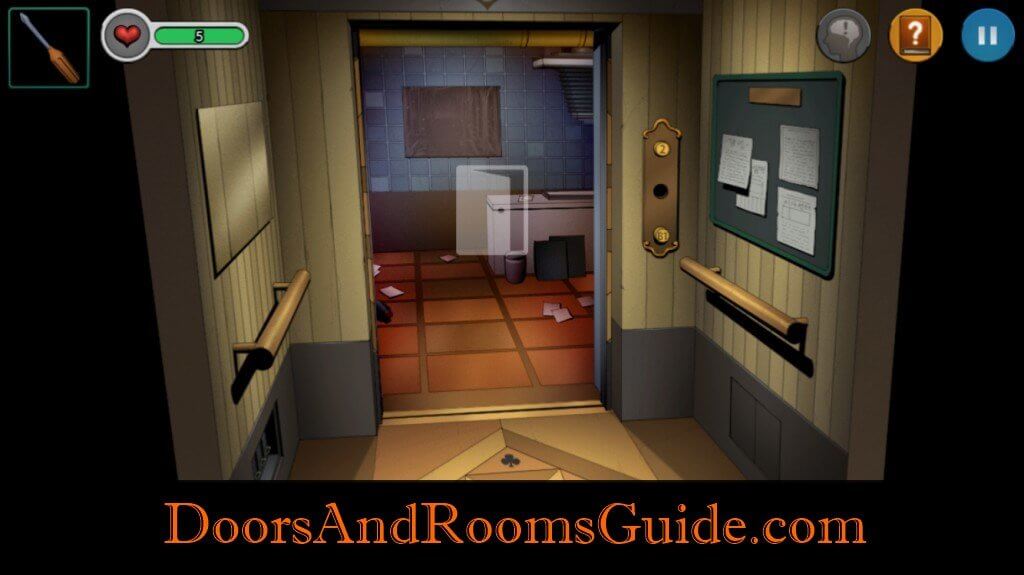
9. Control Box
10. Second Floor
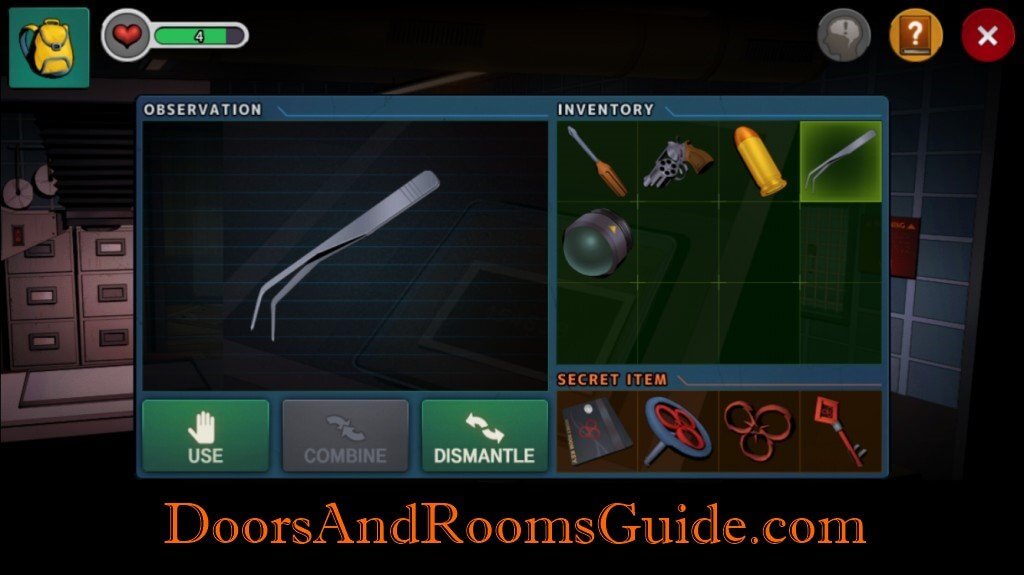
11. Tong
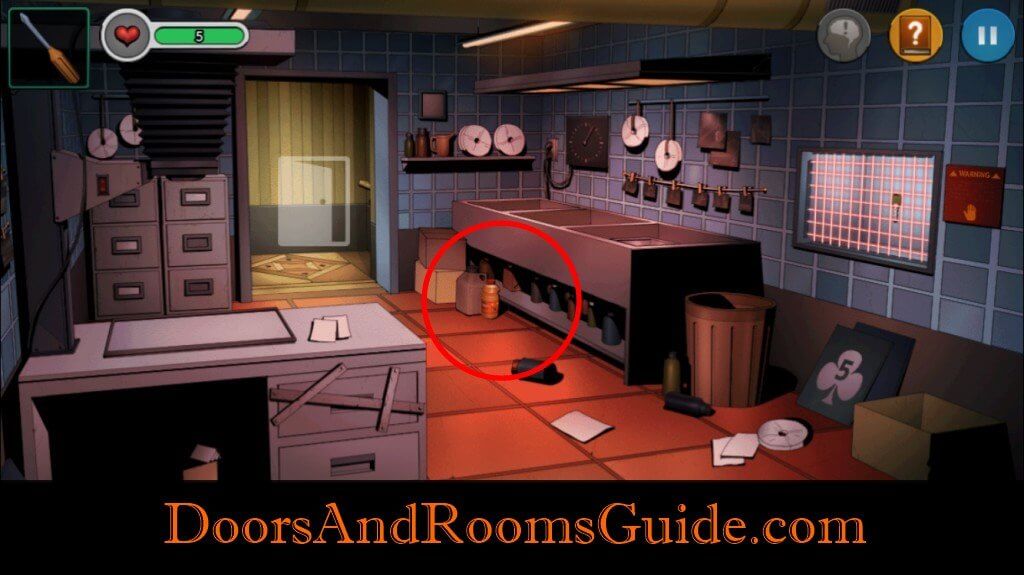
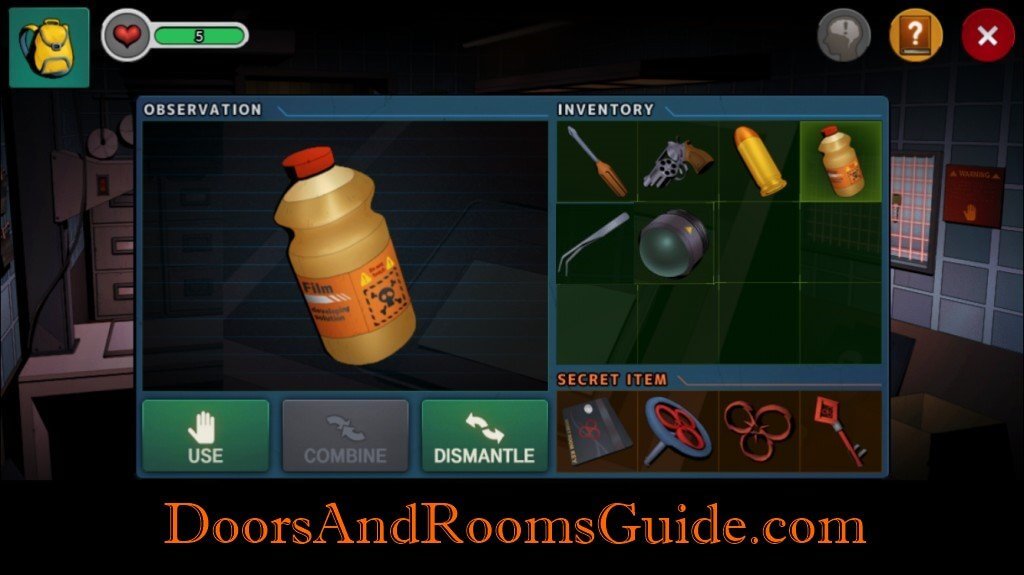
12. Light Bulb
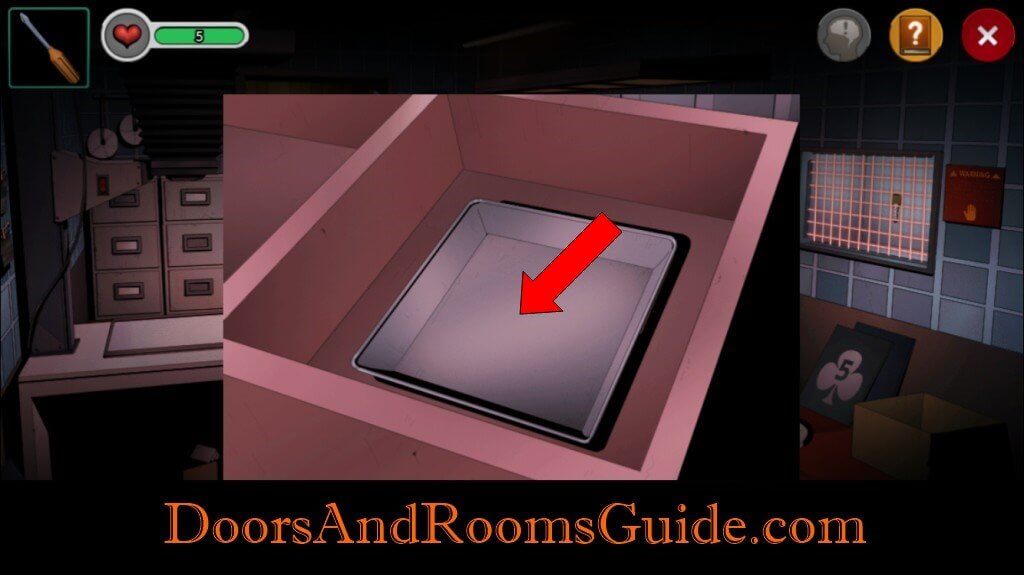
13. Solution
14. Sink
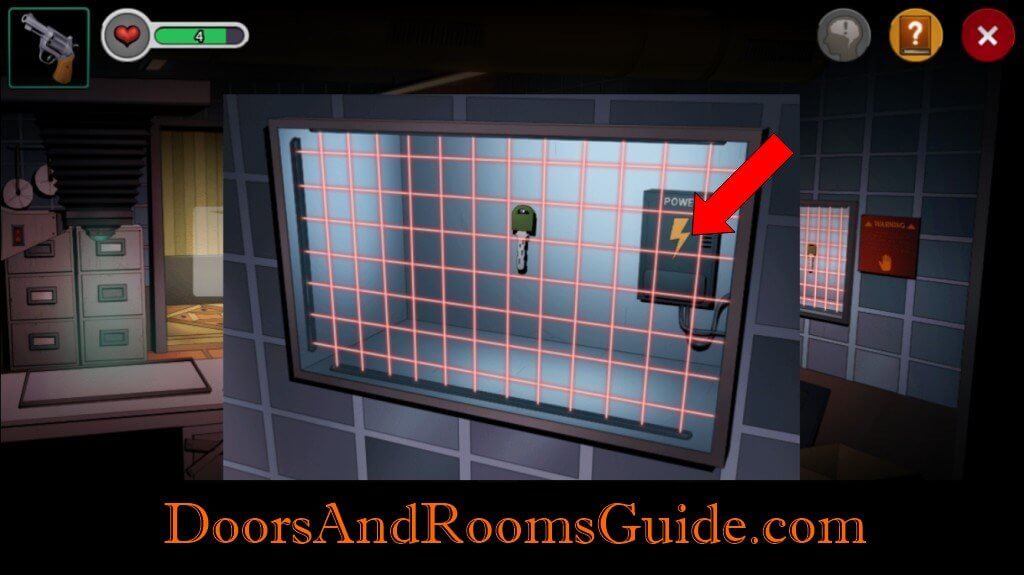
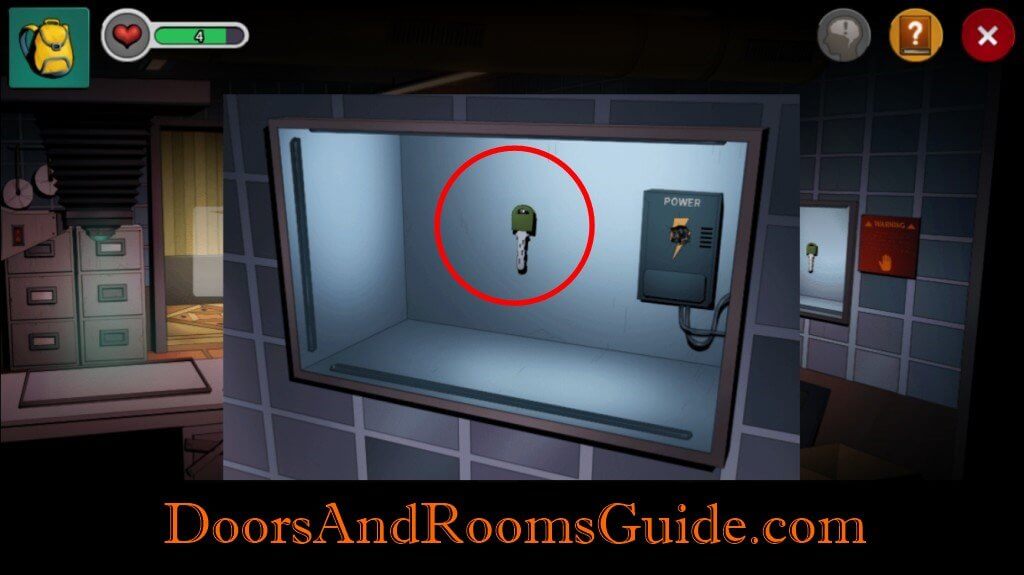
15. Enlarger
16. Green Key
17. Number Clue 3
18. Number Clue 4
19. Number Clue 5
20. Number Clue 6
21. Elevator Puzzle
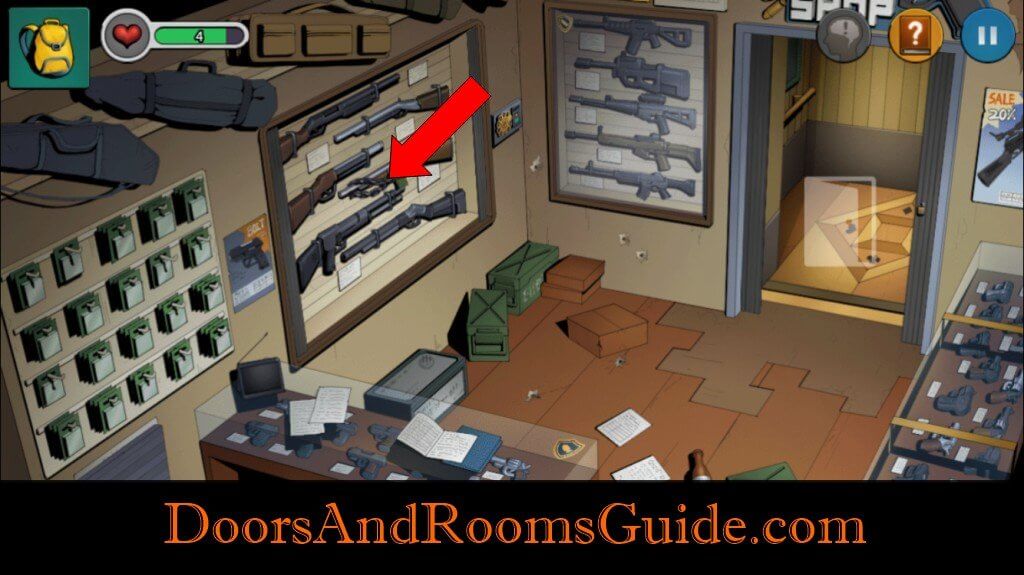
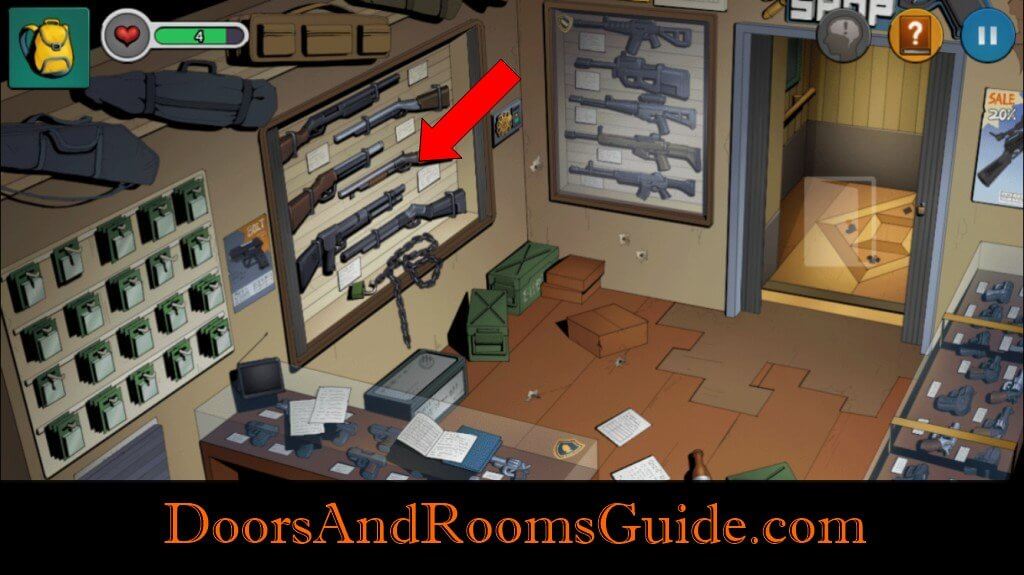
22. Display Keypad
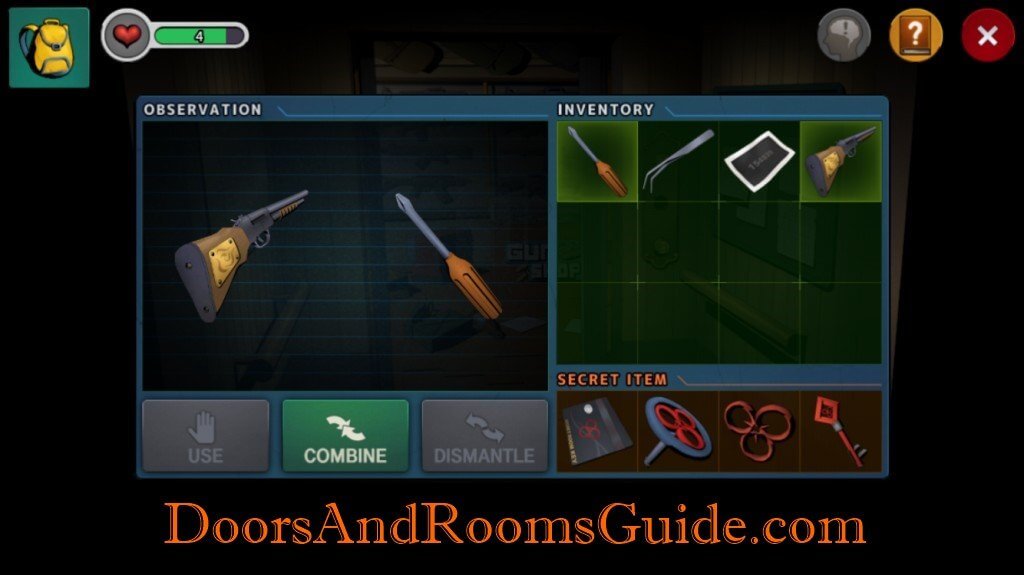
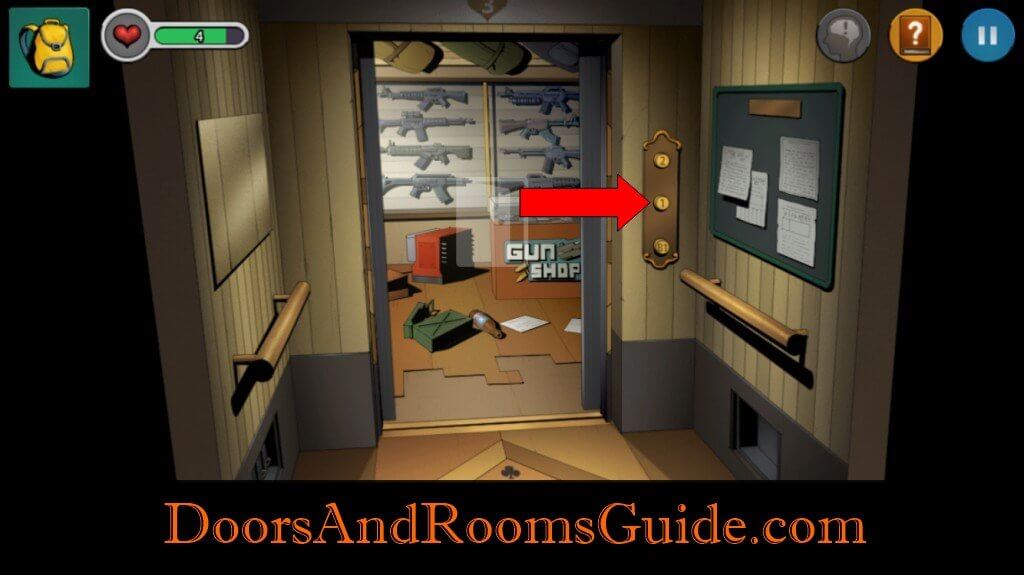
23. Shotgun
24. Escape
Warning
Stage Walkthrough
1. Revolver: Get revolver from the box.

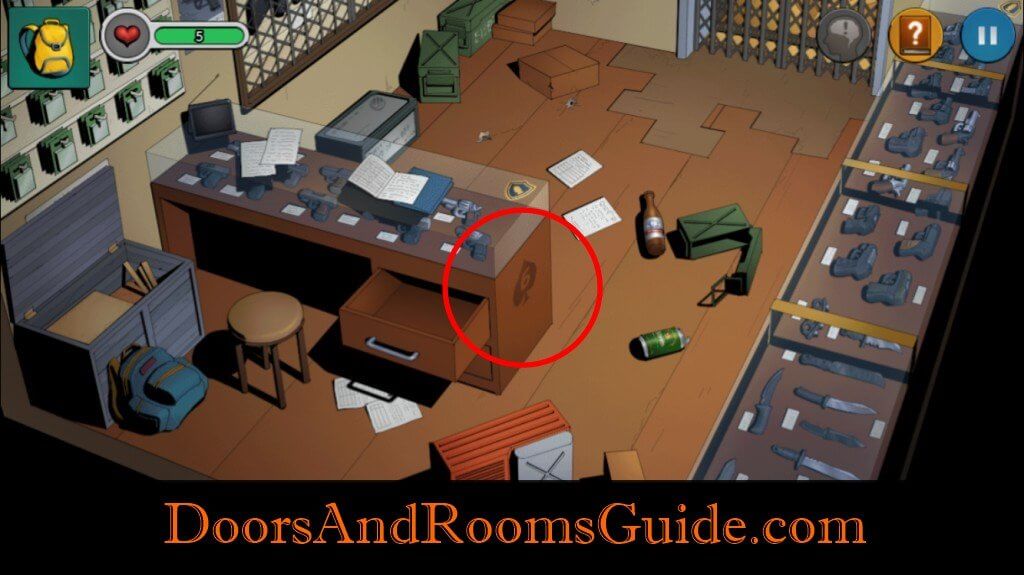
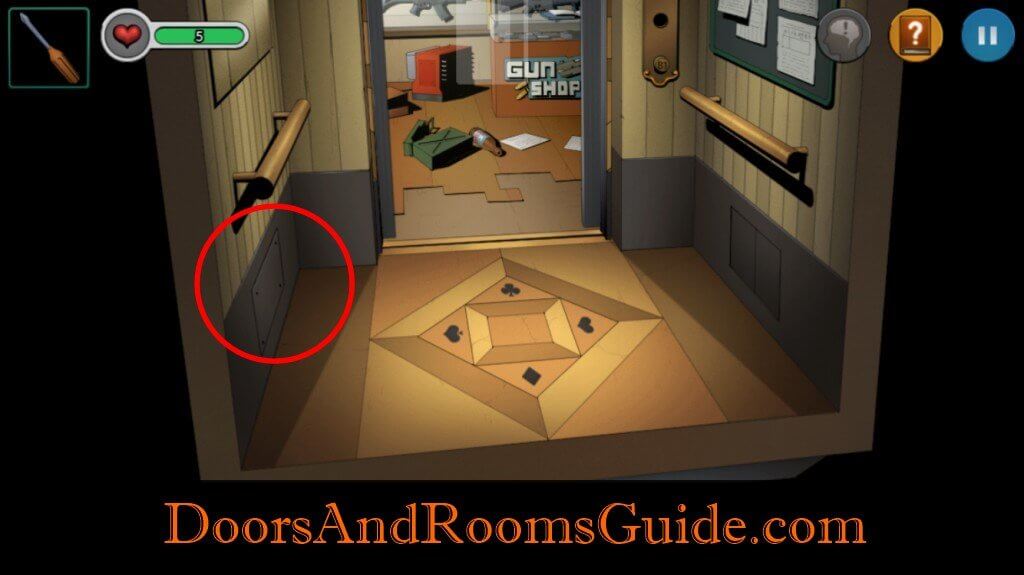
2. Screwdriver: Open drawer. Get a screwdriver.
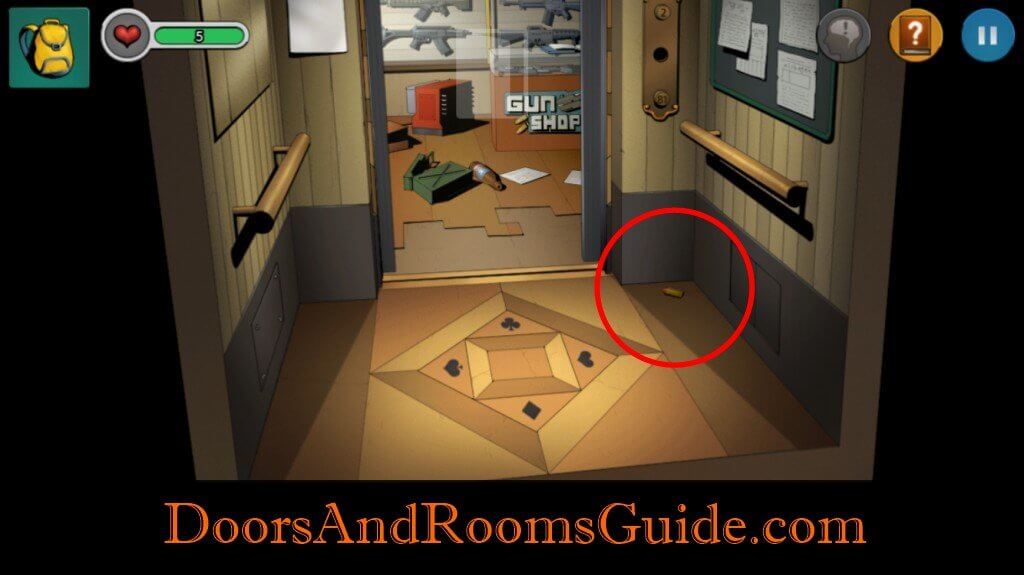
3. Bullet: Pick up bullet on the floor.
4. Number Clue 1: Notice a Spade 6 on the side of the display case.
5. Number Clue 2: Observe a Diamond 4 at the corner of the wall.

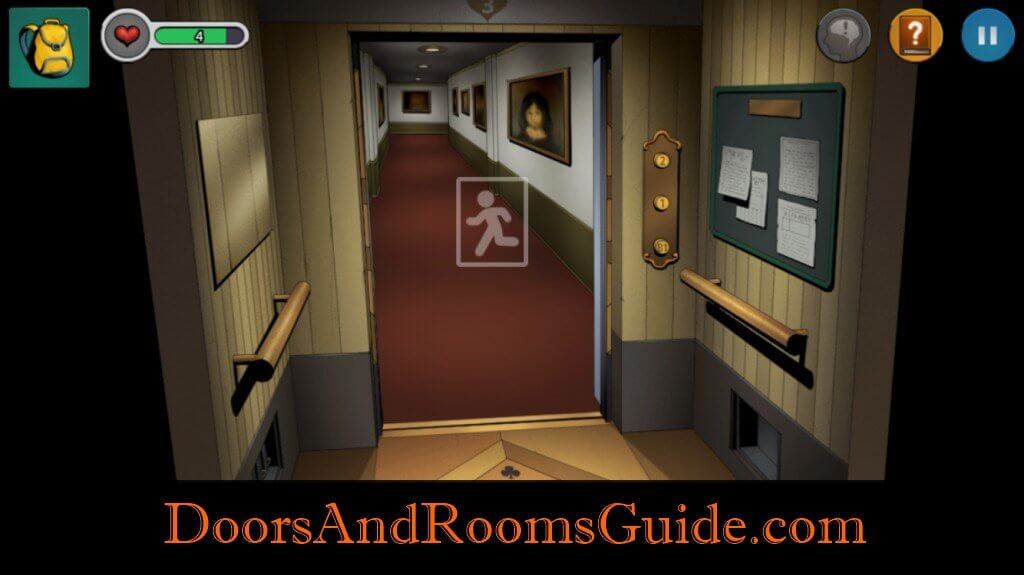
6. Gate: Combine the revolver and bullet. Use the revolver to destroy the lock on the elevator gate. Enter the elevator.

7. Floor: Pick up a bullet.
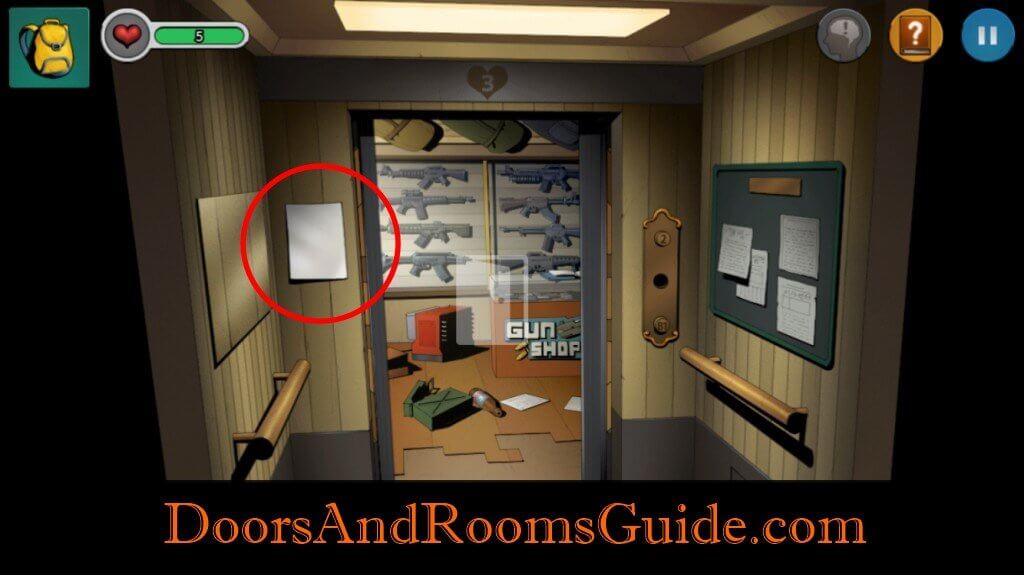
8. Photo Paper: Get the Photo Paper typed on the wall next to the door.
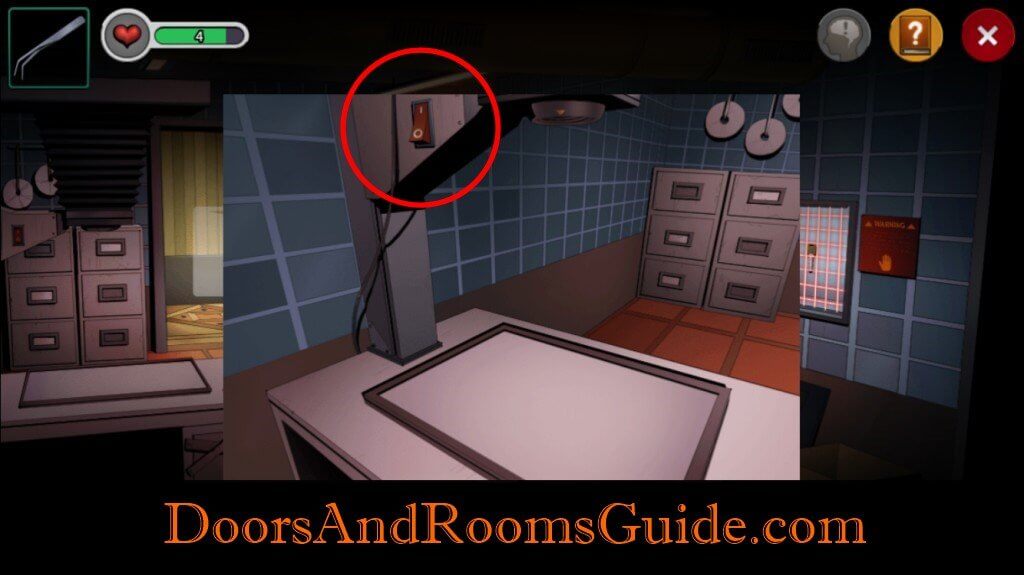
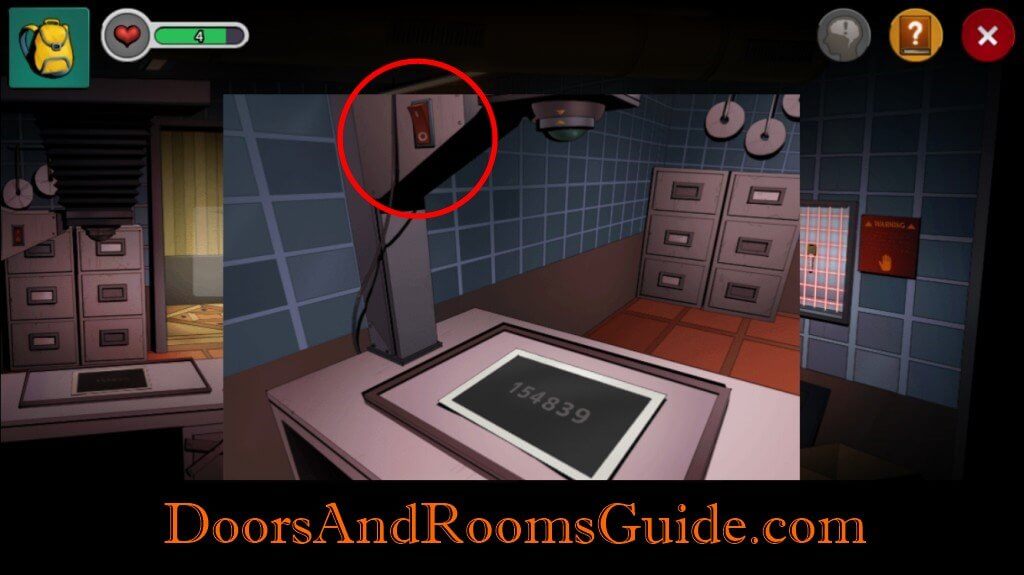
9. Control Box: Use the screwdriver to open the control box cover. Flip the switches really fast so that all the power is on at the same time.

10. Second Floor: Press the second floor button. Go up and enter second floor.
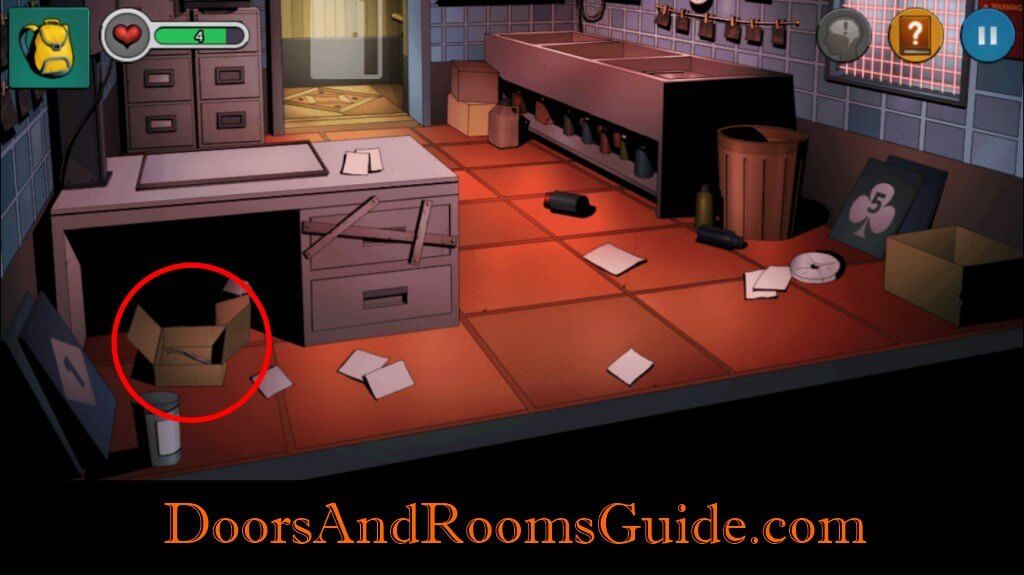
11. Tong: Open box and grab a tong.
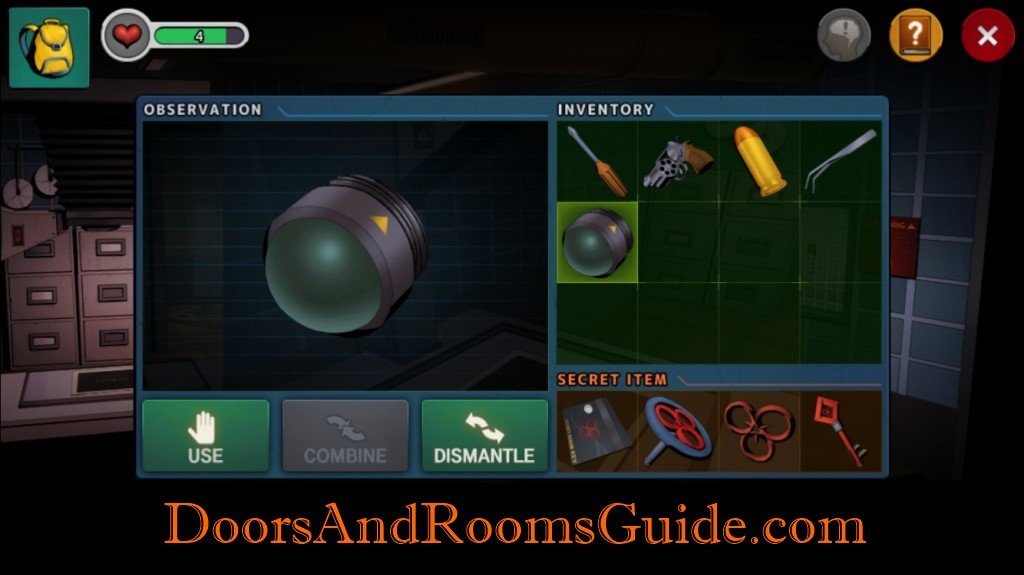
12. Light Bulb: Open drawer. Get a light bulb.

13. Solution: Pick up solution on the floor.
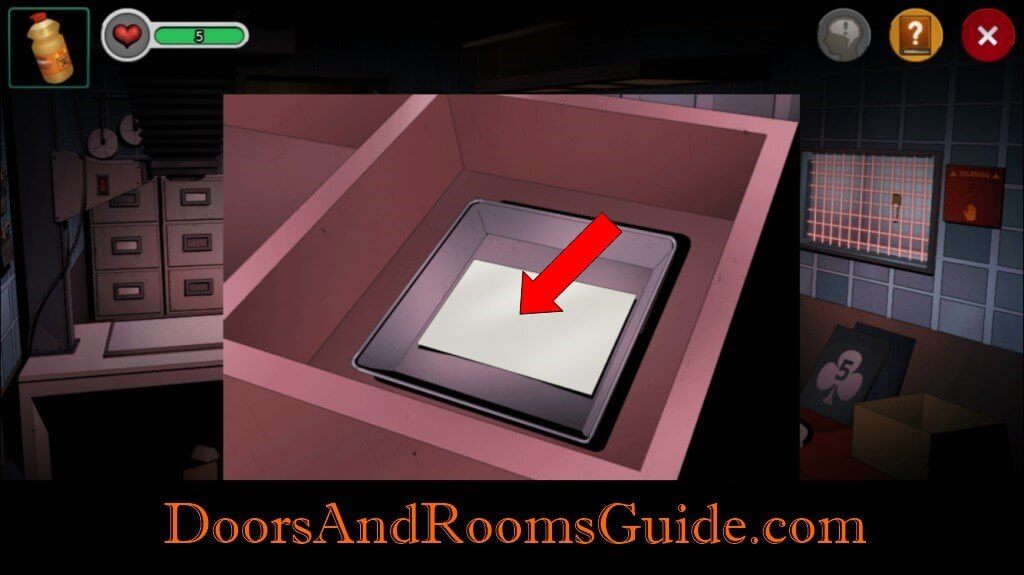
14. Sink: Go over to the sink and place the Photo Paper in the tray. Then pour the solution over the paper. A set of number appeared. Pick up the paper with tong.
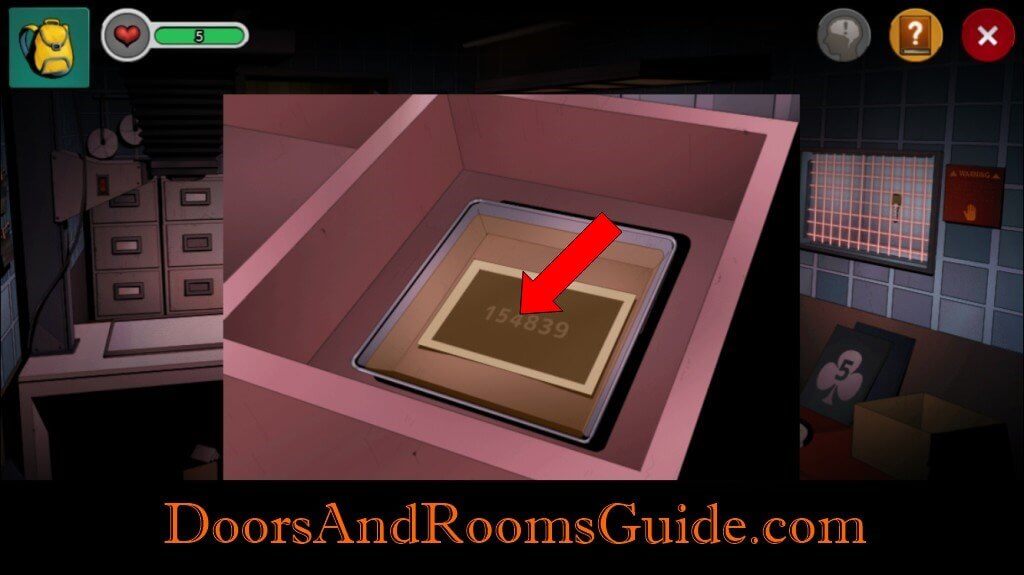
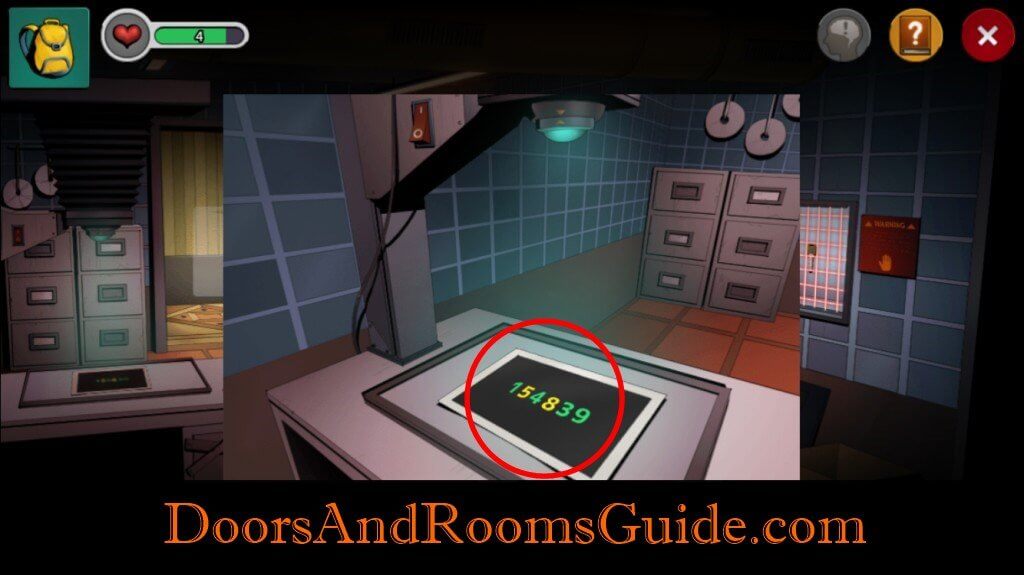
15. Enlarger: Turn off the power. Insert light bulb. Place the photo paper on the enlarger. Turn on the power. Notice that some numbers appear in color green and some in yellow: 1(Green), 5(Yellow), 4(Green), 8(Yellow), 3(Green), 9(Green).

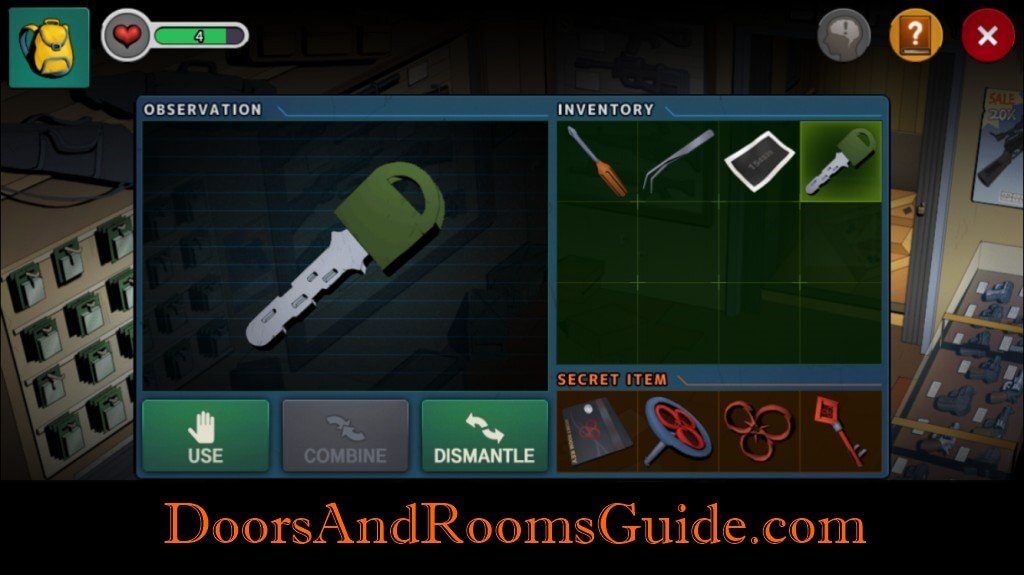
16. Green Key: Combine revolver and bullet. Destroy the power supply to the laser wall. Get a green key.
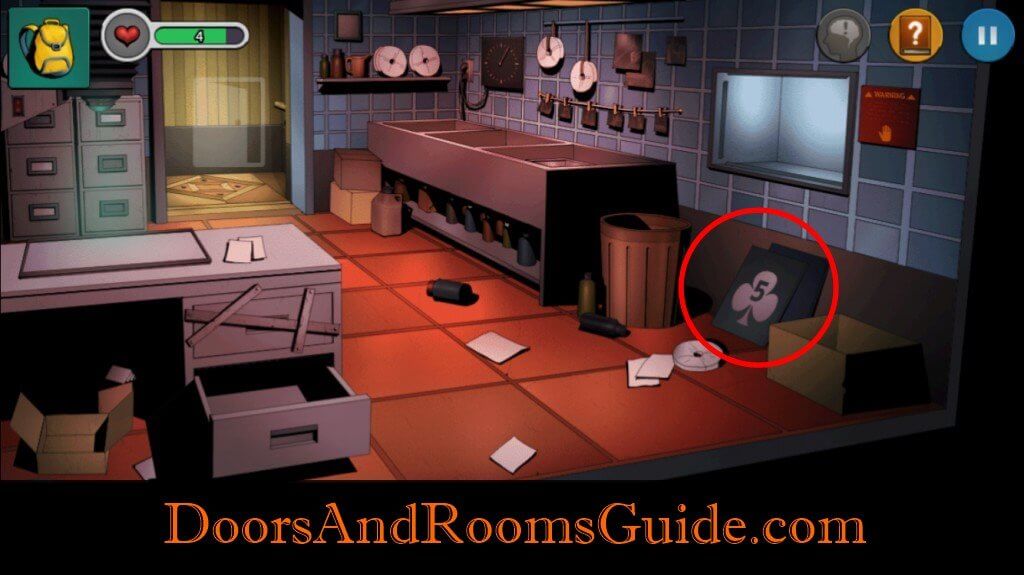
17. Number Clue 3: Notice a Club 5 on a black plate on the right.
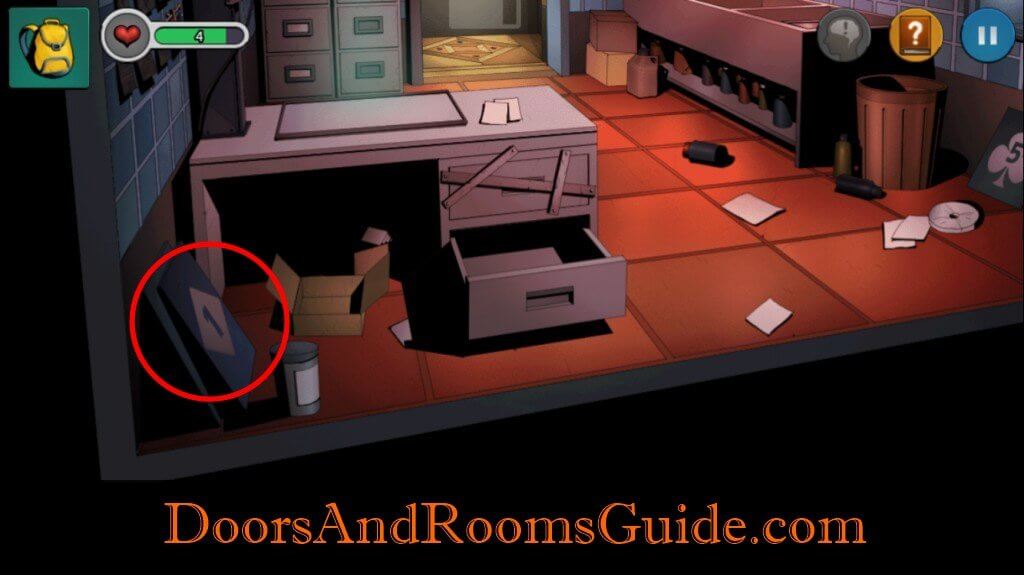
18. Number Clue 4: Notice a Diamond 1 on a black plate on the left.
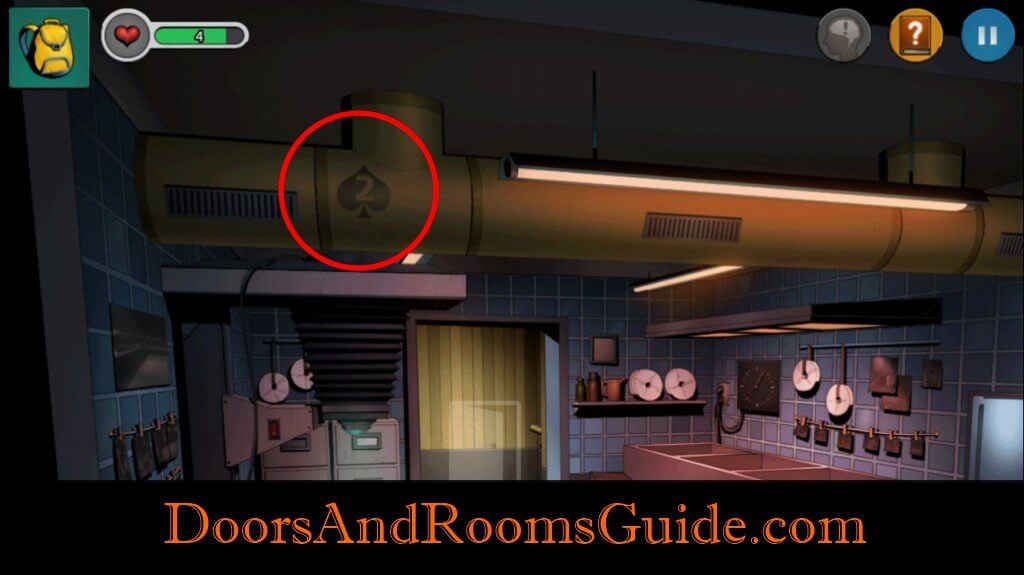
19. Number Clue 5: Notice a Club 2 on the ceiling vent.
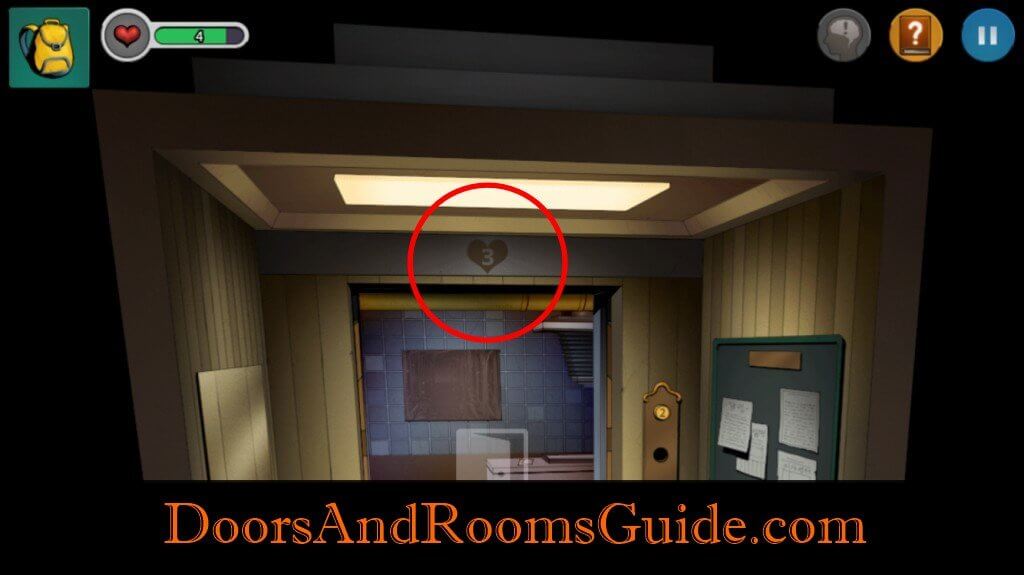
20. Number Clue 6: Go into the elevator. Notice a Heart 3 above the door.
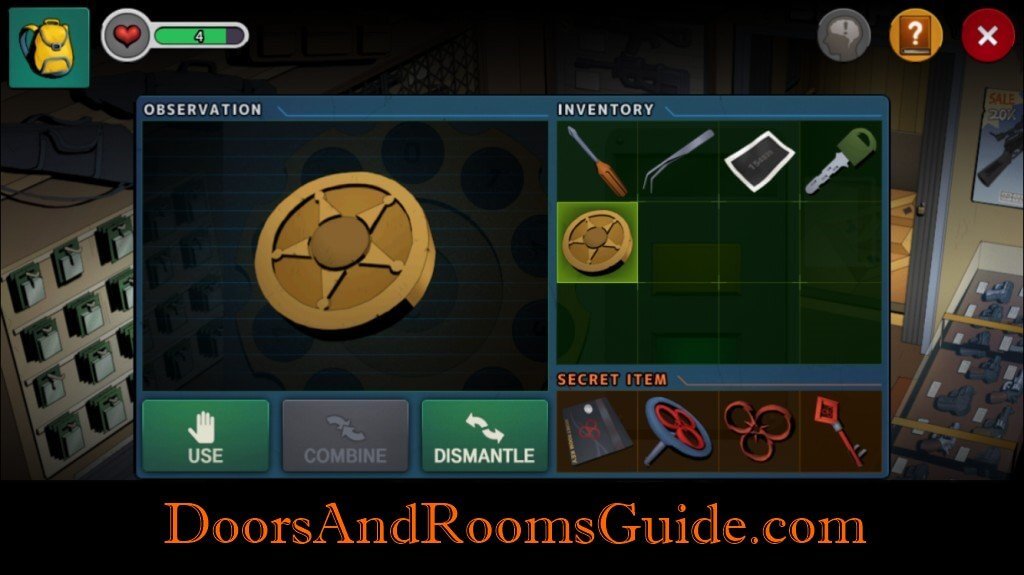
21. Elevator Puzzle: Locate puzzle on the elevator floor. Combine all the number clues and put them in order: Diamond 1, Club 2, Heart 3, Diamond 4, Club 5, Spade 6. Tap the floor in this order. A secret compartment will open. Get a round plate.

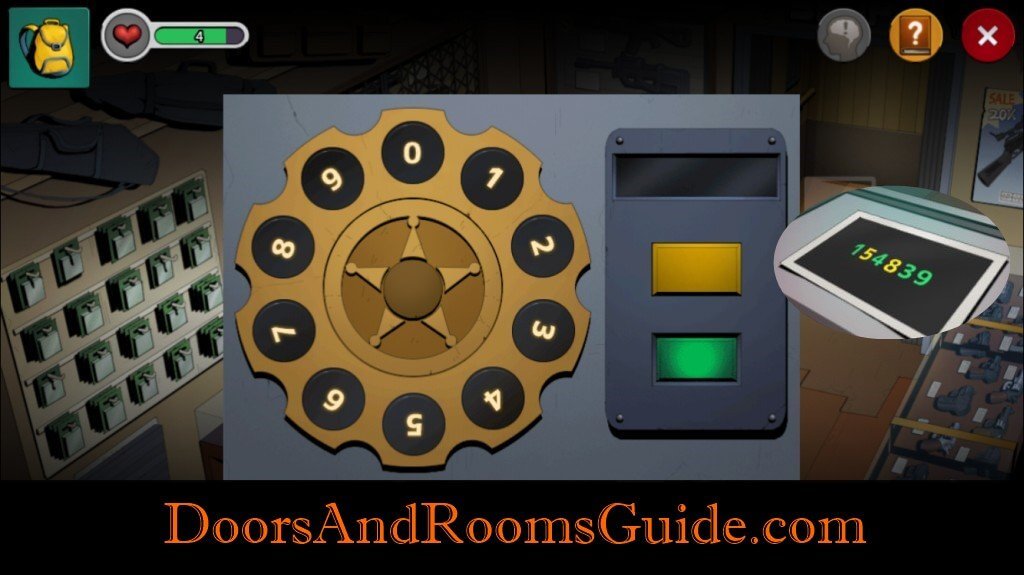
22. Display Keypad: The gun display is locked. Insert round plate. The combination can be found on the photo paper. Press on the yellow or the green button when you need to switch color. Password: 1(Green), 5(Yellow), 4(Green), 8(Yellow), 3(Green), 9(Green).


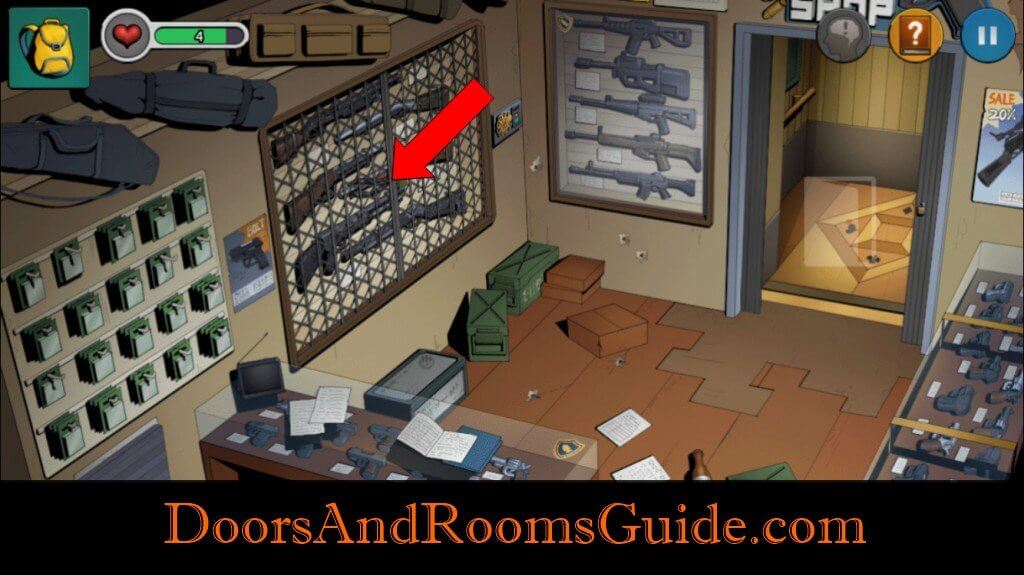
23. Shotgun: Open display gate. Use the green key to unlock a shotgun. Grab the shotgun.
24. Escape: Go into the elevator. Combine shotgun and screwdriver. Dismantle shotgun. Get a first floor button. Insert button in the elevator pad. Press the first floor button. You have escaped!


Warning
1. Do not touch the enlarger before turn off the power switch.
2. Do not touch the laser wall before destroy the power supply.
It’s
1. Diamond
2. Spade
3. Heart
4. Diamond
5. Club
6. Spade
I can’t complete this level. now I am stuck
Como entró a la puerta 10
I have collected all my stuff, did what I needed to do and still can’t get this puzzle in the elevator to work?
Check the other posts for the proper sequence
because the combination is wrong
i can’t unlock the level even i complete all the 9 stages
I unlocked the bore
I locked up the bore in the elevator
I locked up the bore in the elevator now I can’t get to the gun shop on B1
Can’t seem to flip the switches fast enough to keep them all green at the same time????
Can’t flip the switchex fast enough to get power to stay on.
Elevator puzzle is 1d-2s-3h-4d-5c-6s
I tried both combinations in the elevator: diamond club heart diamond club spade AND Diamond spade heart diamond club spade. Neither of these combinations work for me. Any other suggestions?
It’s dshdcs, and while you are going through pushing the buttons, the compartment will make flipping sound. As soon as you hear the sound, you start from the beginning, dshdcs, you will get the coin.
My error was I was pressing each one the number of times and not just once each.
The elevator puzzle isnt there…. What am i missing????
Can’t slide the switches fast enough! Finger tips wearing out 😀