
Map
Walkthrough Item Index
Trap Warning
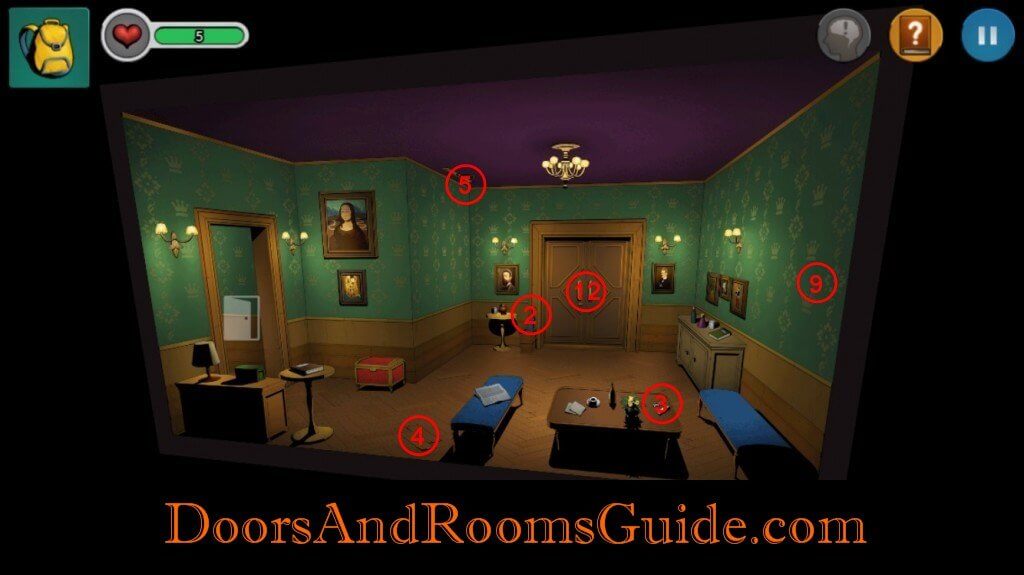
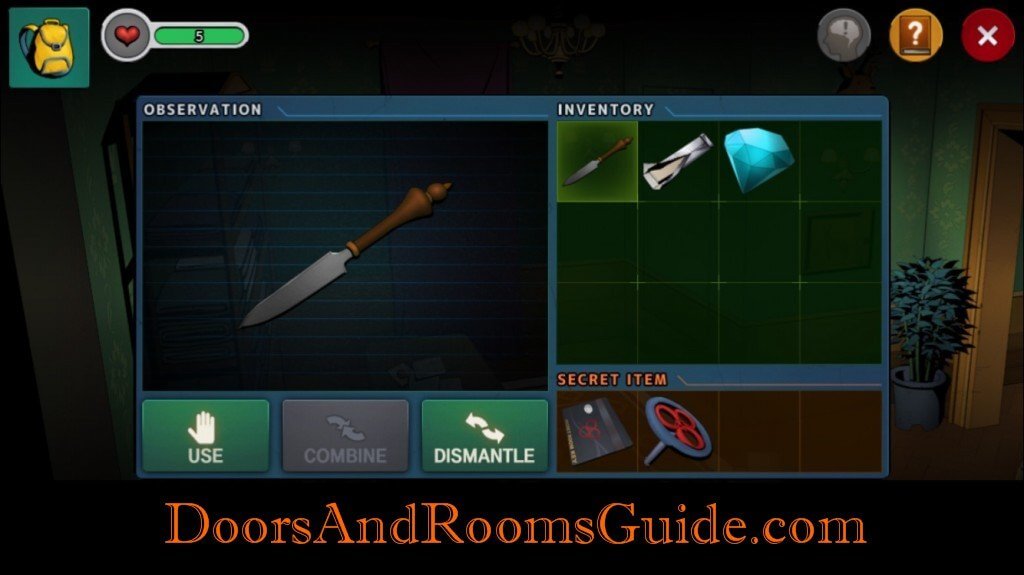
1. Letter Knife
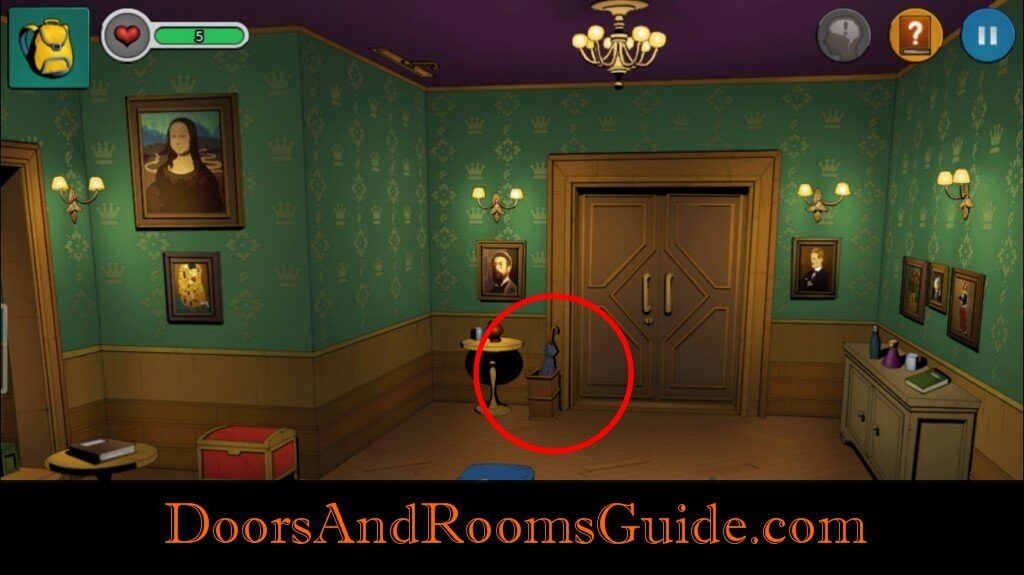
2. Umbrella
3. Gum
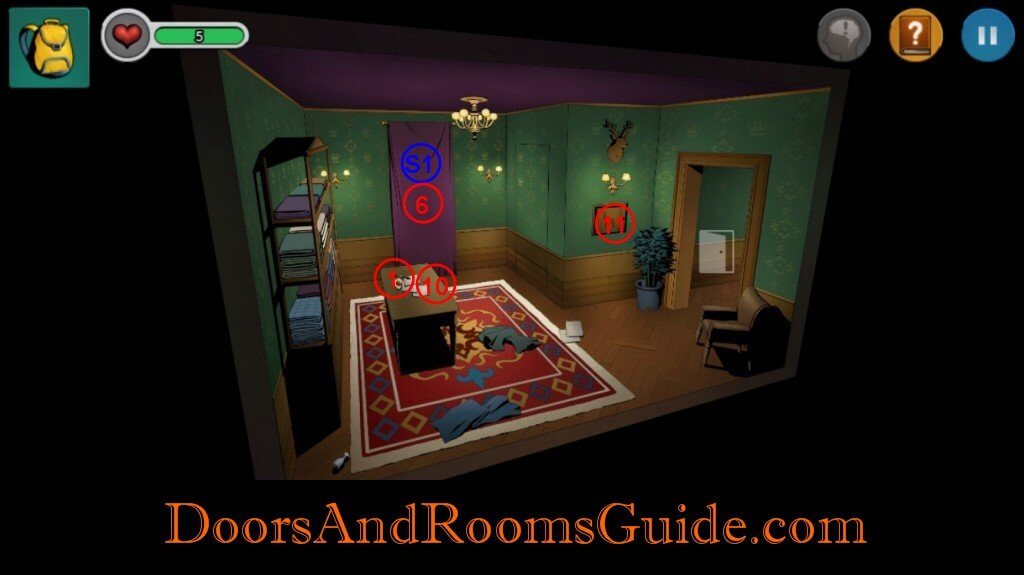
4. Floor
5. Puzzle
6. Dragon
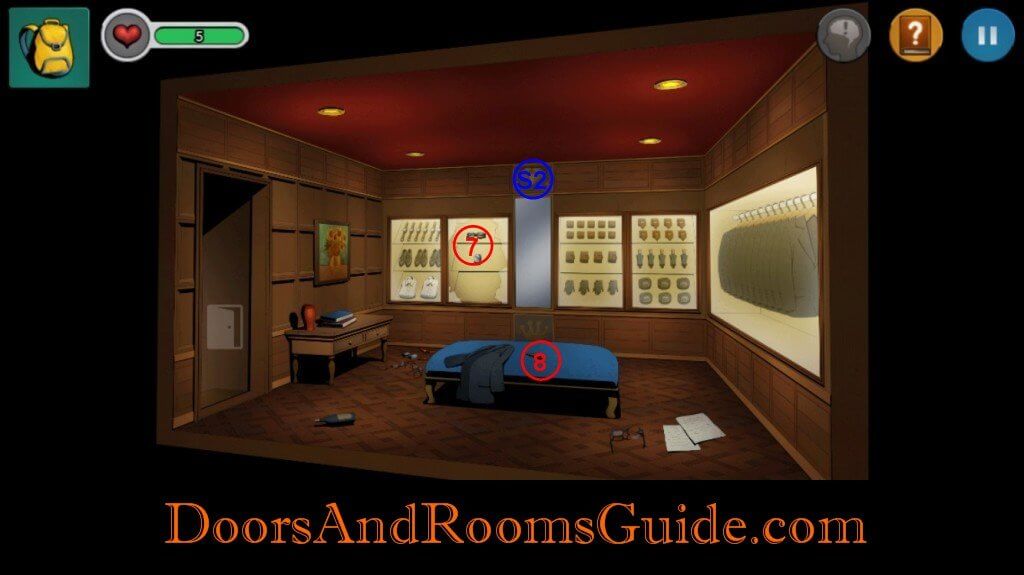
7. Closet
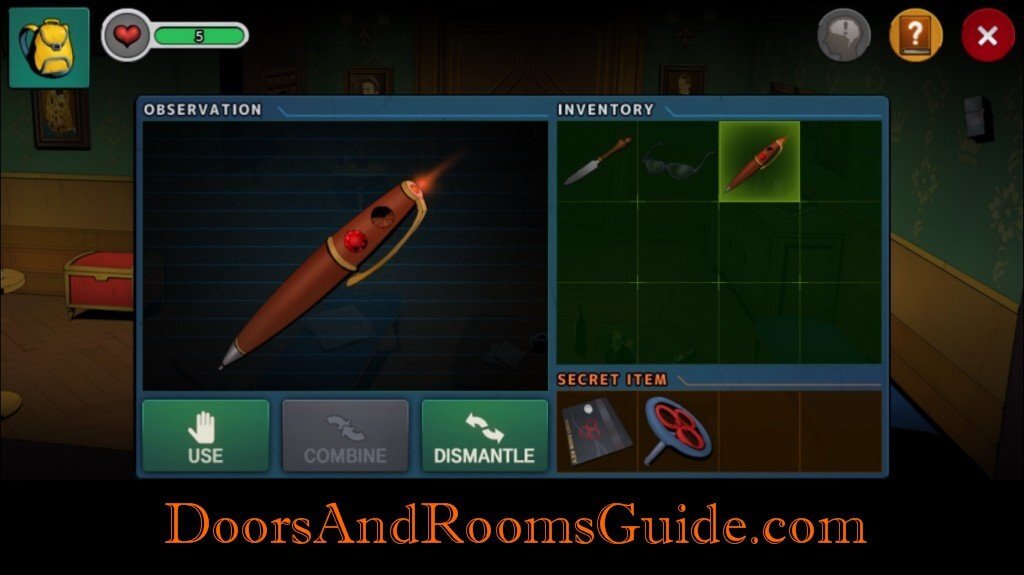
8. Pen
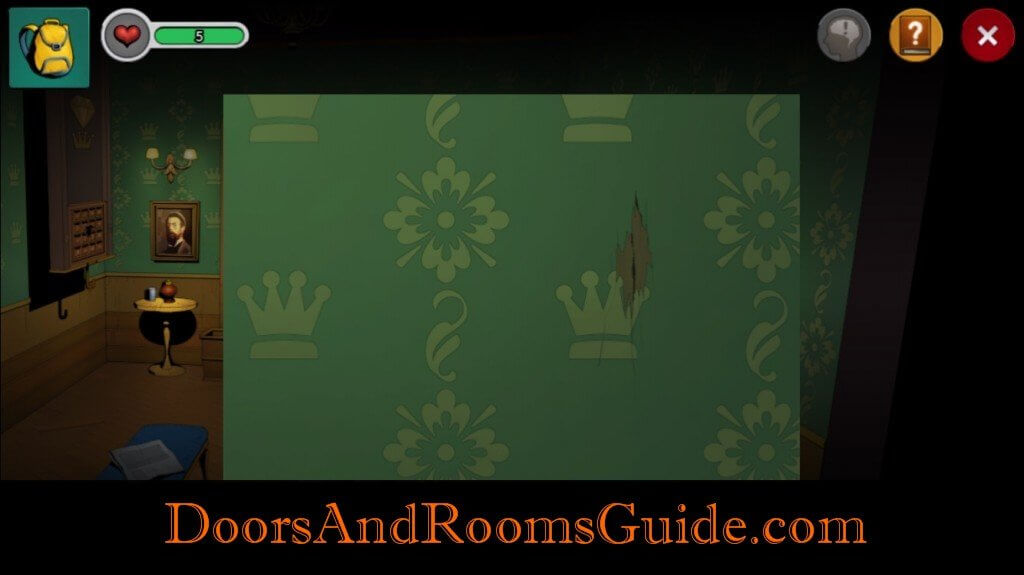
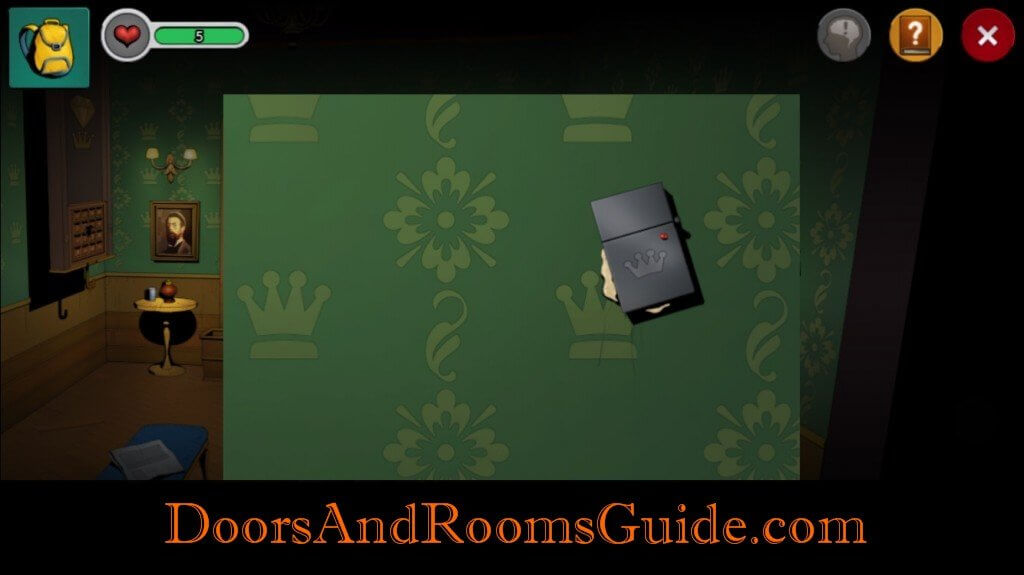
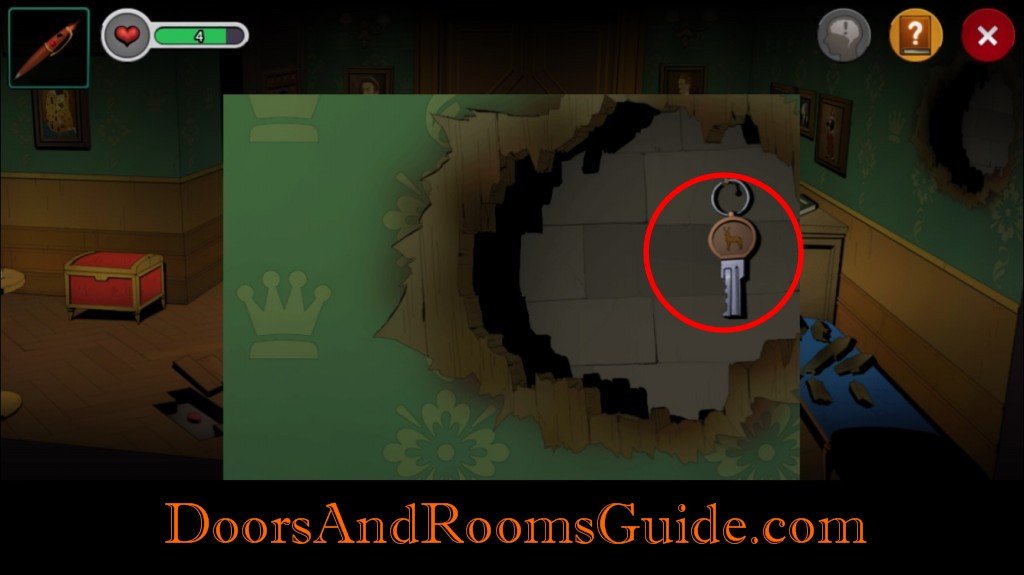
9. Wall
10. Glasses
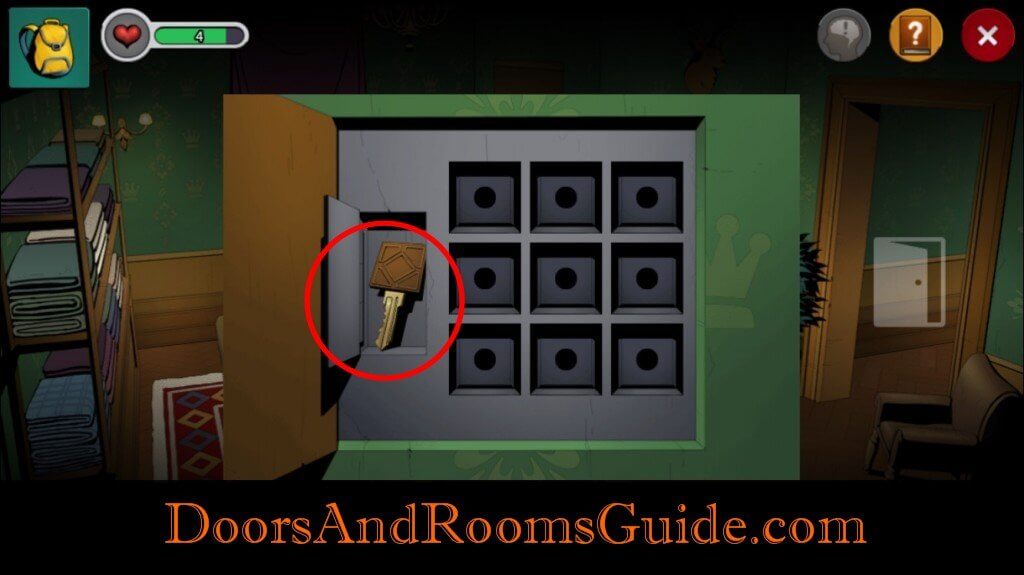
11. Safe
1. Letter Knife: Pick up letter knife on the table. Notice the hint carved on the table: a deer on top of nine squares.

2. Umbrella: Get the umbrella next to the door.
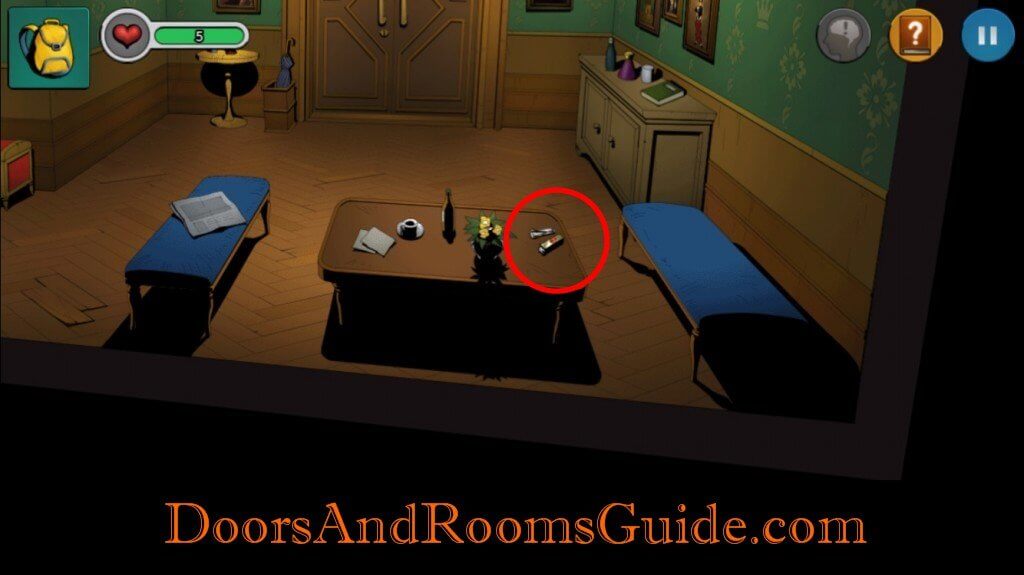
3. Gum: Grab a piece of chewing gum on the coffee table.
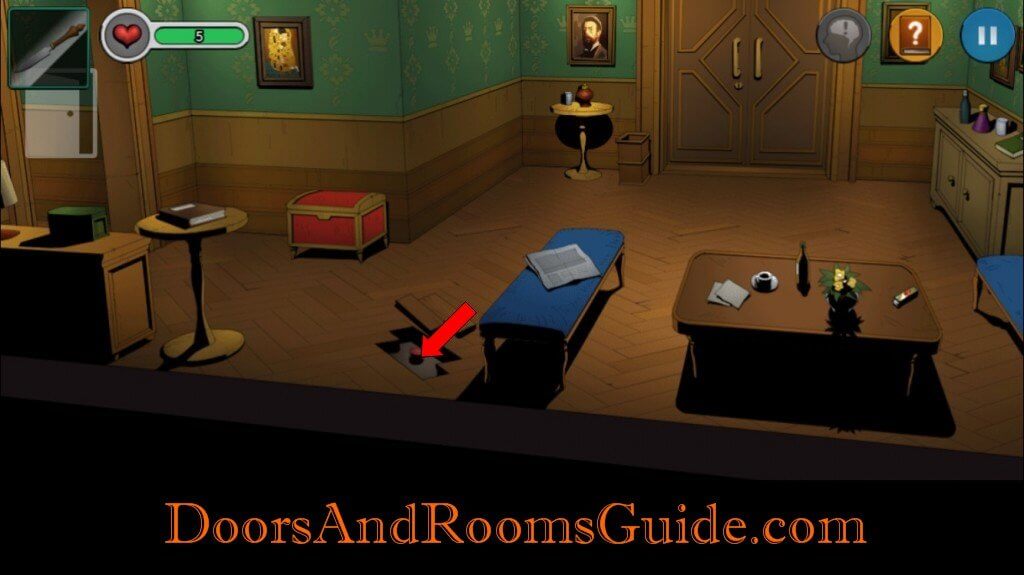
4. Floor: Notice two pieces of floor boards are out of place. Use the letter knife to pry open the floor boards. Press the red button. The button released a hook on the ceiling.

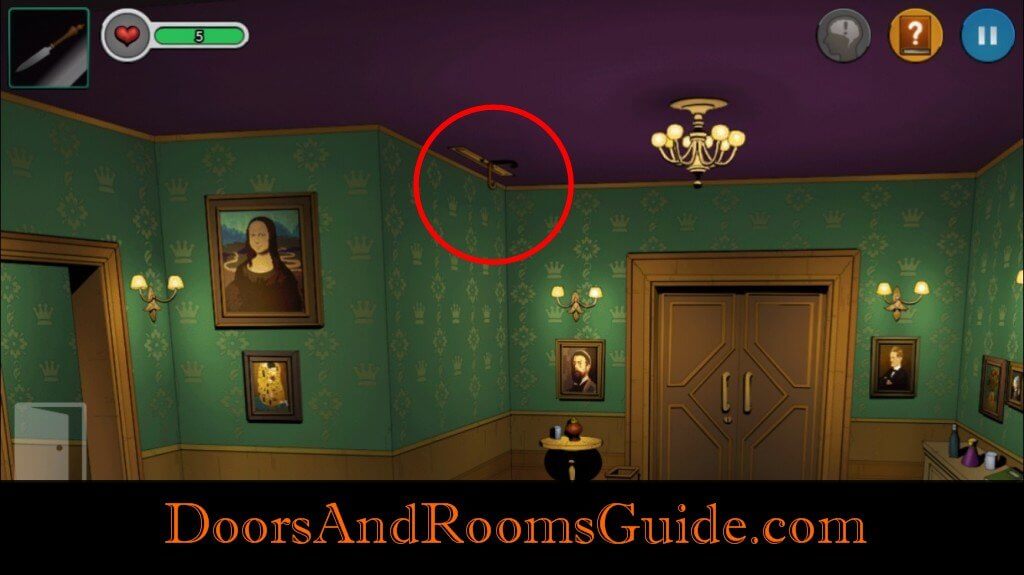
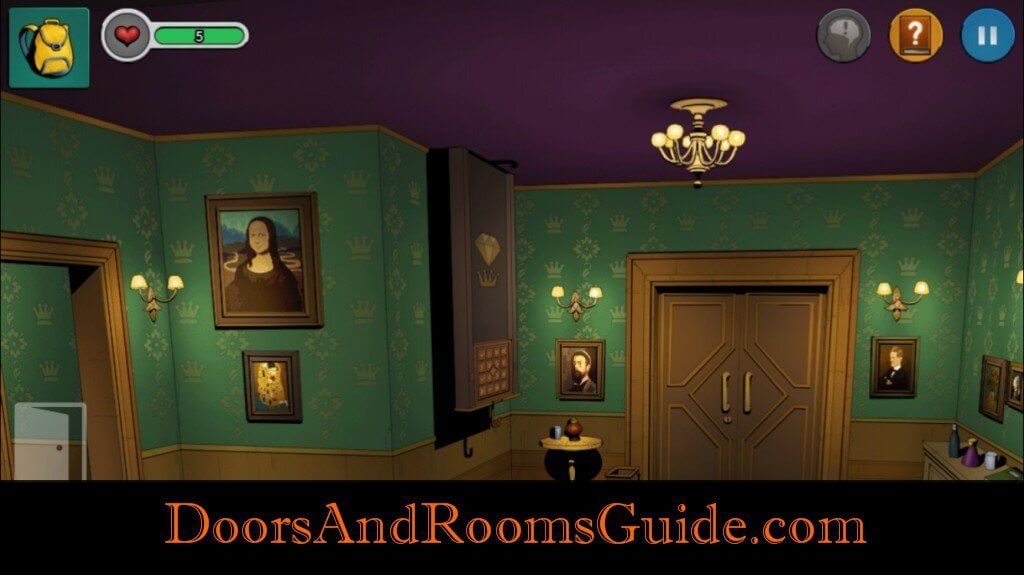
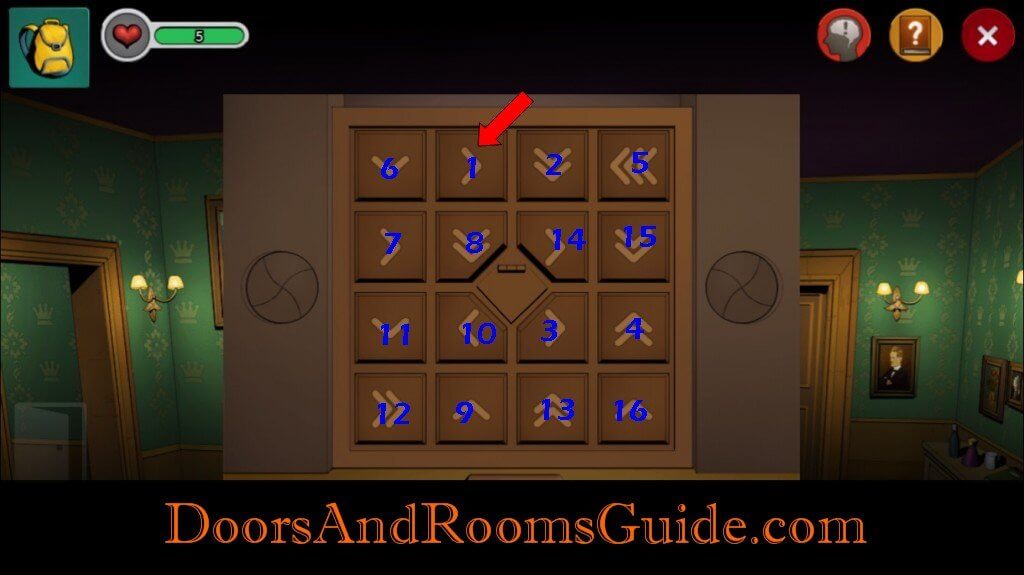
5. Puzzle: Use the umbrella to grab the hook. A puzzle panel will be lowered. Recall the hint that you saw on the table with a deer and nine squares. The deer indicates the starting square coming down from the top.
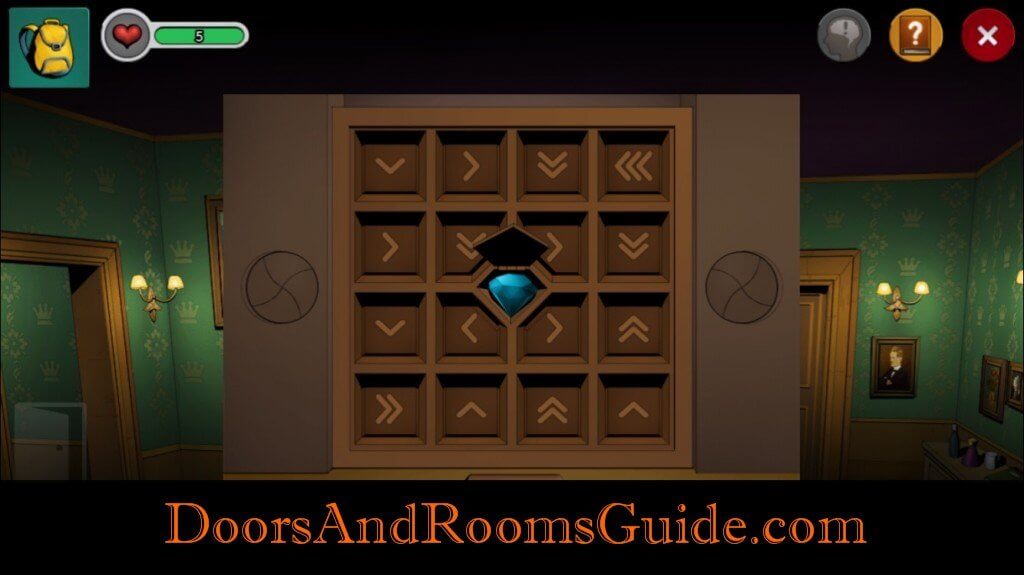
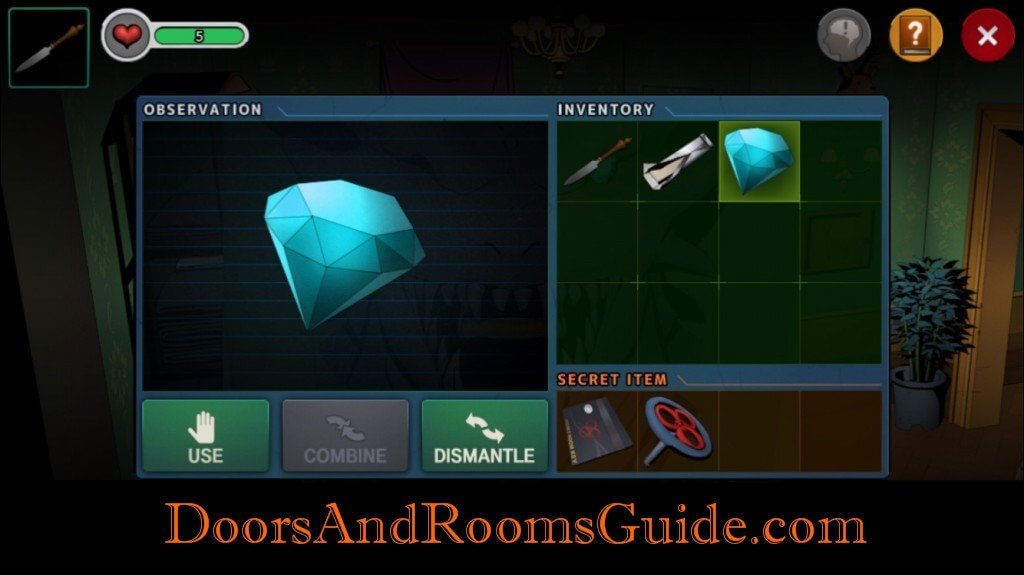
Start the puzzle by pressing on the second square on the top row. Follow the arrow on the square: the arrow points the moving direction and the number of arrows represents the number of steps to take. We have numbered the exact solution to help you if you have trouble following the arrows, simply press the buttons in the order shown. Once all the squares are pressed. A compartment will open with a blue gem inside for you to grab.

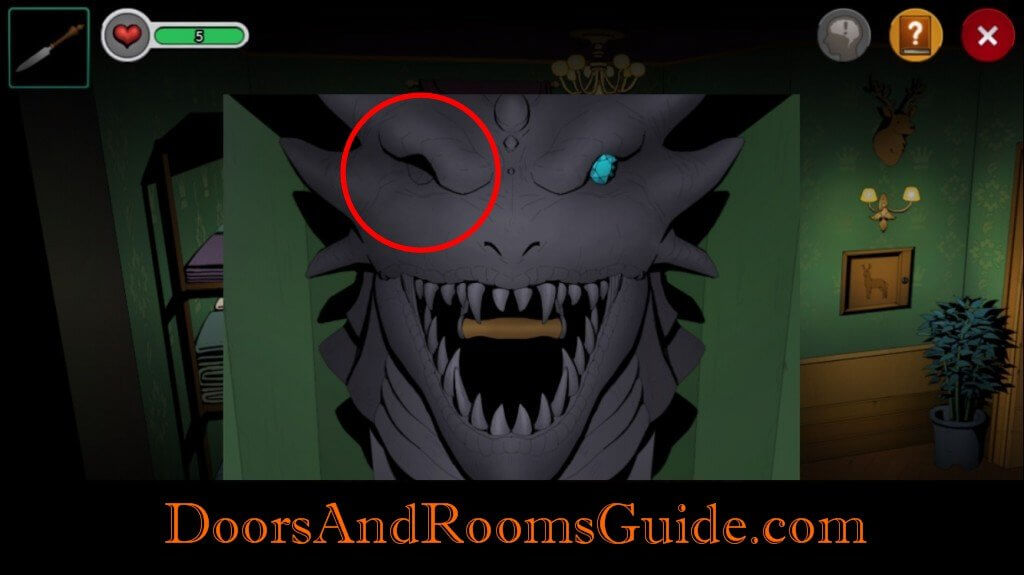
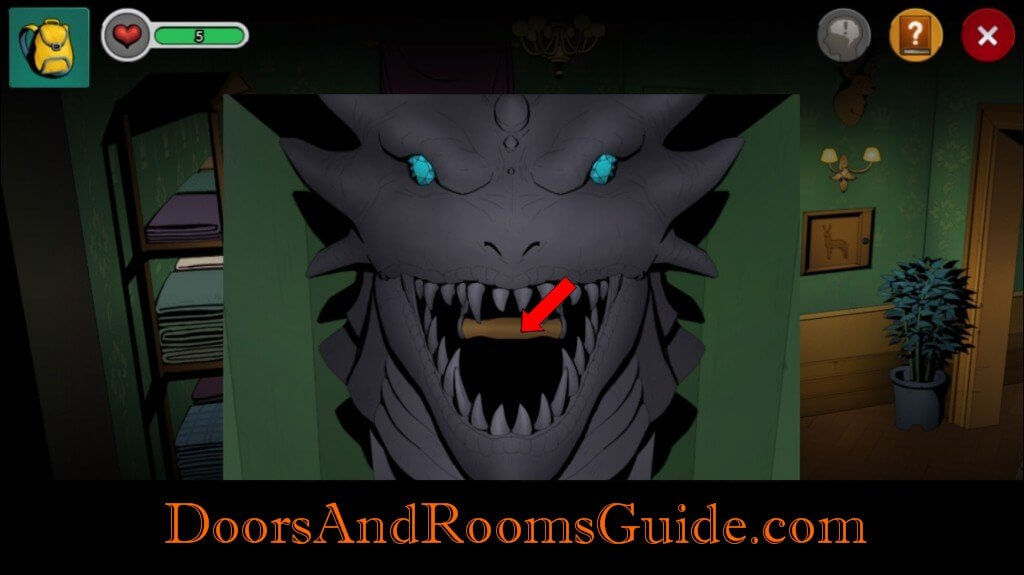
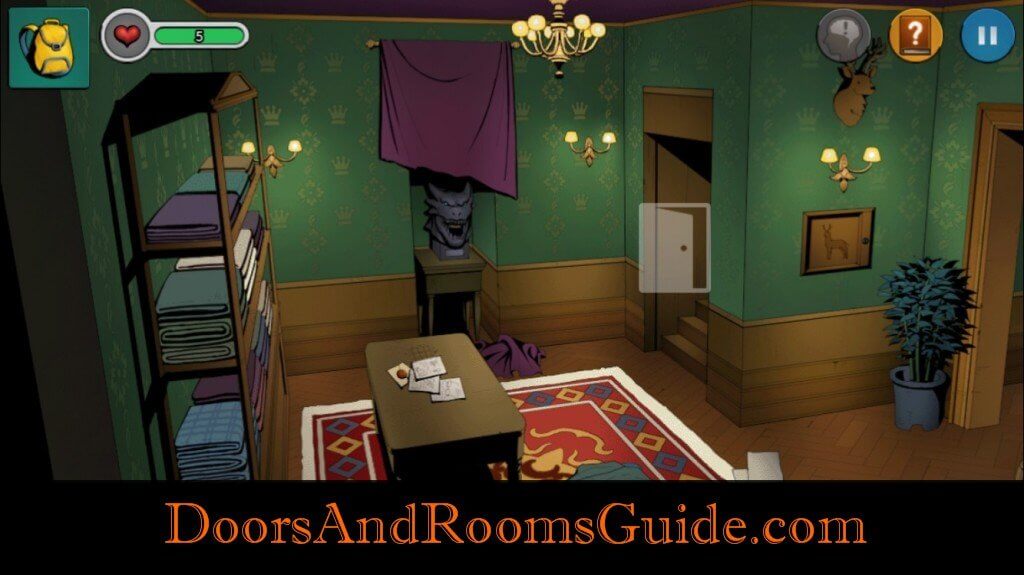
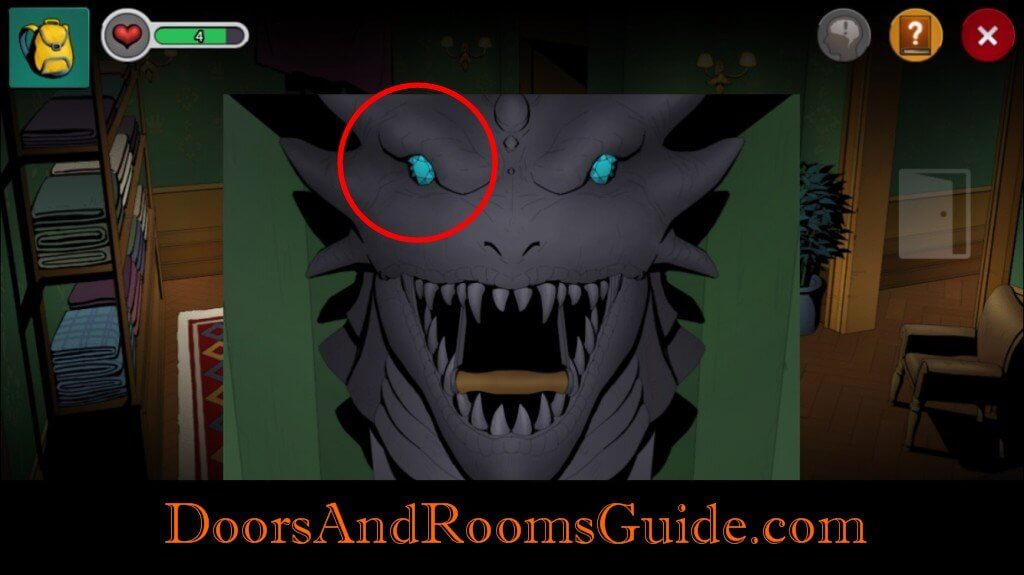
6. Dragon: Use the letter knife to cut open the purple curtain. Insert the blue gem into the left eye socket. Pull the lever. A hidden door to the second floor is opened.

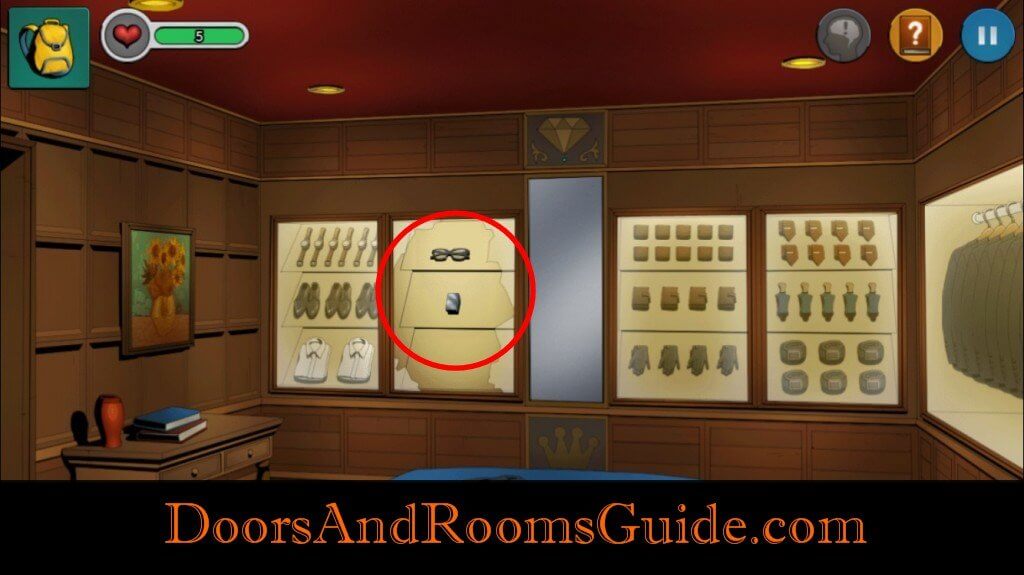
7. Closet: Grab the sunglasses and a lighter from the closet with broken glass.
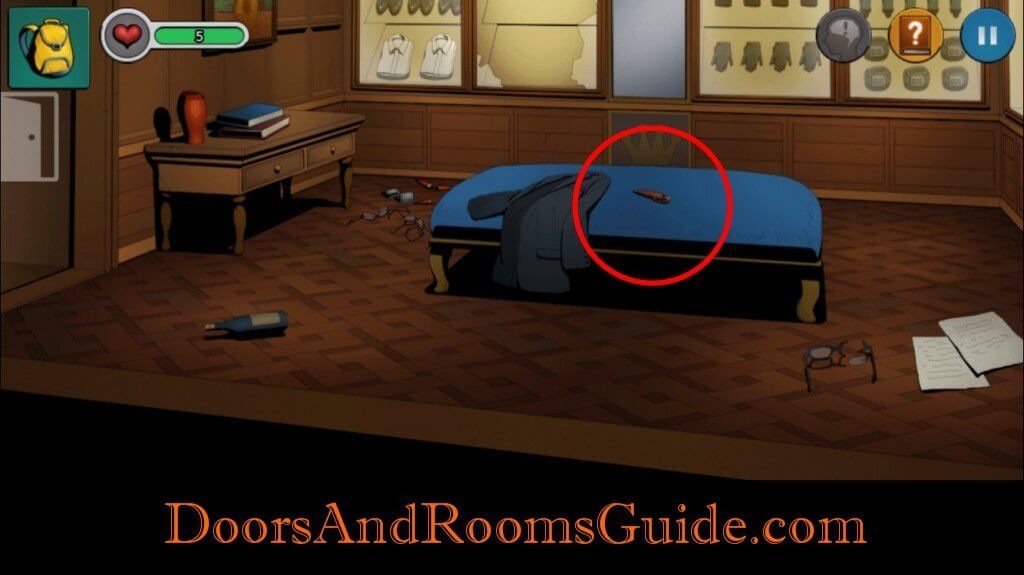
8. Pen: Get the pen on the sofa chair.
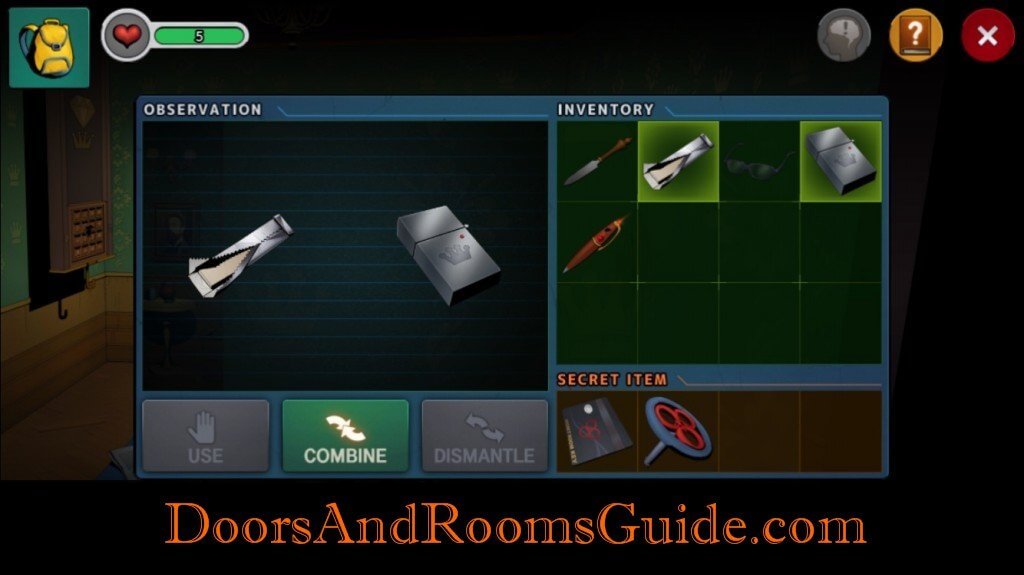
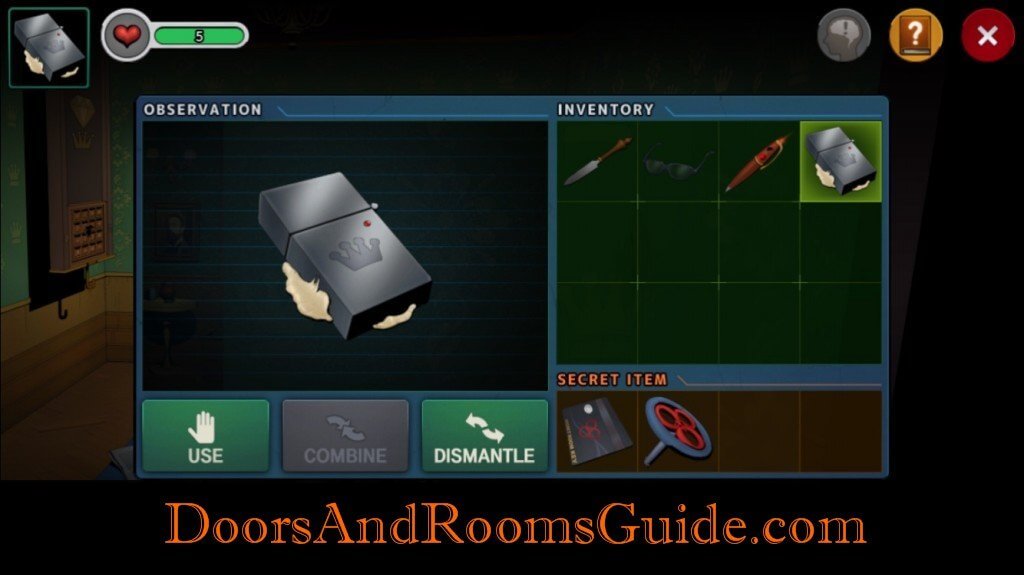
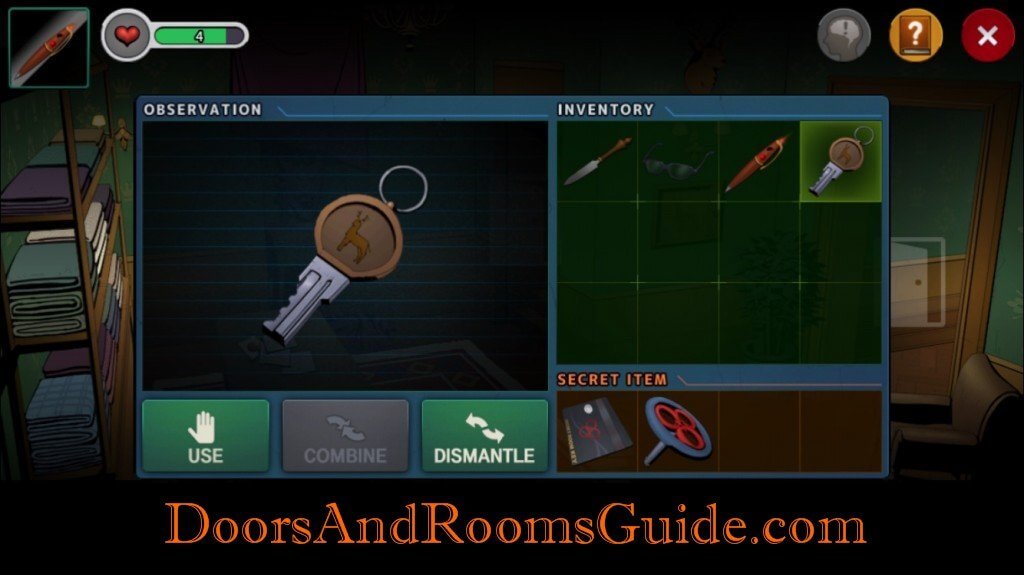
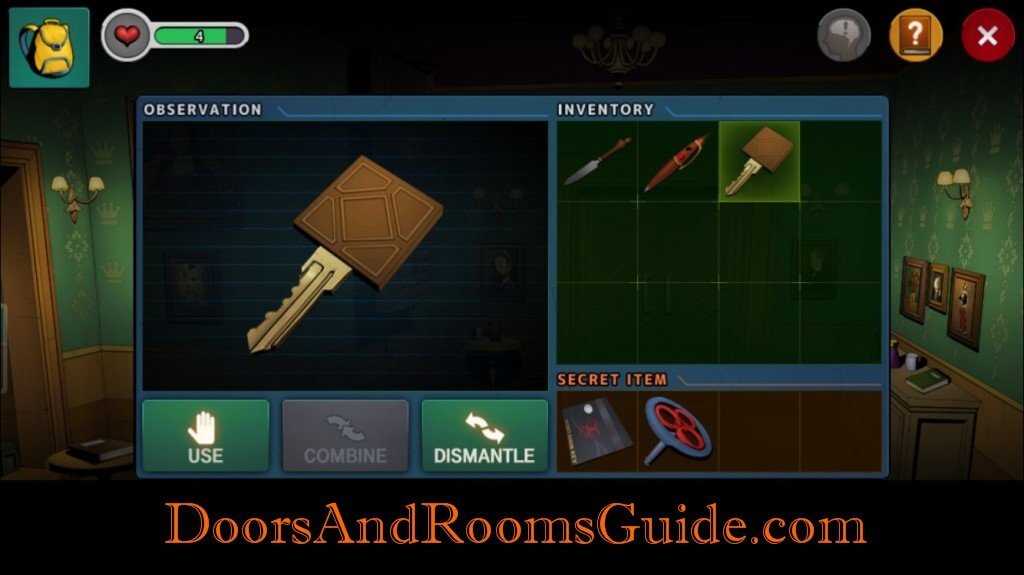
9. Wall: Locate a spot on the wall where the wall paper is ripped. Combine gum and lighter. The lighter is actually a bomb. Place the bomb on the wall. Set off the bomb with the pen which is actually a bomb remote control device. Retrieve a key with deer icon.
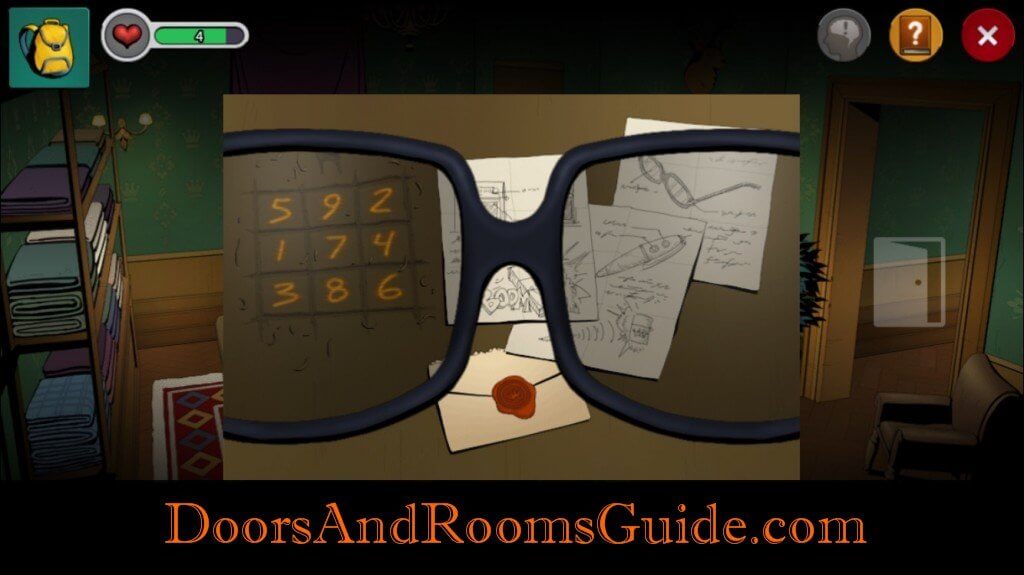
10. Glasses: Go to the table with letters. Put on the glasses. Hidden numbers appear on the squares.
5 9 2
1 7 4
3 8 6

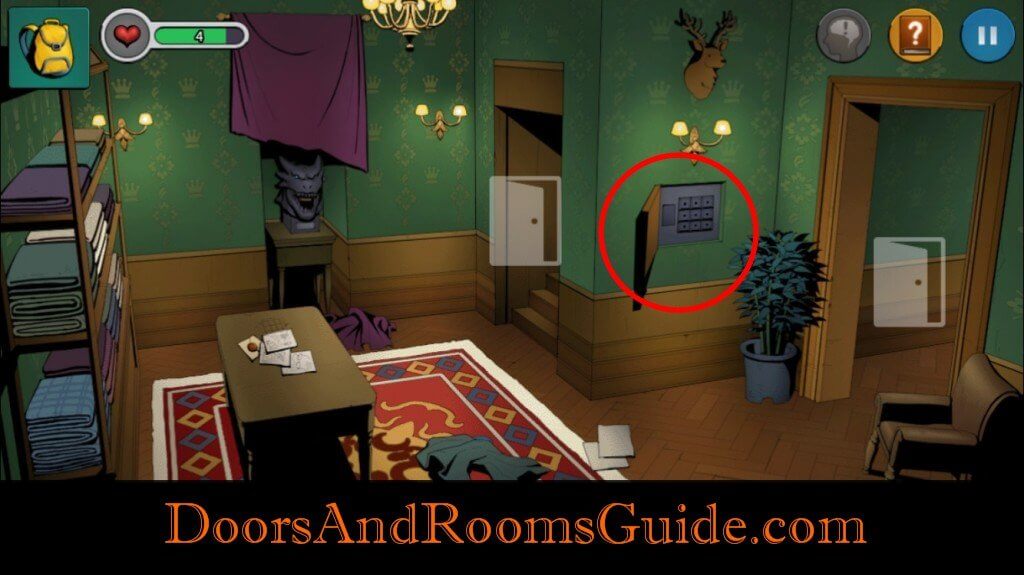
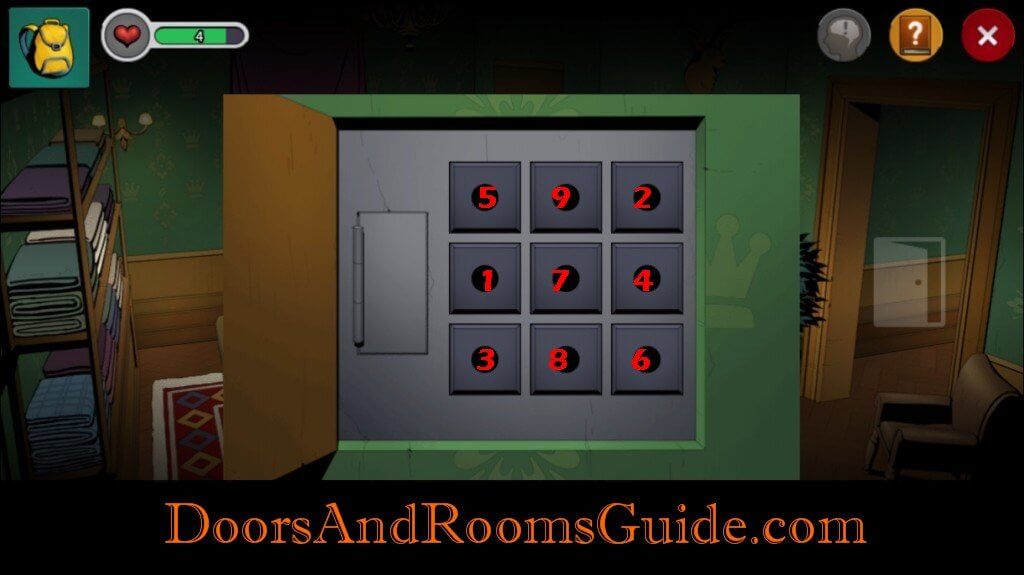
11. Safe: Use the key with deer icon to unlock a cover with deer icon. Press the buttons in the order shown from the hidden numbers on the table. Retrieve the door key.
12. Escape: Use the door key to unlock the door. You have escaped!
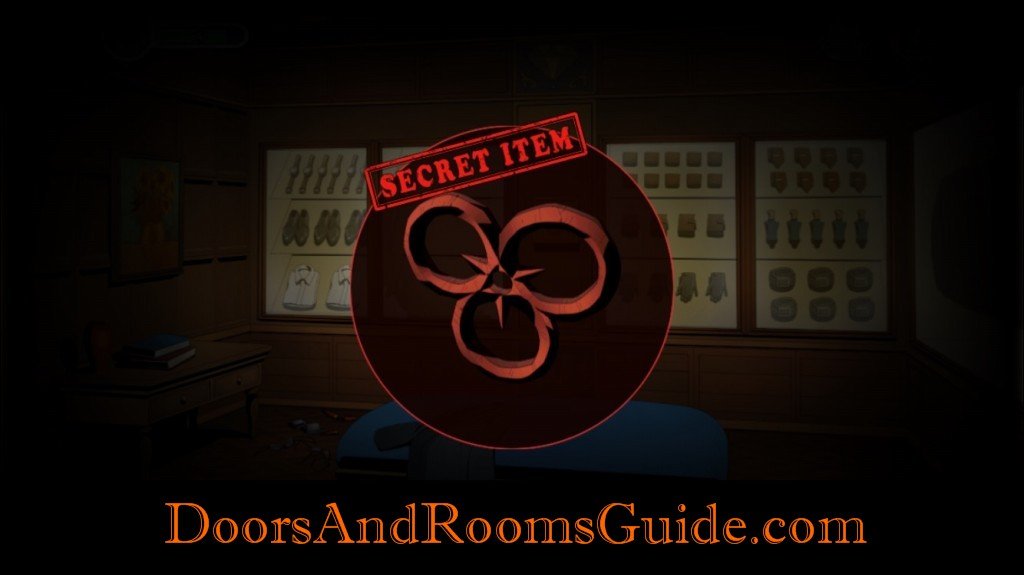
Secret Item:
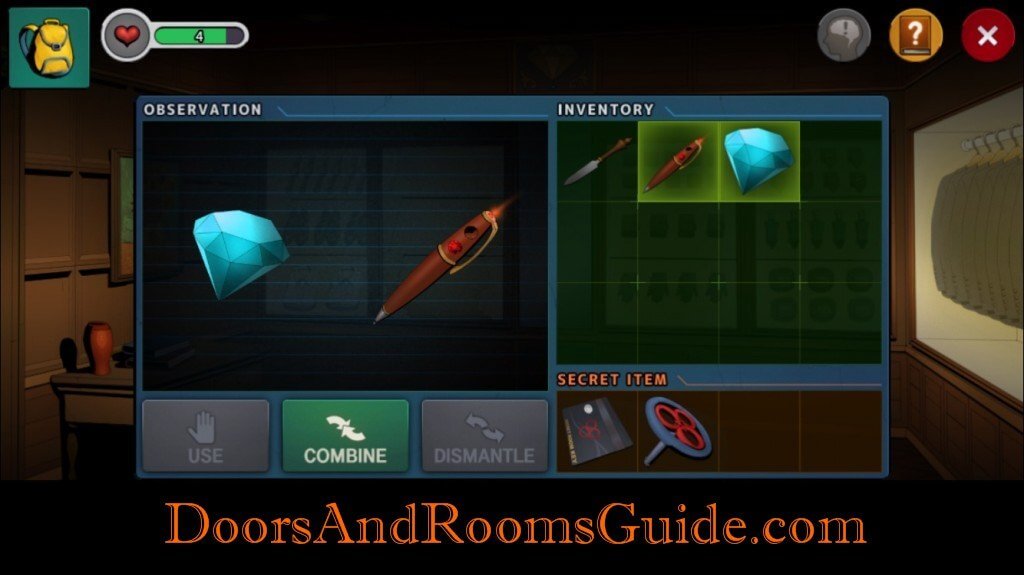
S1. Get the blue gem on the dragon head sculpture.
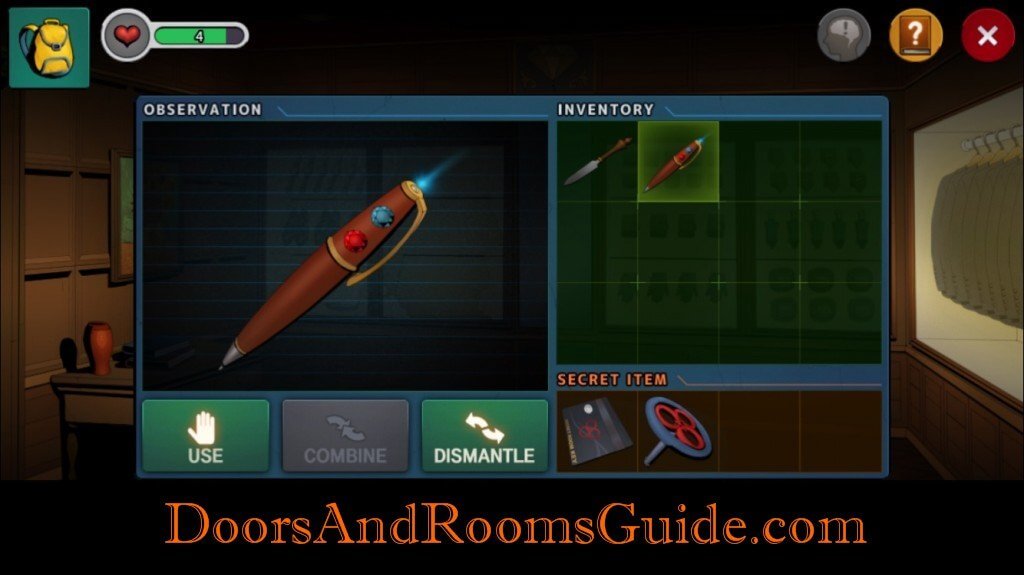
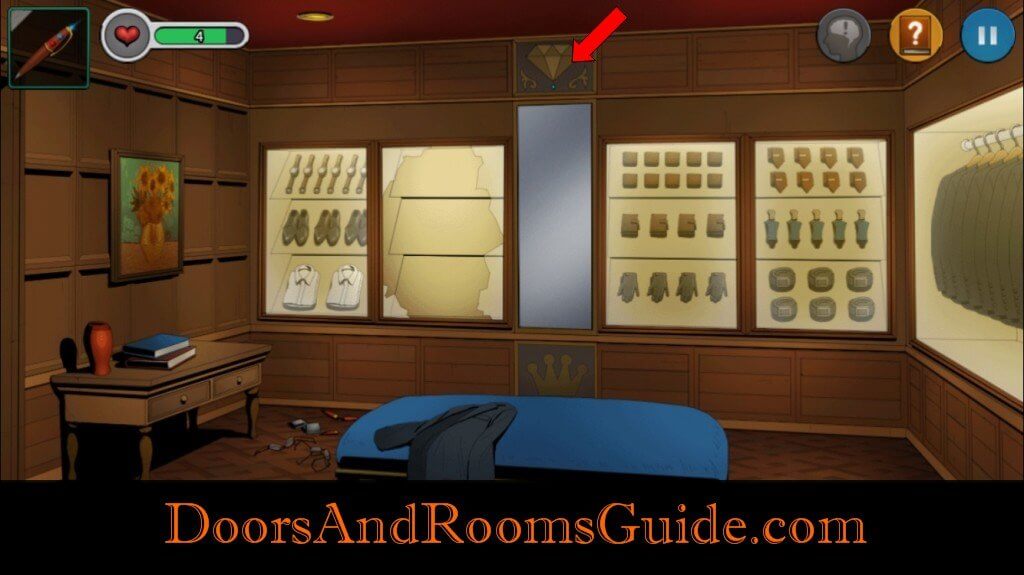
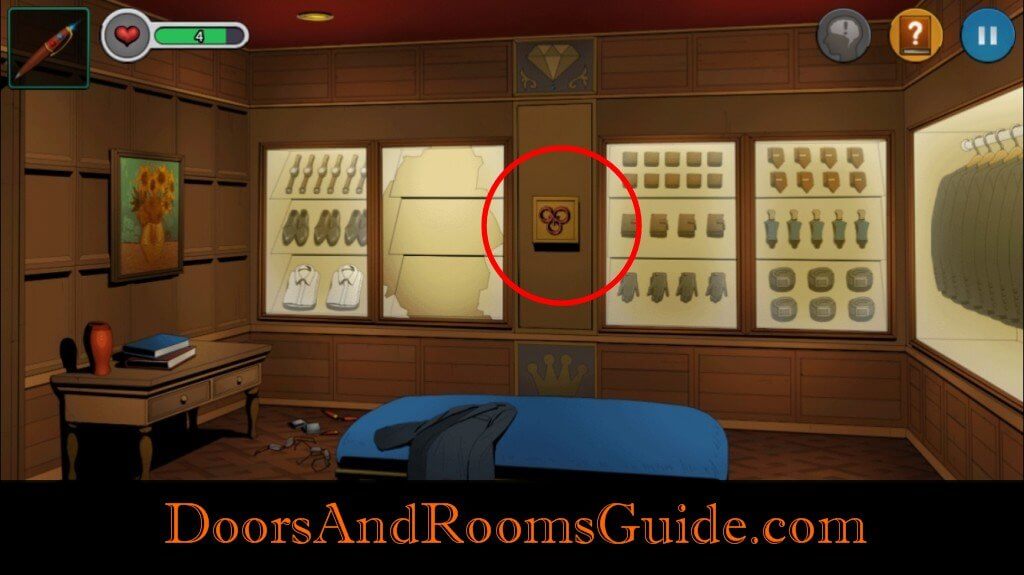
S2. Go to second floor. Insert blue gem into the pen. Use the pen to the diamond wall panel on top of the mirror. Grab the secret Item: Secret Red Metal Rings.
Warning:
1. Be careful of the dragon head. If you pull the lever without inserting the blue gem, the dragon will bite.
2. Be careful of the deer safe. Sharp spikes eject if button is pressed in the wrong order.
The arrow puzzle also is a trap. If you press one arrow wrong you also lose health