
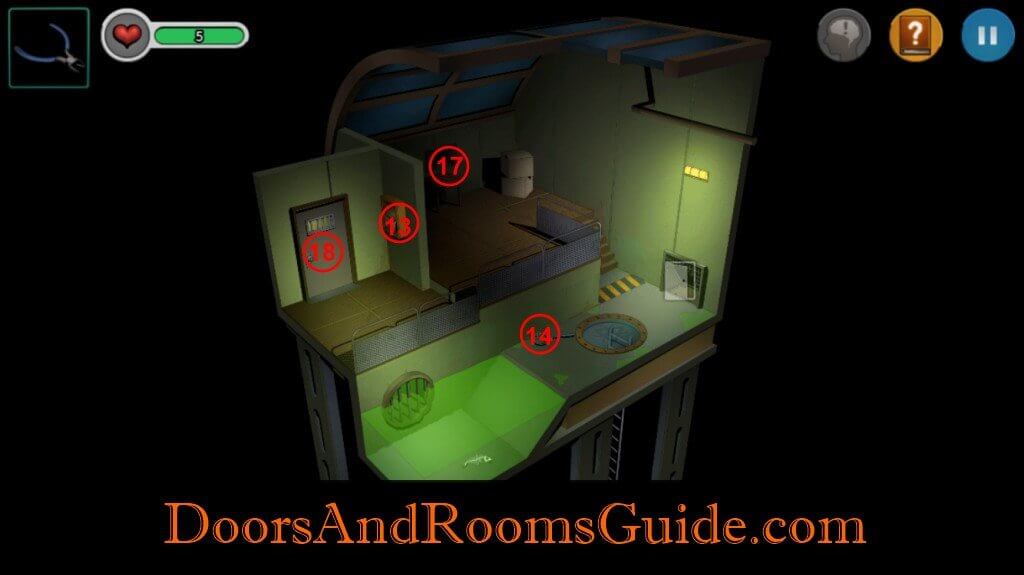
Chapter 2 Stage 6 Walkthrough Map:


Walkthrough Item Index
1. Bag
2. Box
3. Table
4. Trunk
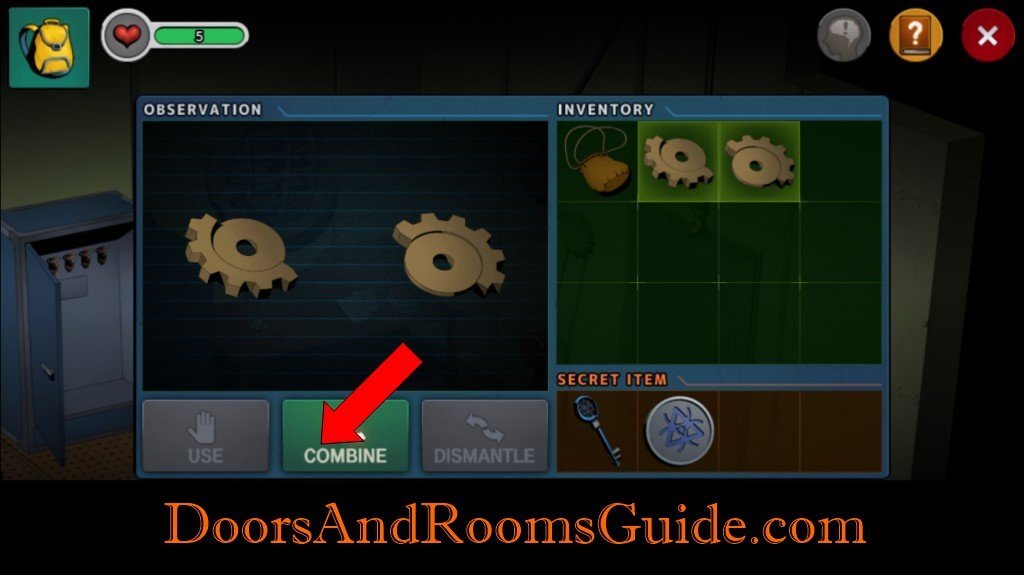
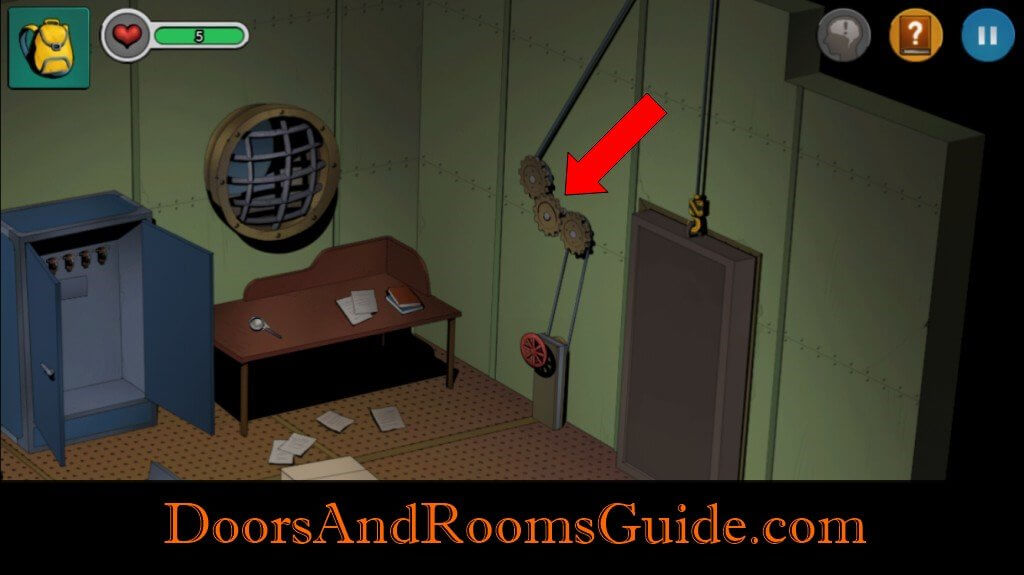
5. Gear
6. Shelf
7. Cabinet
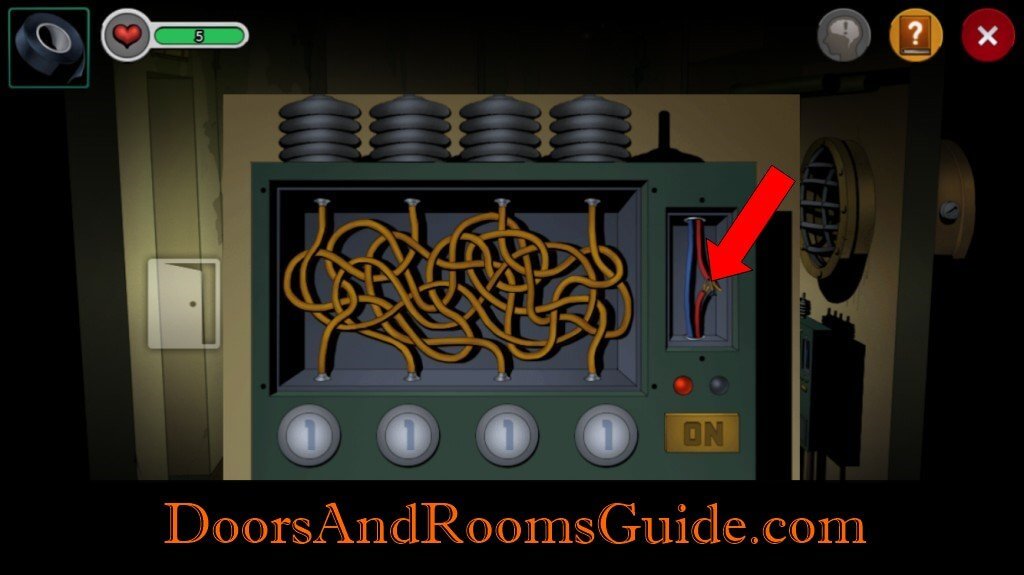
8. Wire
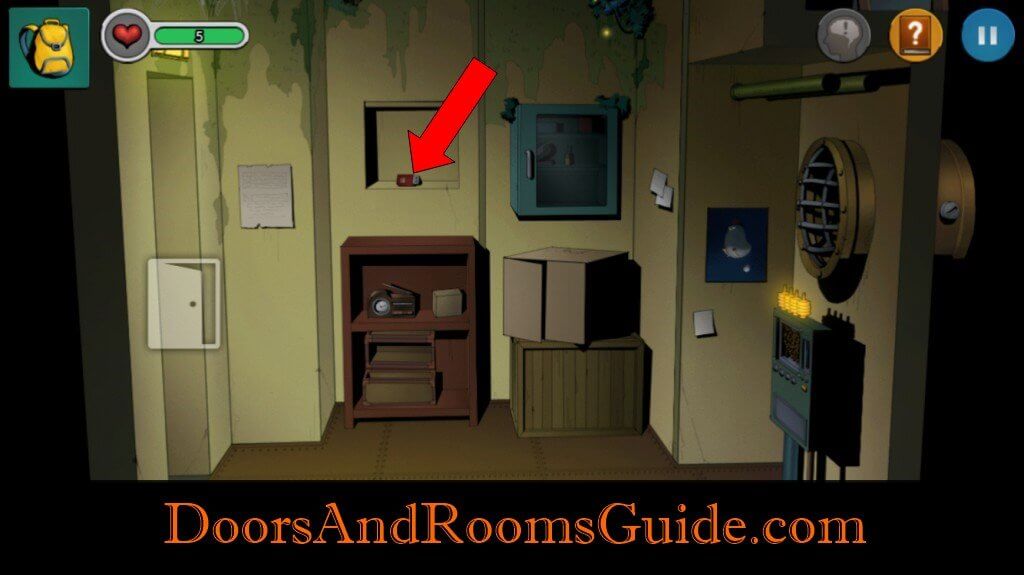
9. Generator
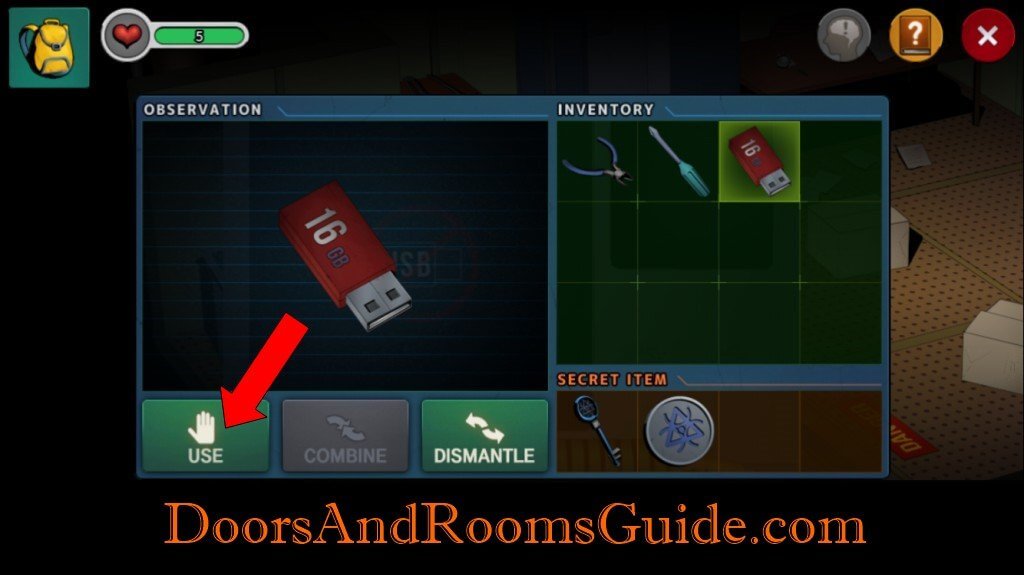
10. USB
11. Pipe
12. Wire
13. Jar
14. Racket
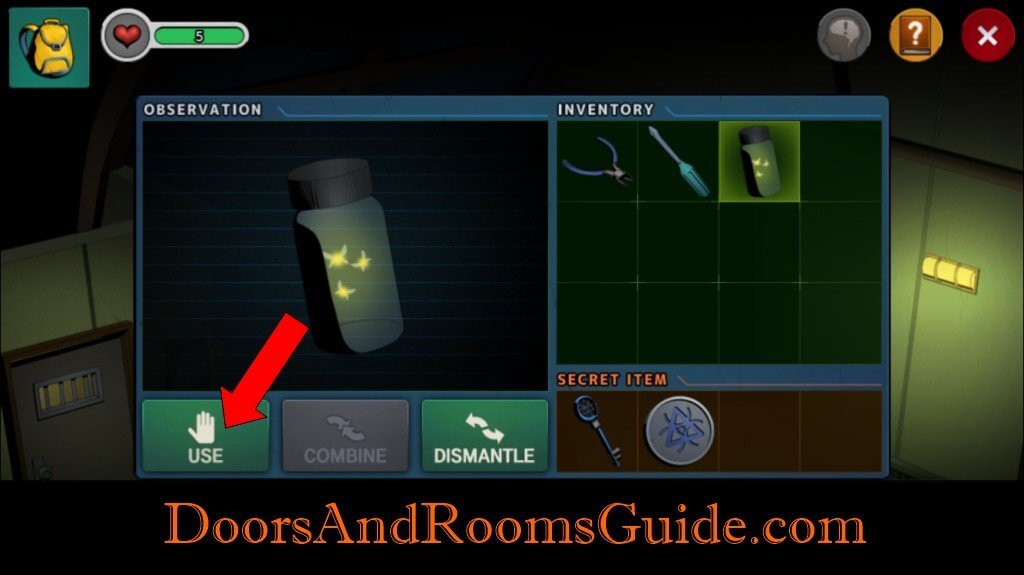
15. Net
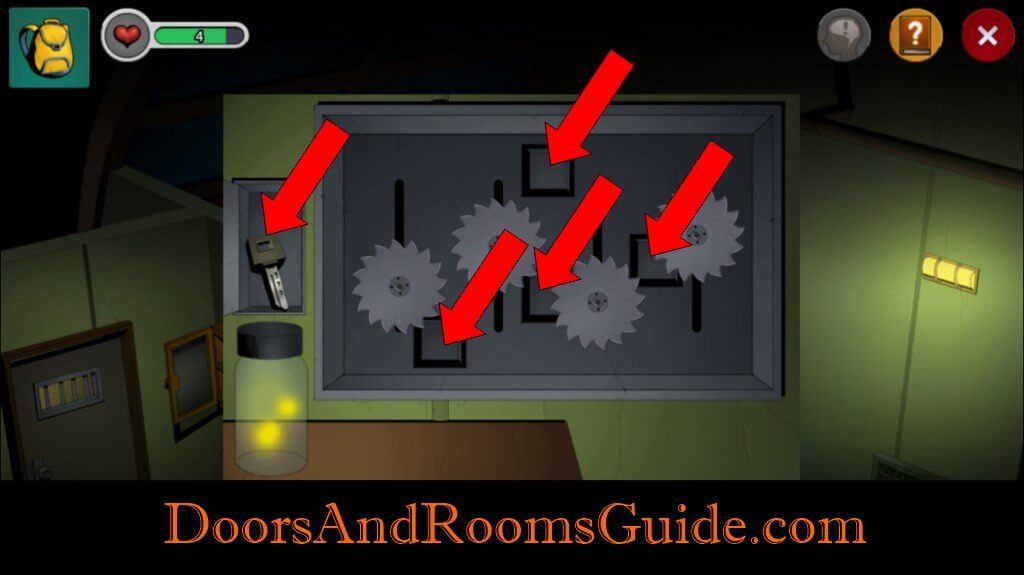
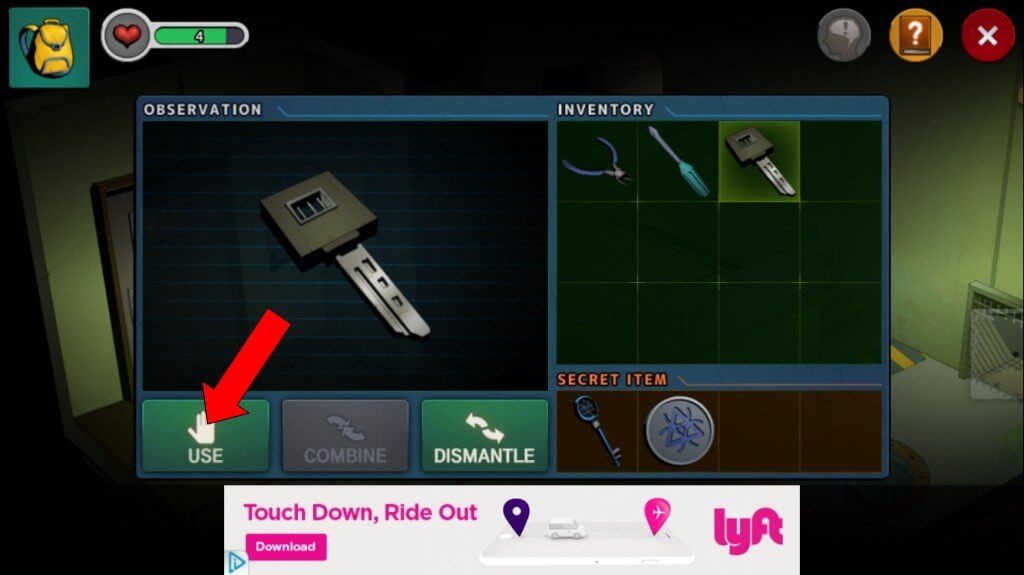
16. Firefly
17. Light
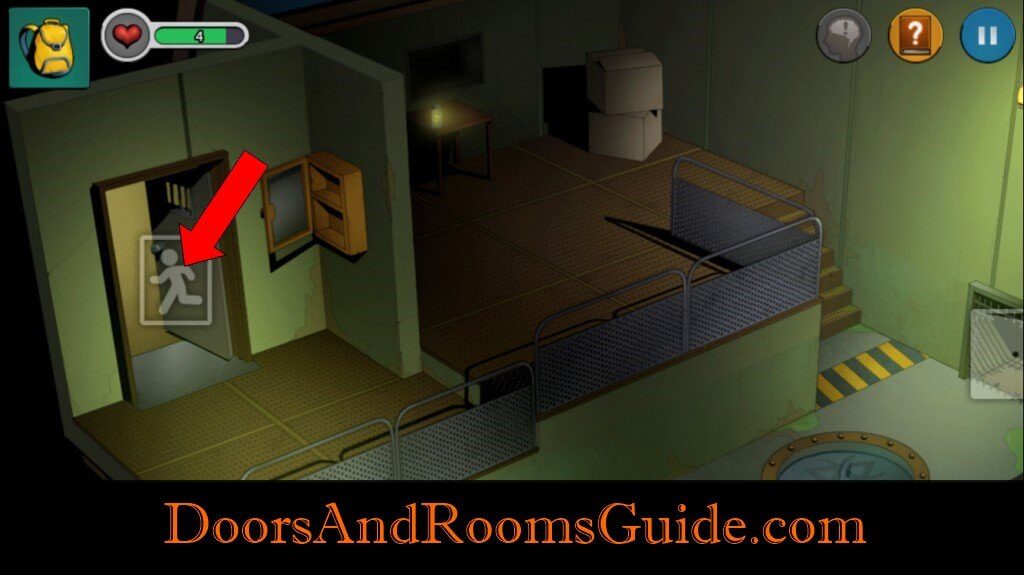
18. Door
Secret Item
Chapter 2 Stage 6 Walkthrough
1. Bag: Open locker. Grab a bag.
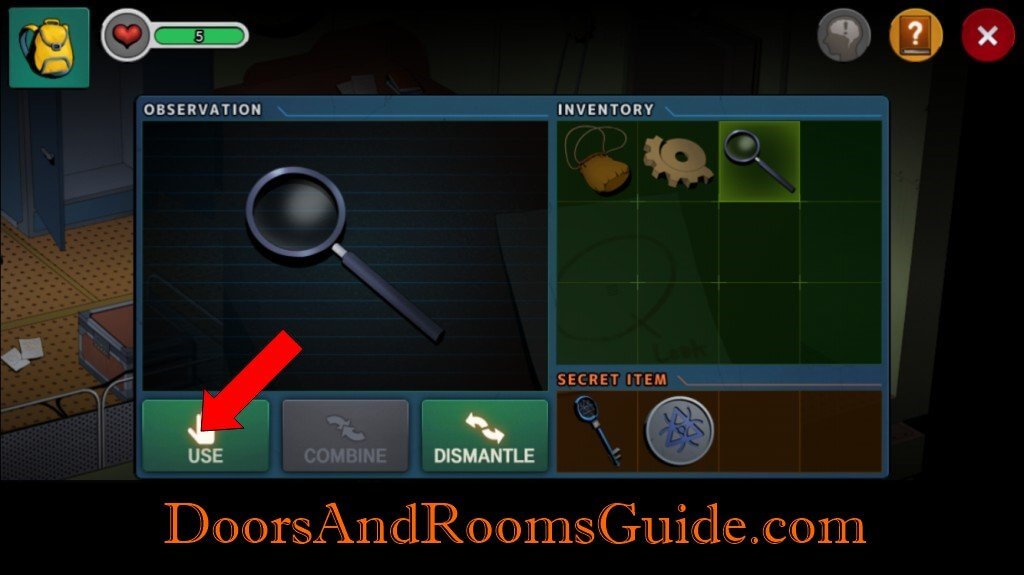
2. Box: Open box. Get a magnifying glass.
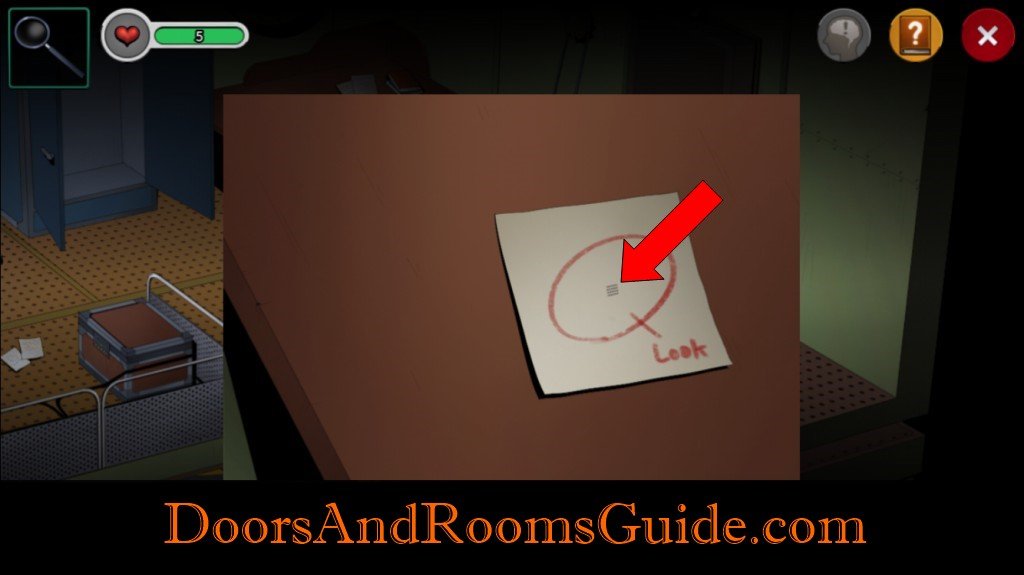
3. Table: Get a half of a gear on the table. Notice a post-it note with a red circle and the word “Look”. Look at the note with magnifying glass. Get combination
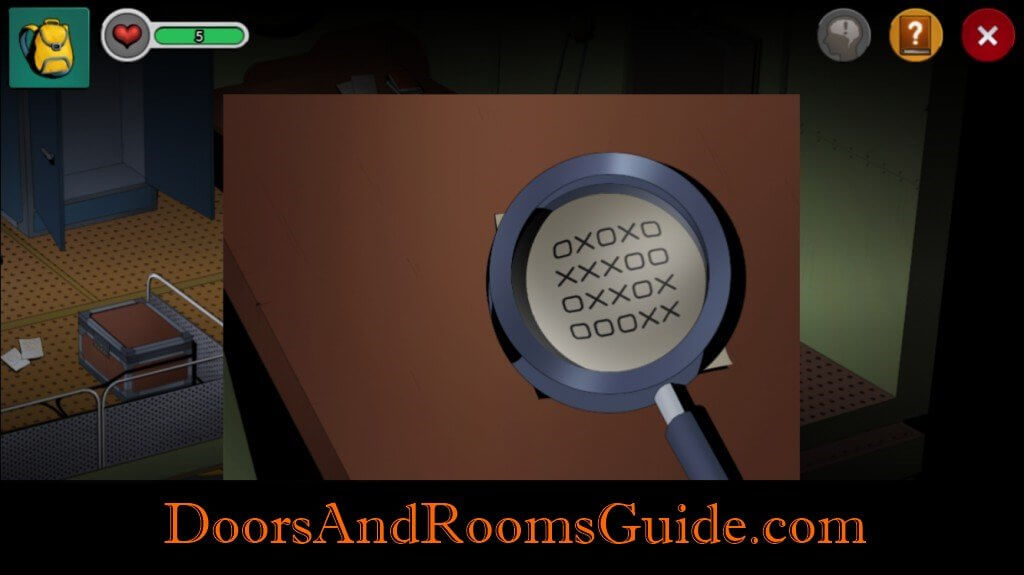
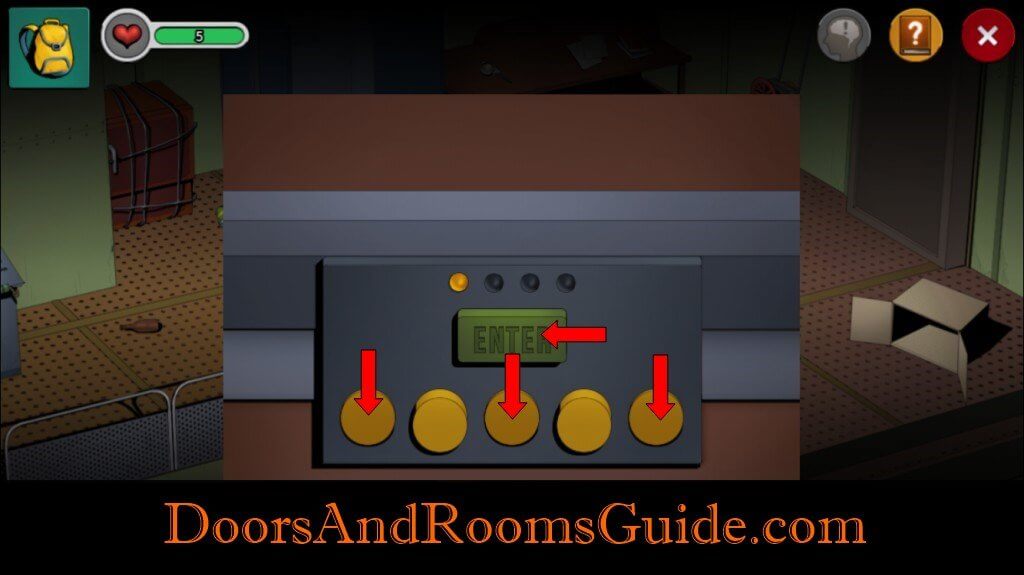
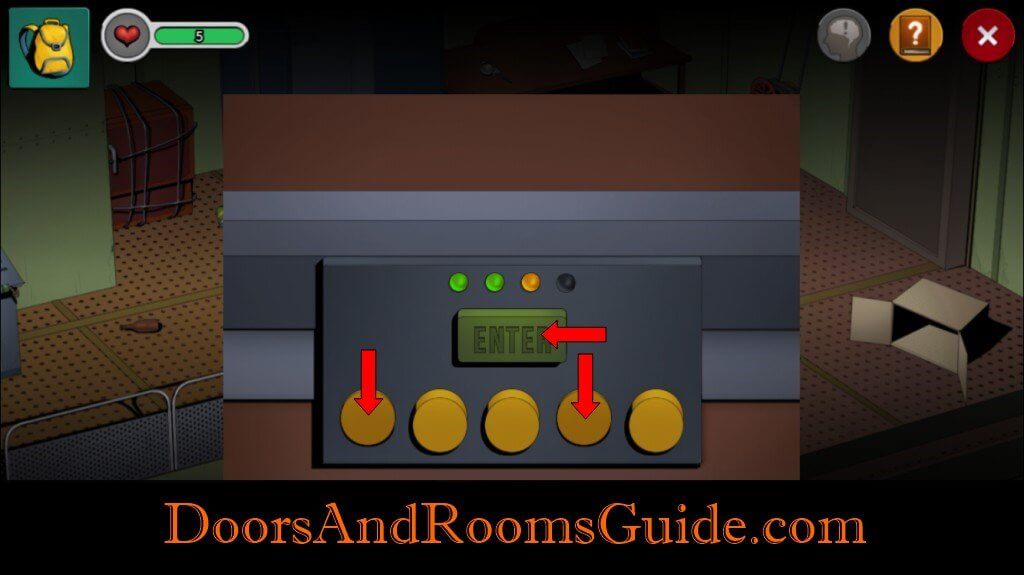
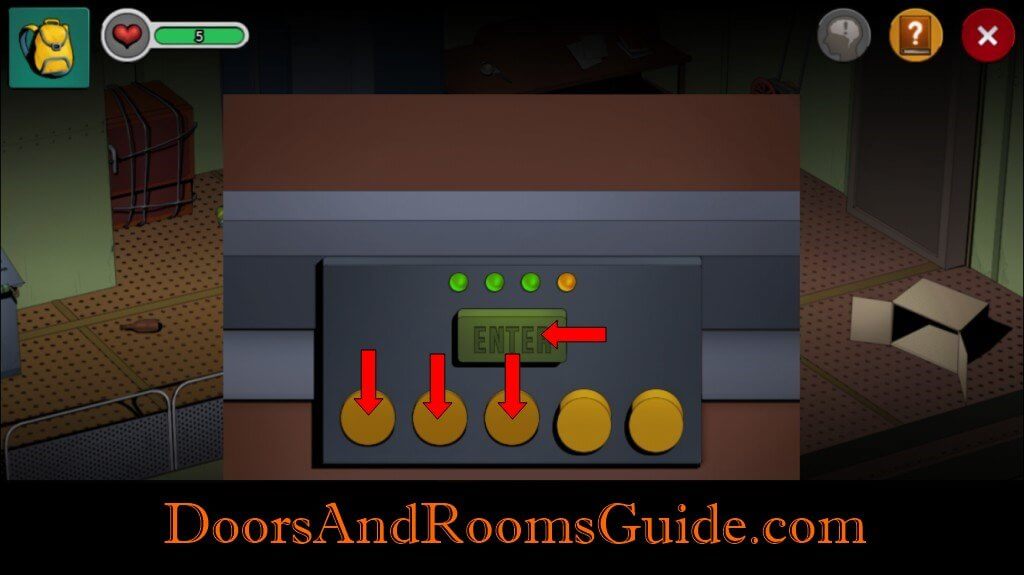
4. Trunk: Enter the combination from the post-it note. The combination is a set of five entries. Press the “o” part and tap on ENTER. Get a second half of a gear.
oxoxo
xxxoo
oxxox
oooxx

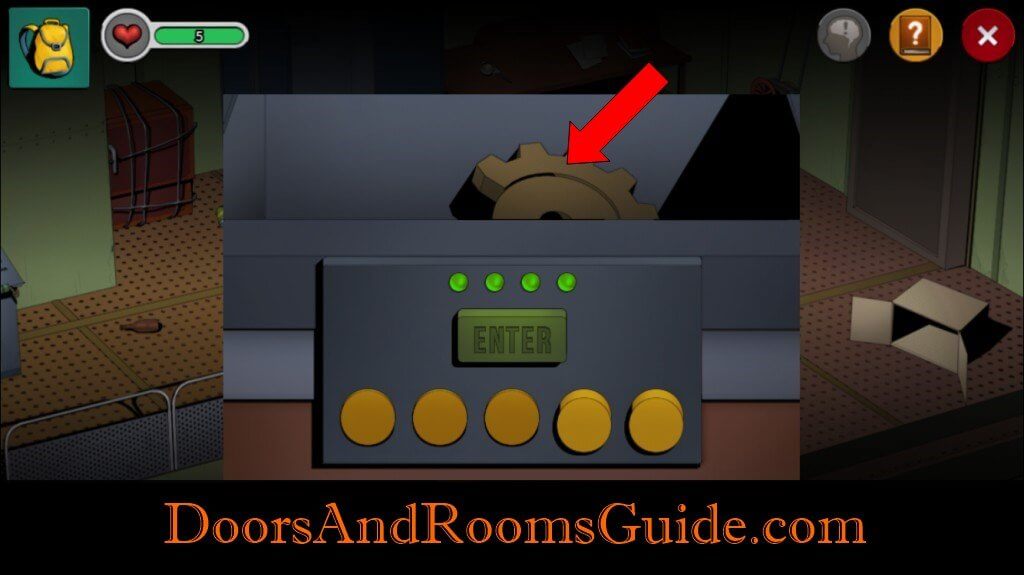
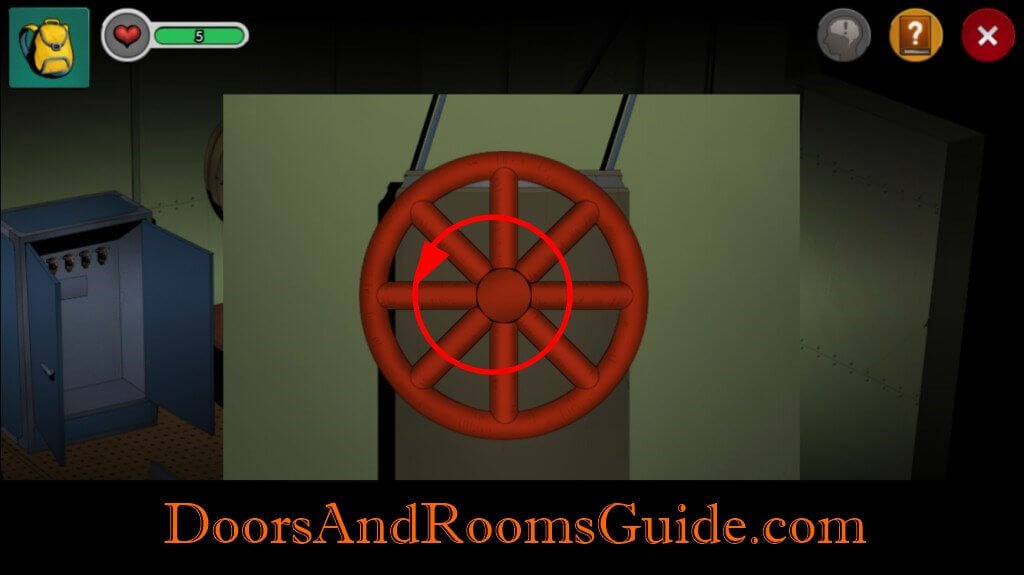
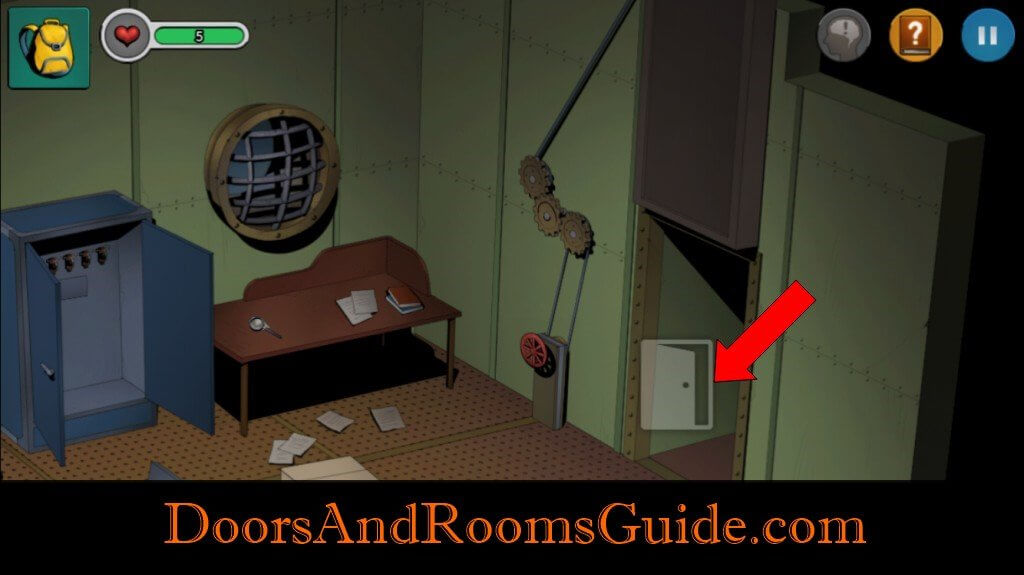
5. Gear: Assemble the gear. Insert gear between gears next to the door. Turn the valve handles counterclock-wise. Go to second room.

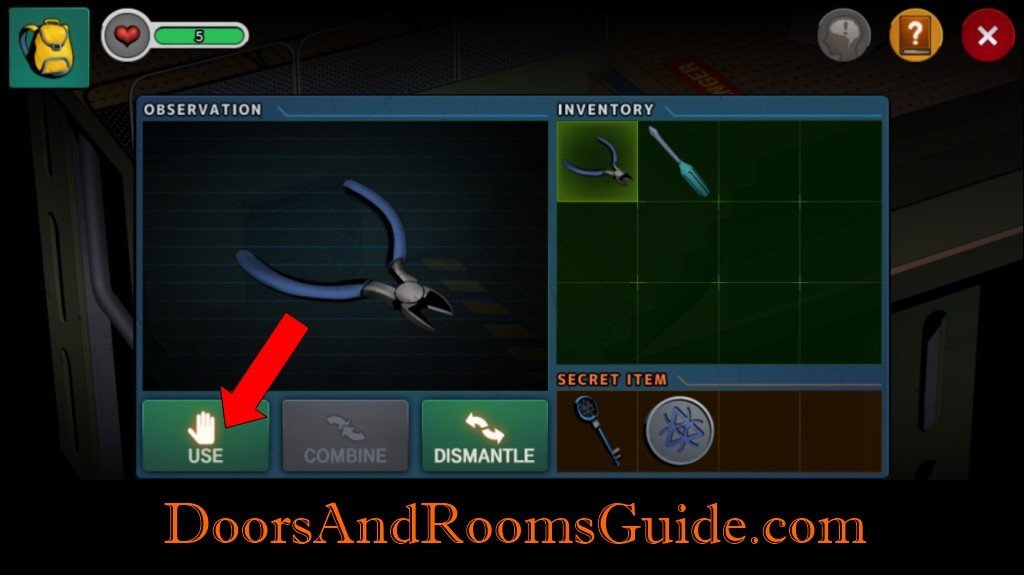
6. Shelf: Open box and get wire cutter from the bottom shelf.
7. Cabinet: Open cabinet on the wall and get a roll of tape.
8. Wire: Go back to main room. Use the wire cutter to cut the wire on a safe. Open and get a screwdriver blade.

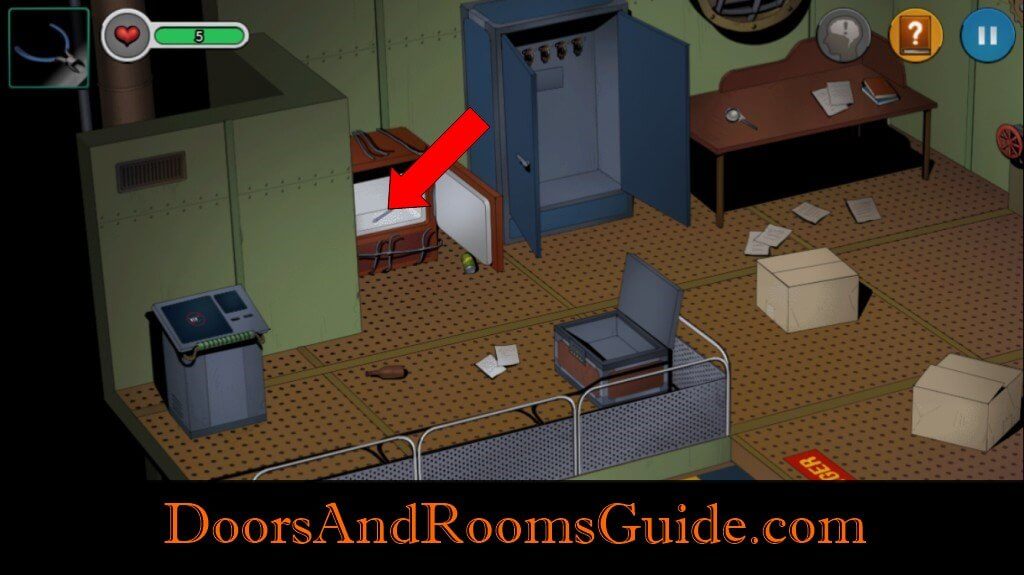
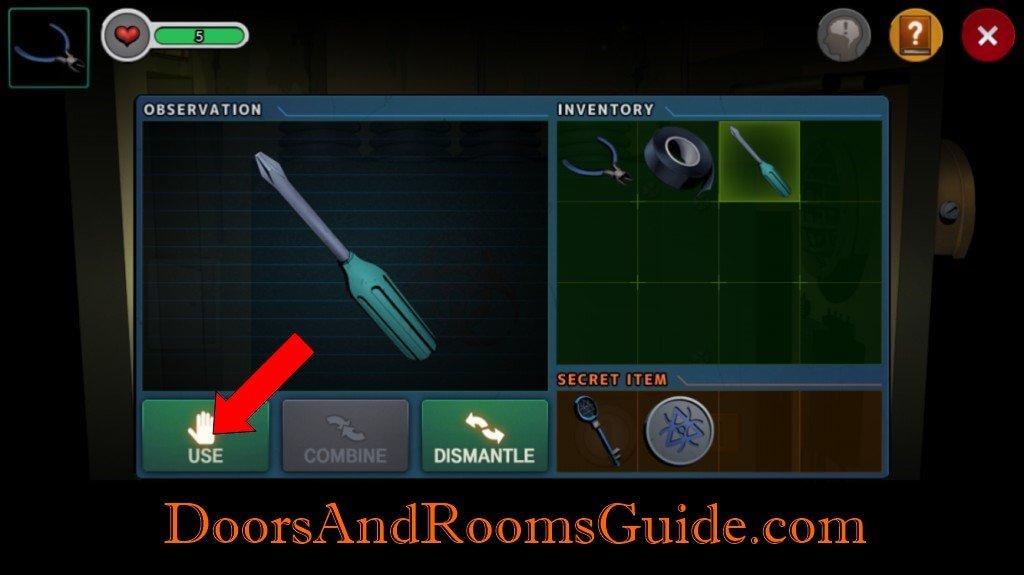
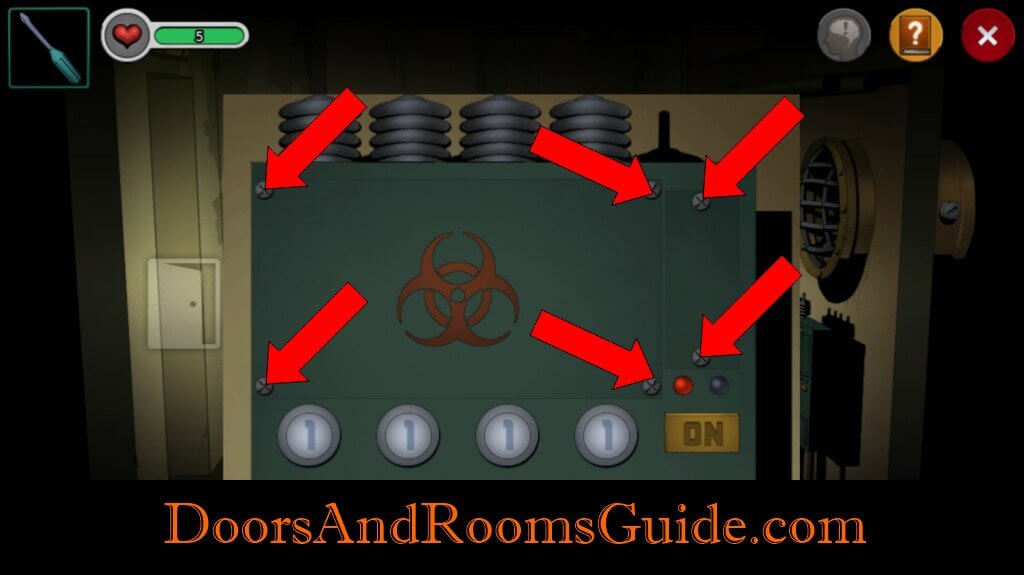
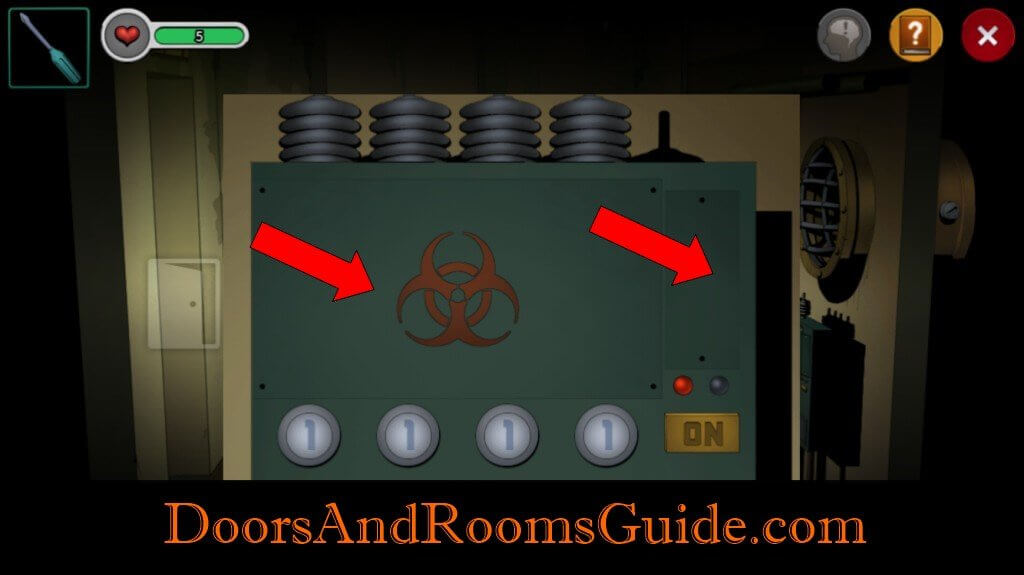
9. Generator: Go back to second room. Locate a power generator. Check out the bag in the inventory. Dismantle the bag and get a screwdriver handle. Combine the blade and the handle. Remove the screws one by one, then remove the covers. Use the tape to repair the red wire. Get hint: 2413.
Follow the wires and change the end number at the bottom to the numbers that you begin with on the top. Get numbers: 3214. Press the ON button.


10. USB: A secret compartment will open. Get the USB.
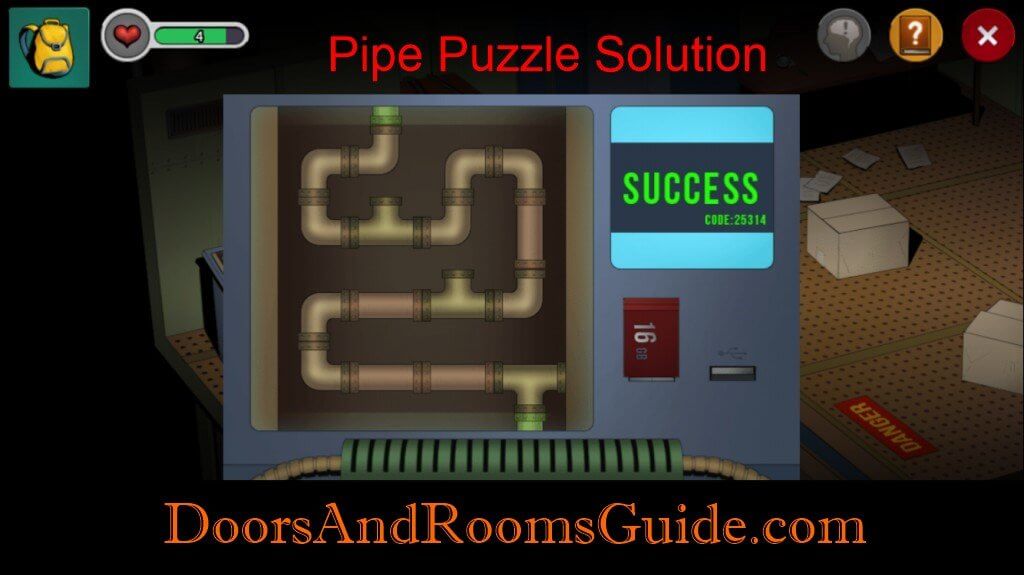
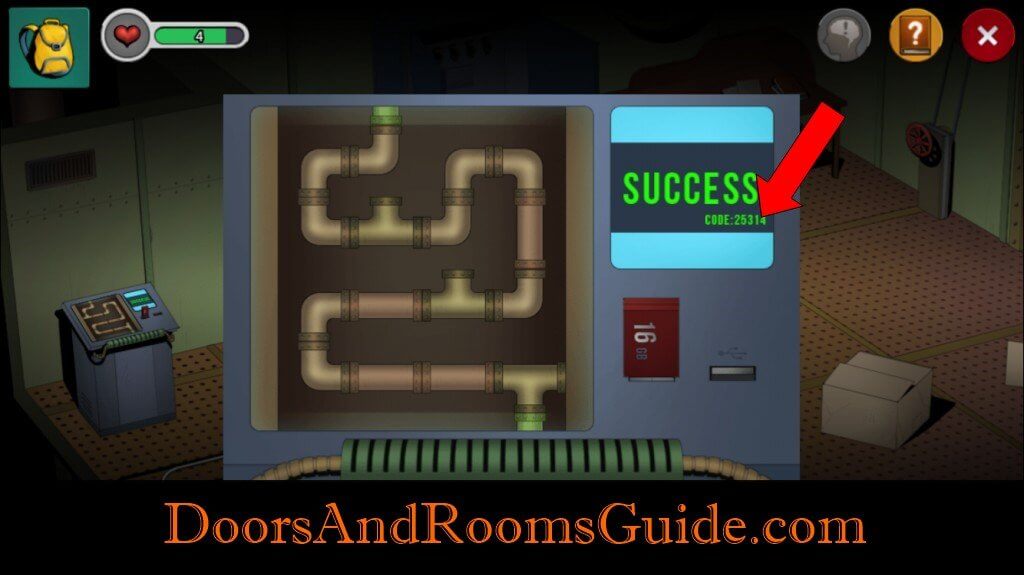
11. Pipe: Go back to main room. Locate a monitor. Insert USB. A pipe-flow puzzle will appear. Tap on the pipe to change its orientation so the pipes are connected from top to bottom. The platform will lower.
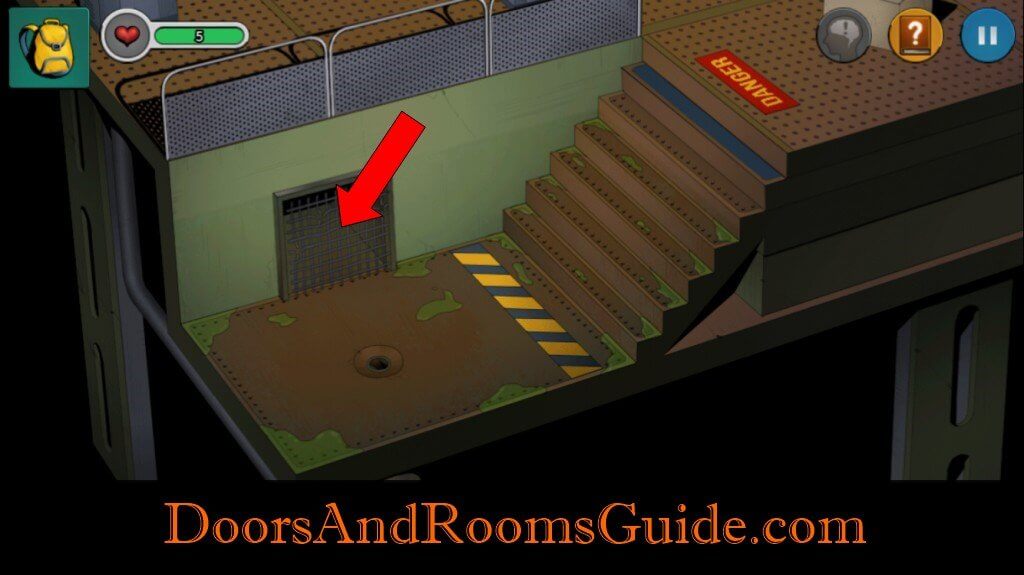
12. Wire: Use wire cutter to remove the drainage wire. Go through the opening to the third room.
13. Jar: Open cabinet. Grab an empty jar.
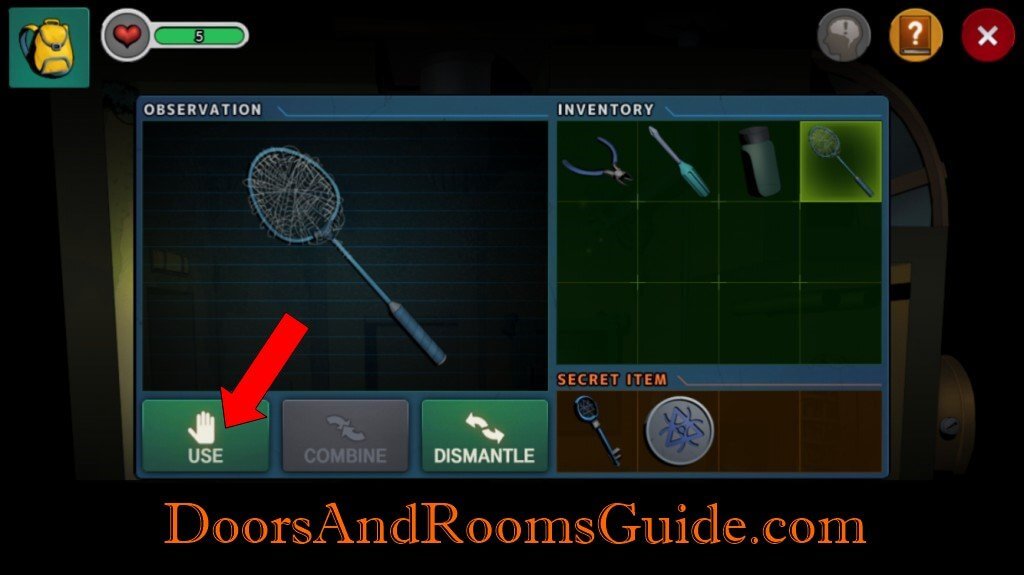
14. Racket: Pick up the racket on the floor.
15. Net: Go back to second room. Use the racket to collect the spider web on the ceiling.

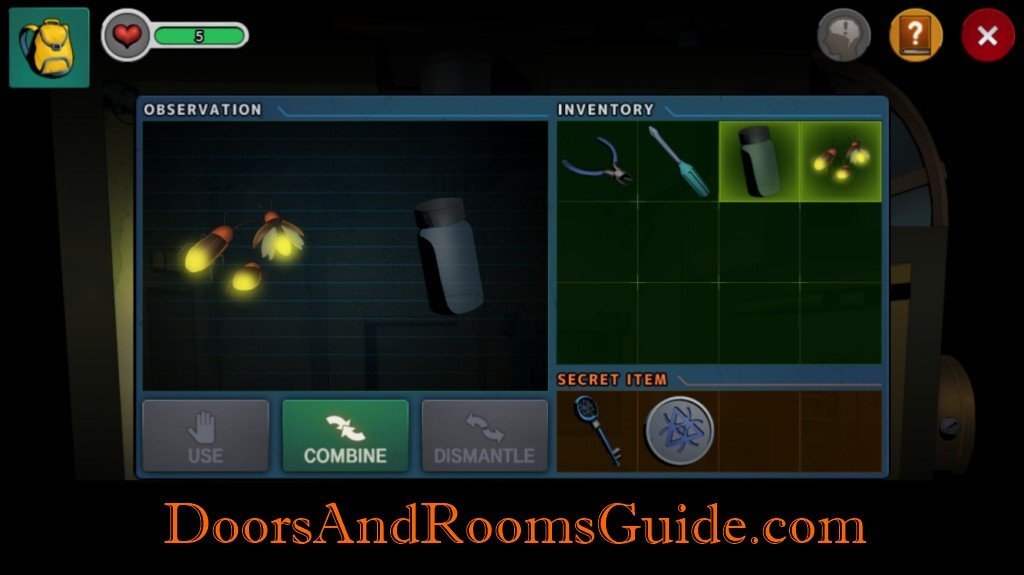
16. Firefly: Use the racket to catch the fireflies on the ceiling.
17. Light: Go back to the third room. Locate the dark spot. Place the fireflies in the jar. Be really careful and put the jar in the bottom-left. A panel with moving spikes is revealed. Carefully and quickly push the square buttons when the buttons are cleared of the blades. Get the door key.
18. Door: Use the key to unlocked the door. Exit stage 6.
Secret Item:
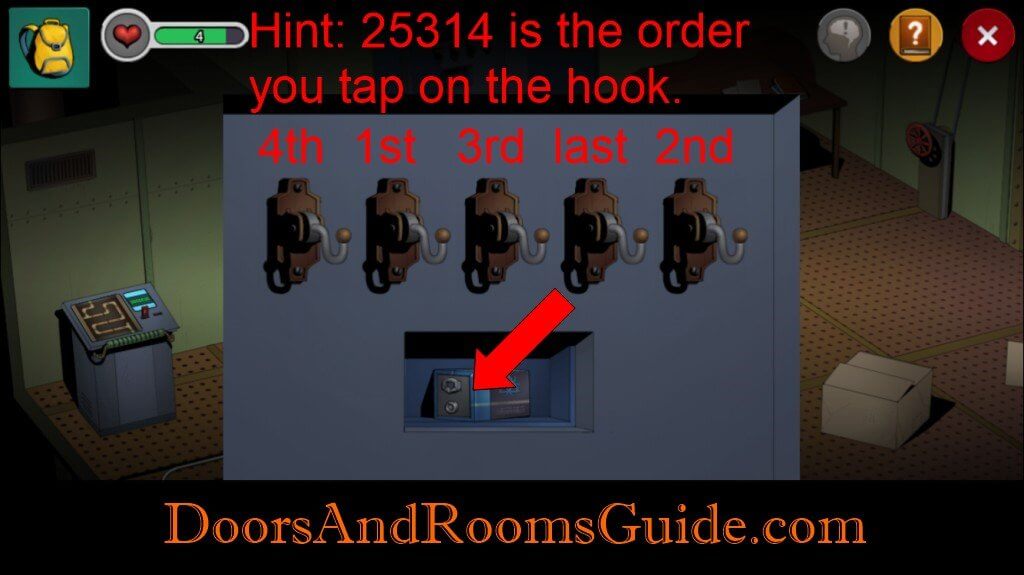
S1. Before leaving the stage, go back to the pipe-flow puzzle in the main room. Locate a code underneath the word SUCCESS: 25314.
S2. Go back to the locker in the main room. Pull the hooks in the order of 25314. A secret compartment will open. Get the secret item: a battery.
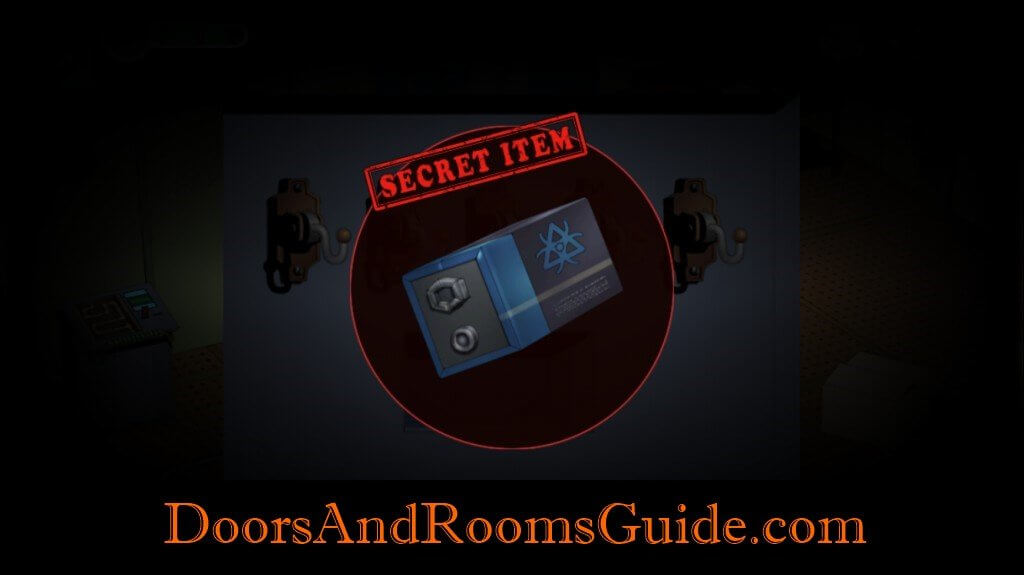
This secret item can be used to unlock stage 9 using the secret doorway in stage 5. Check out our Stage 9 Unlocking Guide for complete walkthrough.
You forgot to mention where to use the last secret item…. In case anyone wonders….In the room with the second poisonous pool, there’s a ladder underneath the glass plate. Smash it with the secret hammer, and you’ll unlock stage 10